Showing posts with label Pecans. Show all posts

Sunday, July 21, 2024

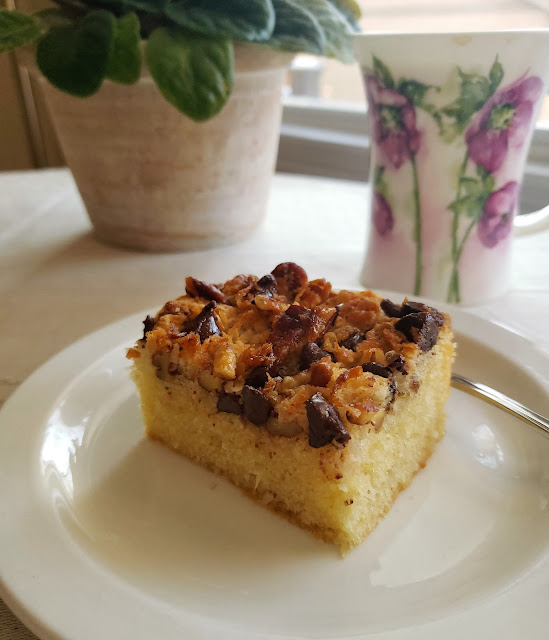
Bing Cherry Coffeecake with Chocolate-Pecan Streusel


I always try to teach—in my classes…through m blog—that a large part of learning to cook well is finding and honing a few basic, reliable and versatile recipes.  You should make these basics so often that you can practically make them in your sleep.  It might seem like this approach to food preparation might be boring…or limiting.  But it isn’t.  It is actually liberating.  The repetition will hone your skills in the kitchen.  And it will actually make you more adventurous as you recognize the patterns and techniques you have learned when you encounter them in new recipes (which will in turn give you confidence to try them).  French home cooking—as I learned it—leans heavily on this idea of learning a slate of basic tried and true recipes and then expanding your repertoire out from this core.  Julia Child called this style of cooking “theme & variation.”  

My short crust pastry is one of these foundational recipes in my kitchen.  When approaching a new recipe for a tart, pie or turnover, unless there is a compelling reason to use another recipe for the crust (maybe the dough needs an alternate flour/grain…or a very specific textural result that my recipe doesn’t provide is required…etc), I just substitute my own dough.  This leaves me free to focus on the part of the recipe that is new to me…and gives me a leg up on having a successful result.

For those of you who have been reading my blog for a while, you are probably aware that this is the way I approach cooking in general. I have posted several kinds of quiche…all with the same custard ratio.  Many ice cream recipes have appeared—all with the same basic formula underneath their varied flavors.  And so on.  

It will probably come as no surprise then that many of my coffeecake recipes are frequently variations on one basic, simple cake: a rich, sour cream cake that is itself a variation on the classic American 1-2-3-4 cake (1 c. butter, 2 c. sugar, 3 c. flour, 4 eggs.).  I shared it first in a Pear & Walnut Coffeecake.  It has since popped up (almost unchanged) in a Pineapple Upside-down Cake and a Peach Streusel Coffeecake.  And it has been the springboard for variations that eventually became Coconut Coffeecake, Piña Colada Cupcakes, Rhubarb Upside-down Cake and Chocolate Coffeecake with Browned Butter Streusel (to name a few).

A few weeks ago, after poking around on line a bit searching for a streusel coffeecake that suited my pantry and finding nothing appealing, I remembered that I already had a delicious recipe that I could use…and that I was pretty sure would turn out well.  Just like the pear coffeecake…and the peach one…I wanted a coffeecake that used the abundant fruit of the moment.  This time it was Bing cherries (not only was I almost out of coffeecake at the time…I had purchased too many cherries for some reason).  I love Bing cherries with chocolate…so I wanted a little chocolate in the cake.  My basic recipe was able to accommodate all of these things easily.  It was a no brainer to make it.  

If you make it…I hope you enjoy it as much as I did.  The basic cake—underneath the cherries and chocolate—might even become one of your favorite basic recipes.     


Bing Cherry & Chocolate-Pecan Streusel Coffeecake

1/2 c. all-purpose flour (60g)
1/4 t. nutmeg
1/3 c. brown sugar
1/4 c. butter
1/2 c. pecans (60g), lightly toasted and coarsely chopped
1/2 c. chocolate chips (85g)

1 3/4 c. all-purpose flour (200g)
3/4 t. salt
1/2 t. baking powder
1/2 t. baking soda
8 T. (1 stick/114g) unsalted butter, at room temperature
1 c. sugar (200 grams)
2 eggs, at room temperature
1 t. vanilla
1 c. sour cream (242 grams)
360g (about 2 1/2 c) Bing (or other dark, sweet cherry) cherries, stemmed, pitted and halved


To make the topping, combine the first four ingredients in a small bowl, rubbing the butter into the dry ingredients. Fold in the pecans and chocolate chips and chill until ready to build the coffee cake.

Combine the flour, salt, baking powder and baking soda in a small bowl and set aside. Cream the butter and sugar until light and fluffy (about 2 to 3 minutes using a stand mixer).  Beat in the eggs one at a time, scraping down the sides after each addition.  Beat in the vanilla. Fold in the flour mixture in three additions, alternating with the sour cream in two additions.  Spread the batter in a greased and floured 13- by 9-inch baking pan. Arrange the cherry halves, cut side up, over the batter so they are relatively evenly spaced.  


Scatter the topping evenly over all.  Bake in a 350° oven until golden and a toothpick inserted in the center comes out clean—35 to 45 minutes. 


Note: This cake freezes beautifully. If you want to have a slice for breakfast every morning, portion the whole cake and freeze the individual portions in an airtight container or in a single layer in a Ziplock freezer bag. A piece can be thawed in the microwave (medium power) or you can let it thaw overnight. To do this, before you go to bed, take out a slice, set it on a plate and cover it tightly with plastic to conserve the moisture as the cake thaws.

Printable Version


Saturday, February 18, 2023

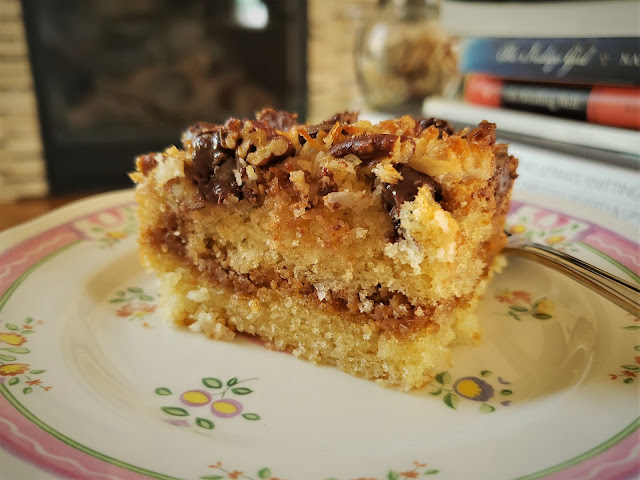
Coconut Coffeecake with Chocolate-Coconut-Pecan Streusel


In my first blog post after my long hiatus I mentioned that much of my personal cooking these days is centered around using things up: ingredients/partial containers left from cooking classes…private events…etc.  But as I pointed out then, anyone who lives and cooks in a small household is familiar with the need to learn to cook with the odds and ends left from previous meals.
 
As I reassemble my career in our post-pandemic world, I have begun to focus on my online cooking classes more and more.  I have been teaching cooking classes for over twenty years, but early in the pandemic it became obvious to me that the kinds of things that had worked well for in-person classes were not the same things that would work well for an online session.  So I’ve been adjusting a bit. 
 
It has occurred to me that the online format is perfect for giving people a peek into the actual workings of a small household kitchen.  I can make the things I actually cook for myself…in the portion sizes I cook them in…basically showing my cooking reality in order to encourage other people who are living the small household life that it is totally possible to cook and eat well when there is “just” one…or two…of you.  As it turns out, those of us living this life are not a small group.  I read the other day that as of 2021, 28% of American households were comprised of single adults.  35% are made up of two adults.  It is clear that small households are the majority of us.  We should be eating well at home!
 
So you might be wondering what all of this has to do with coffeecake.  Well…besides the fact that I regularly make big coffeecakes and cut them into portions for the freezer (and because it’s just me, they are mine…all mine…), this particular coconut streusel coffeecake came about because I had some ingredients leftover from a curbside dinner.  


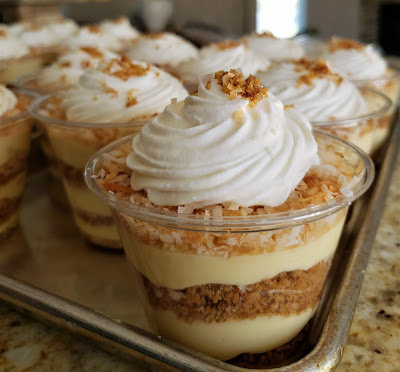
I had made a Coconut Bavarian Parfait and had an open can of coconut milk, a partial bag of shredded coconut, and extra egg whites.  Not to mention the big container of granola-like (i.e. eminently snack-able) graham cracker-coconut crumb crust that was left in my pantry.

So I created a coffeecake that used all of these ingredients.  At the time I thought it was a one-off…a never-to-be-duplicated treat…because I was unlikely to ever make the crumb crust again just to fill a coffeecake.  But of course the cake doesn’t need a crumb crust middle.  And as I have been getting ready for my first “cooking for a small household” class, I remembered this coffeecake because one of the recipes in the class includes a can of coconut milk.  


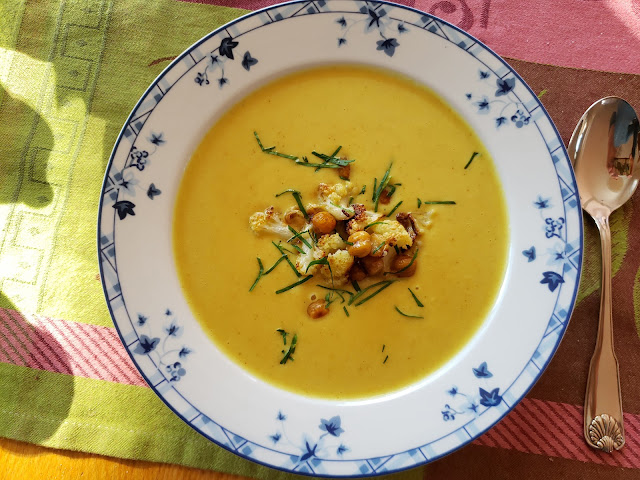
The recipe in question is a delicious purée of spicy roasted cauliflower and chickpeas.
  You can make a big batch and use up the whole can (and freeze or share the extra portions of soup).  Or—like me—you can make a small batch….in which case, you’ll have some coconut milk leftover.  You could roll that can of coconut milk into another dinner later in the week (these pork meatballs are fantastic)…or you can make a cake.  I know.  Tough decision.

You’ll notice when you look at the cake recipe that it uses all egg whites.  I almost always have a container of egg whites in my refrigerator.  I frequently make things that use just egg yolks and I save the whites.  They keep well in an airtight container for several weeks (just mark the date so you won’t keep them for six months…).  But if you don’t have egg whites, just use two large eggs instead. 


I have not included the graham cracker-coconut crumb crust filling in the recipe I’m posting.
  But if you would like to add it, the recipe can be found on the post for my Coconut Bavarian Cream Tart.  Just make the crust…toasting the clumps spread out on a baking sheet instead pressed into a pie or tart pan.  Break the clumps up a bit when they are cool.  To add this to the cake, spread half of the batter in the pan, scatter 2/3 to 3/4 cup (or however much you like) of the toasted crumb crust over the batter, dollop the rest of the batter over the crumbs and smooth out.  Top with the streusel and bake.  Increase the baking powder to a tablespoon if you add a layer of crumbs—the cake batter will need a little extra oomph because of the weight of the crumbs. 
 
If you make this coffeecake, you’ll have a little over half a can of coconut milk left.  There are lots of great things you can do with that half can.  But if you happen to see this post before February 28, I hope you’ll consider joining me for my “Cooking for a small Household: a Head of Cauliflower and a Can of Chickpeas” class.  I’ll be making that delicious soup…as well as a couple of other nice dishes using cauliflower and chickpeas.


Coconut Coffeecake with Chocolate-Coconut-Pecan Streusel
 
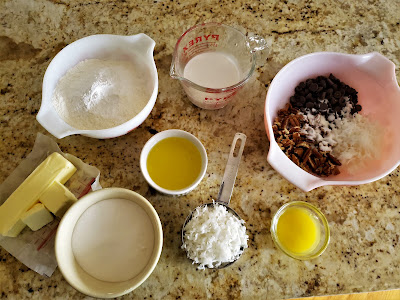
80 g. (scant 3/4 c.) pecans, lightly toasted and coarsely broken
115 g/4 oz. (2/3 c.) semi-sweet chocolate chips
50 g (1/2 c.) sweetened shredded coconut
25 g. (2 T.) sugar
25 g. (2 T.) melted butter
 
1 3/4 c. all-purpose flour (200 g.)
1/2 t. salt
2 1/2 t. baking powder
10 T. plus 2 t. (150 g.) unsalted butter, at room temperature
1 c. sugar (200 g.)
100 g. egg whites (see notes)
1 1/2 t. vanilla
2/3 c. coconut milk (160 g.)
75 g. (3/4 c.) sweetened shredded coconut
 

Butter a 9x9-inch baking pan.  Line the bottom with parchment.  Butter the parchment.  Flour the pan.  Tap out the excess and set aside.  Preheat the oven to 350°.
 
To make the streusel, place the pecans, chocolate chips, coconut and sugar in a bowl and stir until everything is evenly distributed.  Drizzle the melted butter over all and fold with a rubber spatula until the butter is well distributed.  Set aside.
 
Combine the flour, salt, and baking powder in a small bowl and set aside.  Beat the butter and sugar until smooth.  Increase the speed and cream until fluffy.  Beat in the egg whites in two or three additions.  Beat in the vanilla.  Fold in the flour mixture in three additions, alternating with the coconut milk, beginning and ending with the flour mixture.  Add the coconut with the final addition of the dry ingredients. 
 

Spread the batter in the prepared pan.  Scatter the streusel evenly over all.  


Bake in a 350° oven until golden and a toothpick inserted in the center comes out clean—40 to 45 minutes.  Serve warm.  Serves 9 to 12.
 
Note:  If you don’t have any egg whites on hand, you may replace the 100 grams of egg whites with 2 large eggs.

Sunday, February 28, 2021

Spinach Salad with Blue Cheese, Cranberries, Maple-Glazed Pecans & Maple-Dijon Vinaigrette

This has been a winter of green salads for me.  Ever since Christmas it has seemed like I have always had an abundance of salad greens in my fridge…left from classes, pop up dinners, etc.  Baby lettuces, spinach, arugula, romaine, radicchio, endive….  I’m sure I’m missing some.  There are worse problems to have.  These leftover greens have provided the foundation for many a delicious winter lunch—satisfying my depths of winter craving for things fresh and raw.


If you want to be able to make spontaneous salads, you just need to make a point to keep a well-stocked salad pantry.  In addition to greens (if you don’t know how to store your greens so they keep for a while, check out my long ago post onhow to do so),  you’ll want to have nuts and seeds, dried and fresh fruits (this time of year: apples, pears, and all kinds of citrus),  cheeses and olives… things like eggs, avocado and canned/leftover meats/fish for substance…and finally, things like celery, radish, onion (red, scallion, shallots) for sharpness and crunch. 

If in addition to all this you keep a couple of nice homemade vinaigrettes in your fridge, you will be able to have a delicious and simple—or complex—salad anytime you like.  I almost always have a plain/basic vinaigrette in my fridge—one that will go with just about everything (usually mustard and shallot based).  And then another one with some kind of interesting flavor profile that fits the current season.  For example, in late winter and early spring, I like to make one with reduced orange juice (great on citrus, green vegetables like asparagus and green beans, beets and avocado).  And the maple one that I am sharing today is perfect for the fall and winter months. If all else fails, if you have olive oil and lemon juice (or a selection of vinegars), you can dress your greens with a squeeze of the latter and a drizzle of the former…and a sprinkling of salt & freshly ground pepper.

The salad I’m sharing today happens to be the one I served at my most recent curbside pickup dinner, but it could easily have been a spur of the moment pantry salad.  Most of the time after I have spent a lot of time cooking something, I’m not really in the mood to eat it myself.  (Hasn’t everyone experience this after big holiday meal preparations?).  But I was tired enough after my last curbside that I didn’t really want to start my dinner from scratch, so I had the salad I had served to my clients.  I was so glad I did.  Even in my “I’m tired of this food” state, I thought it was exceptionally good.  I knew I had to share it here.


It is just a simple spinach salad … enhanced with a few of the pantry elements listed above:  cheese…nuts…dried fruit…a tasty vinaigrette.  But don’t be fooled by its simplicity.  With just a few ingredients, it manages to hit all the right salad notes.  It is refreshing, tangy, salty and slightly sweet.  The addition of a little shredded romaine to the spinach, plus the crunchy maple glazed pecans and chewy dried cranberries, give texture…and the maple syrup spiked vinaigrette brings everything together nicely.  If you maintain a salad pantry, you probably have all the ingredients on hand to make it right now.


Spinach Salad with Gorgonzola, Dried Cranberries & Maple Glazed Pecans

5 oz. baby spinach (weighed after any obtrusive stems have been removed)
2 to 3 oz. romaine or radicchio, sliced in 1/4- to 1/2-inch wide ribbons
3/4 to 1 c. Maple Glazed Pecans (recipe below)
3/4 c./3 oz. dried cranberries/craisins
2 1/2 to 3 oz. crumbled Gorgonzola (choose a harder/crumbly aged variety—piccante or naturale), or substitute Feta
1 oz. shaved red onion, rinsed under cold running water and blotted dry (optional)
1/2 to 2/3 recipe Maple-Dijon Vinaigrette (recipe below)


Place all of the ingredients except the vinaigrette in a large bowl.  Season with salt & freshly ground pepper.  Drizzle a third cup of the vinaigrette over the salad and toss until everything is well coated…adding a bit more if necessary…but be careful, you don’t want a sodden salad. 

Mound the greens on a platter or divide among four individual plates.  If you like, drizzle a little more of the dressing over the plated salads. 
Serves 4
 

Maple-Dijon Vinaigrette

1/4 c. white wine vinegar
2 T. minced shallot
1/2 t. kosher salt
1 T. Dijon mustard
2 T. Maple syrup
5 T. olive oil
5 T. vegetable oil

Place the first three ingredients in a bowl and let sit for 5 to 10 minutes to allow the shallots to soften.  Add the Dijon and whisk until smooth.  Whisk in the maple syrup.  Add the oils in a thin stream, whisking constantly.  Taste and correct the seasoning.  You may need as much as another 1/4 t. of salt, depending on your palate (I add almost that much).

Makes a generous cup of vinaigrette.

Maple Glazed Pecans

Place the pecans (halves or coarsely broken pieces) in a bowl and add 2 T. of maple syrup and a slightly mounded 1/4 t. of kosher salt for every cup (115 g./4 oz.) of pecans.  Spread the nuts in a greased/oiled/sprayed baking sheet that is just large enough to hold the pecans in a snug single layer.  Transfer the pan to a 325° oven and bake for five minutes.  Give the nuts a stir with a heat proof spatula or pancake turner and return to the oven.  Continue to bake until the syrup is thickened and bubbling…and has darkened slightly.  The amount of time this will take will vary greatly according to how many cups of pecans you are preparing.  For one cup it might take 2 or 3 minutes, for 4 cups it will be closer to 6 or 7 minutes.  Do not under bake or the pecans will remain sticky.


Remove from the oven and immediately transfer the nuts to a second greased/sprayed/baking sheet, quickly spreading/separating the nuts…and continuing to stir and separate every few minutes as they cool.  Store in an airtight container at room temperature. 

 Printable Version 


Wednesday, February 12, 2020

Banana Cake with White Chocolate & Pecan Streusel


A few years ago I made the most delicious triple layer banana cake for my birthday.  I don’t remember now why I decided that a banana cake (with cream cheese frosting) was what I wanted—I usually make my Marbled Chocolate Sweet Potato Cake on my birthday.  Whatever the reason, I didn’t actually have a banana cake recipe in my repertoire that I particularly liked.  So I went looking for one.

Most of the time a spur of the moment search like this will result in an acceptable—maybe even excellent—recipe.  But this time, I happened upon the best banana cake I have ever had in my life.  There must have been something about her description (light and fluffy?) that attracted me.  Most banana cakes don’t seem very cake-like.  Often what passes for banana cake could be mistaken for banana bread that has just been baked in a layer cake instead of a loaf pan.  This style of cake tends to be kind of dense and dark…and not very sweet.  And I actually don’t object to this…as long as it is what you are prepared to have on your plate.  But since this was for my birthday, I wanted a true layer cake:  Something light, tender, finely grained…and sweet.  And that’s exactly what this recipe produced.   It is now my go to banana layer cake.


Unfortunately, I don’t make layer cakes that often.  I just don’t have that great of a need for them.  But I do make streusel-topped cakes (for my breakfast) on a regular basis (true story).  I’m not sure why it took me two years to turn this cake into a breakfast cake. 

Besides baking the cake in a 13- by 9-inch cake pan…and topping the cake with a streusel…I only made one minor change to the recipe itself:  I omitted a quarter cup of brown sugar.  I really didn’t want to change such a lovely cake too much, but the original cake really is quite sweet…and with a streusel more sugar would be piled on top.  I didn’t think this small percentage reduction in the sugar would have too much of an effect on the structure and tenderness of the cake…and it didn’t.  The cake is still sweet (and light and tender)—but not overly so (for a breakfast/snack cake).


I toyed with the idea of making only 2/3 of the batter for the same size pan and the same amount of streusel.  If you are a person who always wishes there was more streusel and less cake, then that might be  the route to go (you will find this to be an easy calculation).  But I really love the cake….and feel like it (rather than the streusel) should be the main event.  The result is a lofty cake…crowned with just the right amount of sweet crunch on top.  Perfect.  Now I have not only a “go-to” banana layer cake, I have a fantastic addition to my breakfast cake repertoire….which is just great since you can never have too many streusel cakes in your recipe file.


Banana Cake with White Chocolate & Pecan Streusel

Streusel:
1 c. (120 g.) all-purpose flour
1/2 c. (100 g.) golden brown sugar
3/8 t. salt
6 T. (85 g.) melted butter
3/4 c. (85 g.) pecans, lightly toasted and chopped
3/4 c. (128 g.) white chocolate chips (see notes)
                                             
Place the first 3 ingredients in a small bowl.  Add the melted butter and mix until the mixture is homogenous and clumpy.  Stir in the pecans and chips.  Set aside.

Cake:
3 medium very ripe bananas (340 g. net weight)
2 t. lemon juice
3 c. (360 g.) all-purpose flour
1 1/2 t. baking soda
3/4 t. salt
1 1/2 sticks (170 g.) unsalted butter, room temperature
2 c. (400 g.) sugar
3 eggs, room temperature
2 t. vanilla extract
1 1/2 c. whole milk plain yogurt


Butter a 13- by 9- by 2-inch cake pan.  Line the bottom of the pan with parchment and butter the parchment.  Flour the pan, tapping out the excess.  Set aside

Pass the bananas through a food mill, or purée in the food processor.  Stir in the lemon juice.  Set aside.  Combine the flour, soda and salt and set aside.

Cream the butter and sugar until very light and fluffy.  


Beat in the eggs one at a time, scraping down the sides after each addition.  Beat in the vanilla.  Fold in the flour mixture in three additions, alternating with the yogurt in two additions.  Fold in the bananas. 


Spread the batter in the prepared pan.  Scatter the streusel evenly over all.  


Bake in a 325° oven until golden and a toothpick inserted in the center comes out clean—about an hour.  Serves 15 to 18.


Note: Try to get real white chocolate chips for the streusel and not the inferior “white morsels” or “white baking chips.”  I’m partial to Baker’s White Chocolate Chips—which are reasonably priced and widely available.

(Cake portion of recipe adapted from Divas Can Cook)

Printable Version


Wednesday, February 28, 2018

Pecan Shortbread Cookies

If you read my last post, you probably noticed the little pecan shortbread cookies in some of the pictures.  For some reason I have never posted the recipe for these cookies, even though they are a favorite.  As I nibbled on the cookies and thought about how delicious their slightly salty, slightly caramel-y crunch was alongside the mousse, I decided I needed to share the recipe.


The original recipe is from Maria Helm Sinskey’s book The Vineyard Kitchen.  As with most recipes that I make fairly regularly, this one is not exactly like the original…but it is very close.  I find that most of the recipes in this particular book work very well for me as written.  And Sinskey’s preferences and palate are similar to mine, so I have tried an unusually high number of them.  It is one of my favorite cookbooks and I highly recommend adding it to your cookbook library

It was my chef friend Nancy who first saw this book.  Knowing I would really like it, she gave me a copy.  It was also Nancy who first noticed the recipe for these cookies and made them for a dinner we were preparing when we worked together at The Culinary Center of Kansas City.  We both loved them and have both continued to make them over the years.  They are a great companion for all kinds of cool, creamy desserts--things like custard, flan, panna cotta, and ice cream.  I particularly like them with the butterscotch pot de crème I posted a few years ago.  I probably wouldn’t have made them on purpose to go with the mousse (I just so happened to have some in my freezer), but they were perfect.  They are also very good all by themselves…perhaps with a cup of coffee or tea….or even a glass of milk.

The original recipe for these cookies was for a smaller quantity of dough, baked in a smaller pan (a nine inch square).  Because we were making the cookies that first time for a very large group, Nancy multiplied the recipe by three and put it in a half sheet pan.  This turned out to be a fortuitous adjustment since these cookies—like all shortbread cookies—must be cut when they are warm.  Flipping even the original small square out of a deep baking pan without breaking the thin, tender cookie would have been difficult….flipping an entire half sheet without some collateral damage, almost impossible.  Instead, Nancy cut the cookie while it was still in the half sheet pan with the long edge of her bench scraper.  I thought this was brilliant…and even though I only make a quarter sheet pan-sized batch when I bake them now, I still employ this method. 


There is only one thing about this recipe that I have found to be a little bit difficult.  The baking time seems to be highly dependent on the peculiarities of your oven...and varies more than just a little bit from oven to oven.  I have no idea why this might be, other than that the sheet of cookies is quite thin.  Once it is cooked through and begins to turn golden, it can go from under-baked to burned in a flash.   If your baking pan has a dark finish (like mine) this problem is compounded.  I have baked these in my home oven—which tends to bake hot and fast, and has very strong bottom heat—and they have been done in 20 minutes.  Recently I baked them in a professional convection oven and they took at least twice that long (I can’t tell you exactly how long because I was doing other things and just keeping an eye on the cookies occasionally…).  While baking them for this post, I slid an insulated baking sheet onto the bottom rack of my oven to help mitigate the effects of the strong bottom heat and my dark pan, and the cookies took 35 minutes. 

The moral here seems to be that you should take a peek at the cookies at around 20 minutes…and then keep an eye on them.  They will most likely take somewhere in the range of 30 to 35 minutes.  When they are springy to the touch in the center, and golden at the edges, they are done.  After a minute or two, cut the cookies in the pan with the edge of your bench scraper.  Then, let them cool completely before removing them from the pan (simply slide a thin palette knife under the cookies and they will lift right out). 


After you have made them a time or two, you will have your system down pat and you will find that these are the easiest cookies imaginable to make.  Which is a good thing:  I’m pretty sure that if you like pecans…and shortbread…once you taste these cookies, you will want to make them again and again.

Pecan Shortbread Fingers

3/4 c. lightly toasted pecans (3 oz.)
1 1/2 c. all-purpose flour (6 oz.)
3/4 t. kosher salt (or 1/2 t. table salt)
12 T. (1 1/2 sticks) unsalted butter
3/4 c. powdered sugar (3 oz.)
3/4 t. pure vanilla extract


Place the pecans in the food processor along with the flour and salt and process until the pecans are very finely chopped. 


In the bowl of a standing mixer fitted with the paddle attachment or with an electric hand mixer, cream the butter and confectioners’ sugar until smooth.  Beat in the vanilla.  Add the pecan-flour mixture and mix until the dough comes together in clumps. 


Press the dough (using lightly floured hands or a sheet of plastic wrap) into an ungreased (see note) quarter sheet (13x9) pan 


and prick all over with a fork.  


Bake for 25 to 35 minutes in a preheated 325° oven until the edges are golden.


Cool a moment or two, (the shortbread should still be warm) then cut into long, thin, rectangular “fingers” using the edge of a bench scraper.  I usually trim a small amount—less than a quarter inch—around the edges first.  (Not only does this give all of the cookies nice square edges, it produces a warm crunchy cookie snack for the baker….) 


I then cut into 36 fingers—3 cuts down the length of the pan and 12 across.  Allow the cookies to cool completely before removing from the pan. 

Makes 3 dozen

(Adapted from The Vineyard Kitchen by Maria Helm Sinskey)

Note:  I always line the pan with a sheet of parchment.  In order to keep the parchment from sliding around while I press the dough into the pan, I very lightly grease the bottom of the pan—and then leave the parchment itself ungreased.

Wednesday, November 22, 2017

A Chocolate, Caramel & Nut Tart...for Thanksgiving and the Holiday Season to come


Tomorrow is Thanksgiving Day.....  And as has been increasingly the case in recent days (and months... even years....), I haven't had the time to post as much as I would like.  This is especially disappointing to me as we approach my favorite holiday of the year—a day that is all about the Table.  I love it that almost everyone cooks for this particular feast. And I love it that I get to participate—even if in just a small way—in the tables of many through the foods that I teach and recipes that I post.  I console myself about the scarcity of recent posts with the thought that visitors can still find many delicious Thanksgiving recipes that I posted in previous years.  To find them, check out the old October and November posts (click the links on the right), or visit the recently updated Thanksgiving appetizers, side dishes, desserts and all-things-pumpkin photo albums on my Facebook page.


Today, I thought I would sneak in a dessert post.  I have been making this Chocolate, Caramel & Nut Tart for a little over a year.  It is rich...but not too sweet.  A small sliver would be just the thing at the end of the big meal.  It would satisfy the chocolate, caramel and/or nut lovers in the crowd...as well as those that really want pecan pie, but don't know if they can manage something so rich and sweet after a meal of Turkey with All the trimmings.  I have also discovered that unlike pumpkin pie, this tart keeps very well for several days at room temperature—providing a little something sweet for everyone to nibble on in between the flurry of holiday activities. 

The tart is simple to make...and if you keep nuts and basic baking supplies on hand, you probably have everything you need to make it already.  If you have crust phobia, there is no need to fear this crust.  Like the plain sugar dough that I have posted several times, anyone who can make rolled sugar cookies, can make this chocolate crust.  


As for the caramel, just make sure you have all of the ingredients measured and ready and that you pay close attention as the sugar syrup cooks.  There is no need for a candy thermometer, simply stop the cooking by adding the cream (stand back and use a long handled spoon) when the sugar syrup has turned a deep golden amber (you will even notice a small wisp or two of smoke when it is dark enough...but don't cook it much further than that or it will be bitter).    


The choice of nuts for this tart is up to you, but I find that walnuts, pecans and cashews (alone or in some kind of combination) make the best tart.  These nuts all have a softer, more delicate crunch to them and have just the right texture when mixed with the medium soft caramel.  As much as I love almonds, they are simply too hard for this tart. They make the tart not only difficult to cut, but also difficult to eat.  Pistachios (which I used in the tart pictured in the post) fall somewhere in the middle.  Their texture is a bit more obtrusive than I would like, but most people would probably not be bothered by it...and they add nice flavor and color.   

Finally, I want to wish everyone the happiest of Thanksgivings.  If you are cooking, I hope you find pleasure in the process.  And I hope that wherever you are—surrounded by many or few...with family or friends—that you find yourself at a table where for a window of time the frenzied pace of life slows, and you revel in the gifts of the food, the fellowship, the conversation, and the moment. 


Caramel Nut Tart

Chocolate tart dough (below)
1/2 c. semi-sweet chocolate chips or chopped chocolate (3 oz.)
1/4 c. water (55 g.)
1 c. sugar (200 g.)
2 T. light corn syrup (41 g.)
2/3 c. heavy cream (155 g.)
2 T. honey (42 g.)
1 t. vanilla
1/4 t. salt
2 c. mixed nuts (see note), lightly toasted and coarsely broken


On a lightly floured surface, or between sheets of plastic wrap, roll about 3/4 of the chocolate dough out into an 11-inch round that is 3/16 inch thick.   Transfer the dough to a buttered, 9-inch removable bottomed tart pan and ease the dough into the pan, being careful not to stretch it and pressing it against the sides of the tart pan.  Use your hands to gently cut the dough flush with the upper rim of the tart pan.

To blind bake, place the shell on a cookie sheet and bake in a 350° oven until set—10 to 15 minutes.  (It is not necessary to fill this crust with pie weights.)  Remove the tart shell from the oven and immediately scatter the chocolate over the bottom of the shell.  


Let the chocolate sit for five minutes in the warm crust.  When the chocolate is soft, spread it out into a thin layer that covers the entire bottom surface of the shell.  Set aside.


To prepare the filling, place the water in a large saucepan.  Add the sugar and corn syrup and stir and cook over medium heat until the sugar has dissolved.  Increase the heat to medium-high, stop stirring, and bring the syrup to a boil.  Continue to cook, swirling the pan occasionally, until you have a deep amber caramel. Remove the pan from the heat and carefully and slowly pour in the cream (the mixture will hiss and bubble up, so stand back).  Return the pan to medium-low heat and whisk until the caramel is homogenous and any lumps have dissolved. Carefully stir in the honey, vanilla, salt and nuts. 

Using a slotted spoon, carefully transfer the nuts to the prepared shell, spreading them in an even layer.  Slowly pour the hot caramel over and around the nuts, being careful not to let it overflow...you may have some caramel left over.


Transfer the tart to the oven and bake until the caramel is bubbling all over...about 15 to 20 minutes.  Let the tart cool at least 2 hours before serving (the tart is even better if made a day ahead). 


Slice with a sharp knife.  The tart is delicious served with vanilla bean ice cream and chocolate sauce.  Store the tart at room temperature.

Note:  You may use any combination of nuts that you prefer for this tart, although your tart will have a better finished texture if you avoid almonds.  Almonds are quite hard and their texture is noticeable in the finished tart.  My preferred choice is 2/3 cup each of walnuts, pecans and cashews.  Toast each variety of nut separately (different kinds of nuts will take different lengths of time to toast) in a 350° oven, spread on a baking sheet, until golden and fragrant.

(Caramel adapted from The Pie and Pastry Bible, by Rose Levy Beranbaum)

Chocolate Tart Dough:
1/2 c. unsalted butter (1 stick), at a cool room temperature
1/2 c. powdered sugar (55 g.)
1 large egg yolk (20 g.)
3/4 t. vanilla extract
1 1/4 c. all-purpose flour (162 g.)
1/4 c. unsweetened Dutch-processed cocoa powder (22 g.)

In the bowl of an electric mixer fitted with the paddle attachment, cream the butter and confectioners’ sugar until just combined. Add the egg yolk and vanilla and beat until smooth. Sift in the flour and cocoa powder and beat on low speed until the dough comes together in clumps.  Press into a disk.  The dough may be used immediately or be chilled or frozen. 

(Crust recipe from The Last Course:  The Desserts Of Gramercy Tavern by Claudia Fleming)