Showing posts with label Winter squash. Show all posts

Wednesday, January 17, 2018

Black Bean & Butternut Squash Soup with Spanish Chorizo

A couple of weeks ago while I was posting my ‘On this Day’ post to my Facebook page I noticed that for that particular date there were two different soup posts to choose from.  A few days later, I ran into another soup post…  And then a few days after that, yet another.  I decided to check, and it appears that in every January since I began writing For Love of the Table, I have shared at least one soup recipe.  It seems that January is soup month….at least as far as For Love of the Table is concerned. 


And of course it makes sense to be hungry for soup in January.  Soup is warming and filling—just what you need during cold…and sometimes damp…weather.  It is also nourishing….  Whether or not it plays a role in curing a cold or the flu, sitting down to a bowl of steaming soup will almost always make you feel better.   Furthermore, soups are typically fairly lean when it comes to calories and will fit nicely into most reasonable diet plans (should that be part of your January regimen).

So to keep up the streak, I thought I would share the delicious soup that I made over the weekend:  Black bean with Butternut squash and Spanish Chorizo. It was just the thing to have on hand during our recent spate of bone-chilling temperatures.      

When you make your soup, I recommend cooking your beans from dried.  You can of course use canned black beans. There are several good brands that are widely available…and they are truly convenient.  But if you have the time, I think the dried really are better.  When made with dried beans the final flavor seems richer (no surprise since you have the delicious bean cooking liquid to add to the soup)…and the texture more velvety.  It was in fact the presence in my pantry of a couple of pounds of very nice dried black beans from a local grower that put me in mind of a black bean soup.  I wanted to use some of those beans in a place where they would truly shine.   

You may cook the beans using whatever method you prefer—in a pot on the stove, in a wide pan in the oven, or a pressure cooker or Instant pot.  I think the beans cook more evenly if they are given an overnight or a quick soak, but you can cook them straight from dried too—just add an hour or so to the cooking time.

But this soup isn’t just about the beans.  It’s also about the sweet winter squash (excellent with black beans)…and the subtle smoky flavors of the Spanish chorizo and paprika.  This isn’t just an ordinary black bean soup….and we loved it.   It made a terrific dinner (with a big piece of warm cornbread).  But I think I liked it even better during the next few days for lunch. After a day or two the texture is even creamier…and the flavors more developed and nuanced.  Although, I have to admit that my feelings about this may have something to do with the fact that sitting down to a delicious bowl of hot homemade soup in the middle of a freezing cold January day is the very embodiment of Comfort Food.    


Black Bean Soup with Butternut Squash & Spanish Chorizo

3 T. olive oil
1 medium to large onion (white or yellow), cut in a ¼-inch dice
3 large cloves of garlic, minced
2 1/2 to 3 oz. finely diced Spanish chorizo (cured spiced pork sausage, casings discarded if desired)
2 t. cumin
2 t. smoked paprika
1 1/3 lb. Butternut squash, peeled, seeded and cut into a 1/3-inch dice (to make about 4 cups)
3 cups chicken or vegetable stock or a combination of half stock and half water, plus more as needed
5 to 5 1/2 c. cooked black beans (see notes)
1 to 2 T. Dry Sherry (or more, to taste)
Sour cream thinned with a bit of milk
Coarsely chopped Italian flat leaf parsley
Minced green onion (white and green portions)
Toasted pepitas (see notes)

Warm the olive oil in a medium sized soup pot or Dutch oven set over moderate heat.  Add the onions and sweat without color until very soft—15 to 20 minutes or so.  Add the garlic, chorizo, and spices and cook briefly to infuse the flavors into the fat and onions—about 5 minutes.  Add the squash and stir to coat with the onions, chorizo and spices.  Season with salt and continue to cook for another five minutes.  Add the stock/water, adding enough so that the squash moves freely in the liquid and is completely submerged…but not “swimming” in the liquid.  Bring to a simmer and cook (adjusting the heat to maintain a gentle simmer) until the squash is tender—about 20 minutes.

Add the beans, along with enough bean cooking liquid or water so that everything is submerged, moving freely, but not swimming.  Return to a simmer and cook for another 15 minutes (at a low simmer) to allow the flavors to blend.  Taste and season as necessary with salt and pepper.  If you like, add the Sherry. 

If the consistency of the soup pleases you, the soup is ready to serve.  If you would like a creamier soup, remove a cup or two of the soup and purée until very smooth using a traditional or an immersion blender.  Return the puréed soup to the pot and heat through.

Serve topped with a generous drizzle of thinned sour cream and a scattering of parsley, green onion and pepitas.

Makes a generous 2 quarts of soup.

Notes:
  • You may cook your beans from dry or use canned. If you use canned, you will need 3 15 oz. cans. Drain and rinse the beans before using. Add fresh water to the soup when adding the beans. If using dried beans, you will need 12 oz. (1 3/4 cups) of black beans. Cook them according to your preferred method—on the stove top, in the oven, or using a pressure cooker or an Instant Pot. I don’t own either of the latter two.  My preferred method is to soak overnight (or use a modified quick soak) and then bake them in the oven. Black beans take about 2 hours. Add 2 or 3 T. of olive oil, a cinnamon stick, a couple of well-branched sprigs of thyme and 3 or 4 peeled and lightly crushed cloves of garlic before adding the water. Salt half to three quarters of the way through the cooking process.
  • If you prefer, you may replace the cured Spanish chorizo with 4 oz. of fresh Mexican chorizo. If using Mexican chorizo, consider finishing with a squeeze of lime juice instead of Sherry and roughly chopped cilantro instead of parsley.
  • If you like to add something acidic, you can add a 14 oz. can of diced tomatoes. Add it after adding and cooking the chorizo and spices, cooking until the tomatoes are slightly thickened. Add the squash and continue as directed in the recipe.
  • If you would like some spicy heat, add 1/8 to 1/4 t. of cayenne or 1 t. of chipotle chili powder with the spices and chorizo.
  • Toast pepitas (pumpkin seeds) in a 350° oven until they are light golden and beginning to puff and pop…about 5 minutes. Drizzle with a small amount of olive oil and season with salt.
Printable Version

Saturday, November 11, 2017

A Savory Winter Squash Tart with Mushrooms & Apples


Over the years I have posted a lot of recipes for savory tarts.  A tender, buttery crust makes an admirable blank canvas for the products of each passing season.   Whether a custard-based, quiche-style tart...or a free form galette...or a simple flat crust topped with cooked vegetables...I love them.   

A selection of local squash...the mottled yellow and green in the center are "Carnival" squash
...my preferred squash for this tart.

This week I will be teaching a class on winter squash and sweet potatoes.  One of my favorite ways to use squash happens to be in a tart...and I will be including a tart in this class.  Most of the time when I put squash in a tart, I leave it in slices or chunks that are roasted (or sautéed) before they are put into the crust.  But this of course isn't the only way to present it and this time I will be turning the squash into a purée—and smearing it onto a flat rectangle of dough where it will act as an edible (and delicious) glue to hold all of the other toppings in place. 

I have posted a couple of other examples of this style of tart...using ricotta instead of squash puree as the "glue."  Both the ricotta and the squash (reinforced with an egg yolk) do a great job of holding the other components in place.  I particularly like using the squash though.  When making such a thin tart, you need to get a lot of bang for your flavor buck in the individual components...and the squash adds a lot of flavor.  It is also the perfect counterpoint to the savory mushrooms and sweet tart apples that make up the rest of the topping.   


If the combination of mushrooms and apples strikes you as odd, I encourage you to try it in this tart.  I think I first encountered this combination in a traditional chicken dish from Normandy.  The dish—Poulet Vallée d'Auge—is a classic French sauté of chicken cooked in stock, cider and cream...with mushrooms and apples.  Every time I eat it I am amazed by the subtlety and balance of this pairing.  Both the apples and the mushrooms are enhanced by it.  The dish would not be the same if it were garnished with just the apples...or just the mushrooms.  It is the same with the tart.

With a small green salad this tart makes a wonderful light dinner...or satisfying lunch.  But since we are on the verge of our annual holiday party season, I have also included instructions at the bottom of the recipe for rolling the crust and building the tart in such a way that you can cut small squares that make a perfect finger food.  Since all of the components (the crust, squash puree, sautéed apples, sautéed mushrooms and candied pepitas) can be made ahead, it would be the perfect thing with which to greet your Thanksgiving guests.  Simply make the components at your leisure in the day or two preceding the feast.  Then, on Thanksgiving morning, build the tarts and place them on a sheet pan in the fridge, baking them as oven space allows, and as close to the arrival of your guests as you can.

Let the holiday cooking and feasting begin. 


Savory Winter Squash Tart with Mushrooms & Apples

1 recipe pâte brisée (below)
1 egg, separated (yolk and white both reserved)
1 T. butter
1 medium shallot, about 1 oz., minced
1 clove of garlic, minced
1/2 t. minced fresh rosemary
3/4 c. (185 g.) Roasted Winter Squash purée (see below—I prefer Carnival Squash in these tartlets)
1/3 c. (1 oz.) finely grated Parmesan
1 large apple (7 to 8 oz.)—something that is sweet-tart and that holds its shape when cooked...like a Braeburn...or a Pink Lady
1 T. butter (more as needed)
6 oz. crimini (or other favorite) mushrooms, sliced 1/4- to 1/3-inch thick
1 T. olive oil (more as needed)
1 T. minced flat leaf parsley
4 oz. goat cheese
3 to 4 T. Candied Pepitas (see below)
Salt & Pepper, to taste


On a lightly floured surface, roll the pastry out into a thin (1/8- to 3/16-inch thick) rectangle that measures at least 10- by 14-inches.  Place on a parchment-lined baking sheet and chill for at least 30 minutes.  Before baking trim the pastry sheet to a 9- by 13-inch rectangle.  


Prick all over with a fork.  Beat the egg white until foamy and loose.  Brush the whole surface of the pastry with the beaten egg white and return to the refrigerator until ready to use.

In a small sauté pan, melt the butter over medium heat.  Add the shallots, garlic and rosemary and cook until very tender and beginning to caramelize.  Let cool.

In a medium-sized bowl, combine the squash purée, Parmesan, cooled shallot mixture and yolk.  Season to taste with salt & pepper.  Set aside.

Peel, quarter and core the apple.  Cut each quarter into 5 or 6 lengthwise slices (about 1/4- to 1/3-inch thick).  Sauté the apples in the butter until they are golden and just tender.  (Choose a sauté pan—preferably non-stick—that is just large enough to hold the apple slices in a snug single layer.  Start over medium-high heat, letting the butter melt and waiting to add the apples until the foam subsides.  Toss/turn the apples occasionally and reduce the heat if the apples are browning too much/too quickly.)  Set aside.

If the apples were sautéed in a non-stick pan, wipe out the pan and set it back over high heat.  If not, set a non-stick sauté pan (one that is just large enough to hold the mushrooms in a snug single layer) over high heat.  When the pan is hot, add a tablespoon of olive oil.  Add the mushrooms.  Sauté until the mushrooms start to brown—about 2 minutes.  Add a good pinch of salt and continue to sauté, reducing the heat if the mushrooms threaten to burn...but still maintaining an active sizzle, until the mushrooms are tender and browned...about 5 minutes total.  Remove from the heat and add the parsley.  Transfer the mushrooms to the plate with the apples.  Fold the apples and mushrooms together.  Season to taste with salt & pepper.


When ready to bake the tart, preheat the oven to 375° and adjust the rack to the lower third of the oven.  While the oven heats, build the tart.  Spread the squash mixture over the chilled crust, leaving a half inch border of crust visible all the way around.  


Scatter the apples and mushrooms evenly over the squash.  


Crumble the goat cheese over all.  (The tart may be made a few hours ahead to this point.  Cover and chill.)


Bake the tart on the lowest rack until the cheese is tipped with gold and the edges and bottom crust are golden brown—about 25 to 30 minutes.  Slide the cooked tart onto a wire rack and scatter over some of the candied pepitas, pressing lightly if necessary to help the seeds adhere to the cheese.  Cut and serve warm.  Serves 4 to 6 as an appetizer or light entrée with a salad of baby lettuces or arugula. 

Variation:  If you would like to make this tart into small passed appetizer portions, instead of cutting the sheet of dough into one large rectangle, cut it into three 5- by 9-inch rectangles.  Top the smaller rectangles exactly as you would the large, using a third of each of the components for each smaller rectangle.  Bake as for the large.  To serve, cut each rectangle in half lengthwise and then crosswise four or five times to make 8 to 10 small rectangles out of each tart.  Because each small rectangle will have been cut from the edge of the tart, each piece will be more stable and it will be easy to pick up with the fingers (you will have a total of 24 to 30 rectangles from the whole recipe).

Candied Pepitas:  Place 1/2 t. fennel seed and 1/8 t. coriander seed in a medium sauté pan and toast over medium heat.  When fragrant, transfer to a plate to cool.  Grind in a mortar and pestle.   In a small bowl, combine 1 T. sugar, the toasted fennel & coriander, 1/8 t. cinnamon, a pinch of cayenne and a generous pinch of salt.  Melt 2 teaspoons of butter in a medium sauté pan set over medium heat.  Add 1/2 c. raw pumpkin seeds and toss to coat in the butter.  Sprinkle the sugar mixture over the nuts and toss to coat.  Continue to cook, stirring and tossing until the pumpkin seeds are popping and lightly colored.  Remove the pan from the heat.  Wait 30 seconds.  Drizzle a teaspoon of honey over and toss to coat.  Spread the nuts on a plate to cool. 


(Candied Pepitas adapted from Sunday Suppers at Lucques, by Suzanne Goin)

To Roast a Winter Squash for a Purée: Preheat oven to 375° to 400°.  Halve the winter squash.  Scoop out the seeds and discard.  Place the squash on a baking sheet and brush with olive oil or melted butter.  Season with salt and pepper.   Place the squash in the oven and roast until fork tender and caramelized in spots—about an hour.  When the squash is cool enough to handle, scoop the flesh away from the skin with a spoon.  Purée the flesh in the food processor or pass through a food mill fitted with the fine disc.  A 2 pound squash will produce a scant 2 cups of purée, or about a pound.  Depending on the desired use of the purée, the butter or oil with which the squash is brushed prior to roasting may be augmented with any number of things—honey, molasses, maple syrup or balsamic vinegar—alone or in combination.  If you prefer that the squash not caramelize during the roasting process, either cover with foil or oil the pan, add a splash of water and roast the squash with the cut surfaces down. 

1 1/2 c. all-purpose flour (6 oz.)
3/8 t. salt
9 T. cold unsalted butter, sliced 1/4-inch thick (4 1/2 oz.)
3 to 4 1/2 T. ice water

Combine the flour and the salt in a medium-sized bowl.  Rub the butter into the flour until the mixture has the look of cornmeal and peas. Drizzle 3 T. ice water over the flour/butter mixture.  Using your hands, fluff the mixture until it begins to clump, adding more water if necessary.  Turn the dough out onto a counter and form into a mound.  Using the heel of your hand, gradually push all of the dough away from you in short forward strokes, flattening out the lumps.  Continue until all of the dough is flat.  Using a bench scraper, scrape the dough off the counter, forming it into a single clump as you do.  Form the finished dough into a thick rectangle.  Wrap in plastic wrap.  Chill for at least 30 minutes.

Printable Recipe


Friday, March 31, 2017

White Bean Soup with Butternut Squash, Farro & Ham

After an unusually warm and dry winter, I was expecting more of the same for spring.  But so far, spring has been cool and wet.  And I love it.  I love the way the spring greens pop in the soft gray light...


...and I love the rain.  As always, I am looking forward to the new, fresh foods of spring.  But these cool days have put me in the mood for more substantial—and a bit unseasonal—fare. 

On one of our recent rainy days I was flipping through a favorite cookbook (One Good Dish by David Tanis)  looking for the details of a particular recipe when the book fell open to a picture of his "winter minestrone" (white bean soup with winter squash).  I have never made the soup that is pictured—rather that recipe was a springboard for a soup that has since become a favorite.  Either version would have been perfect for the chilly, drizzly day.


In addition to the white beans, the original soup included pasta, pancetta and what I thought was a rather skimpy amount of winter squash.  The first time I made the soup, I doubled the quantity of squash.  I also happened to have some chunks of the end of a Serrano ham in my freezer, so I replaced the pancetta with that.  Even though pancetta might be more common in minestrone, I love ham in a bean soup...and it was a delicious substitution.  I have since made it with ordinary American-style ham—which might not be as good as a fine air cured ham (like Serrano or Prosciutto), but was still delicious.  Finally, I got rid of the pasta altogether and added farro to the soup.  I discovered a few years ago how delicious farro can be in soup.  Moreover, it gives the soup a nice keeping quality that it doesn't have when made with pasta.  Pasta, if added to the entire batch, will become bloated and soggy as it sits (it needs to be cooked and stored separately and added to the leftovers as needed to avoid this).  Farro maintains its texture...even when the soup is kept for several days.

One of the things I like the most about this soup is the way the squash is roasted before adding it to the soup.  When diced squash is cooked in the soup, it can break up into the broth.  This is usually a desired quality, since it adds body and color to the soup.  But when roasted and added at the end it maintains a discrete presence.  The effect—both from a visual and a taste perspective—is very nice.   


For some reason I never got around to making this soup this past winter.   And since days when I'll be hungry for such a soup are dwindling, I decided to make it now.  If you happen to have a cool spring day in your future, you should make it.  I think you will find the combination of flavors and textures to be wonderfully satisfying.  And if you don’t make it now, be sure to save the recipe someplace where it will cross your line of vision next fall when winter squash begins to fill the markets once again.

White Bean Soup with Butternut Squash, Farro & Ham

3 T. olive oil, divided
3 to 3 1/2 oz. ham, cut in a 1/3-inch dice
1 medium onion (about 8 to 9 oz.), cut into small dice
2 cloves garlic, minced
1/4 t. fennel seed, crushed
1/8 t. red pepper flakes, or to taste
1/2 lb. Great Northern beans, soaked overnight in cold water, drained and rinsed
Water
1 lb. Butternut squash, peeled, seeded and cut into 1/2-inch dice
1/2 c. pearled or semi-pearled farro
1 t. minced fresh rosemary
Olive oil for drizzling


In a soup pot, heat a tablespoon of the olive oil over medium-high heat.  Add the ham and cook, stirring occasionally until browned in spots—about 3 to 5 minutes.  Add another tablespoon of olive oil, then add the onion, garlic, fennel seeds, and pepper flakes along with a pinch of salt.  Stir to coat in the fat.   Reduce the heat and gently sweat the onions until soft and tender—adding more oil if the pan seems dry—about 10 to 15 minutes. 

Add the beans and enough water to cover the beans by about an inch or so and bring to a simmer.  Maintain a simmer, stirring occasionally and adding hot water as necessary to keep the beans covered by an inch of liquid.  When the beans are about half cooked, season to taste with salt.  Continue to cook until the beans are very tender—about 45 minutes to an hour total cooking time. 

While the beans cook, prepare the squash and farro:

In a large bowl, toss the cubed squash with a tablespoon or so of olive oil.  Season with salt and pepper and spread on a baking sheet large enough to hold the squash in a snug single layer. Transfer to a 400° oven and roast, turning the squash once, until tender and caramelized in spots—about 30 minutes.  Set aside.

Cook the farro in a pot of boiling salted water until just tender—about 25 minutes.  Drain and spread on a baking sheet until needed.

When the beans are tender, add the squash, farro and rosemary, along with enough boiling water so that the soup elements are submerged and moving freely.  Continue to simmer for 5 minutes or so to allow the flavors to blend.  Taste and correct the seasoning.  Ladle in to warm soup bowls and served drizzled with olive oil. 

Makes 2 to 2 1/2 quarts.  Recipe is easily doubled.

Note:  The soup will thicken as it sits.  Be ready to add more water when reheating on subsequent days. 

(Recipe adapted from Winter Minestrone in One Good Dish by David Tanis)


Sunday, March 5, 2017

Farro with Butternut Squash, Kale & Pistachios

Anyone who cooks on a regular basis will tell you they feel like they get into culinary ruts.  The very notion of a rut implies somehow being stuck...or maybe being boring.  But the fact that we gravitate toward the familiar can be a good thing.  The pull of particular foods/ingredients...  favored styles or food cultures...   certain cookbooks/food magazines or blogs...   or a group of chefs/cooks whose recipes cause you stop and take a second look, is often the source of much deliciousness.  Recently, every single one of these bells went off for me when I saw Melissa Clark's recipe for Farro with Roasted Squash on the New York Times Cooking site. 


No matter what Clark had chosen to do with this set of ingredients, I'm pretty sure I would have liked the result....  I appreciate her style and her approach to food.  And I love farro and winter squash.  All of this together made me stop and look.  What inspired me to try my own spin on her recipe was the liquid she used to cook her farro:  apple cider.  I don't know why using cider in this way has never occurred to me (it happens to be a favored winter ingredient...I pretty much always have some in the fridge during the fall and winter months...).  What a great idea.  Cider adds subtle flavor, sweetness and acidity....and compliments the squash perfectly.  I love apples with winter squash. 

As usual, I departed from the original recipe in a couple of ways.  Instead of adding sugar and spices to the squash, I just tossed it with olive oil and salt and pepper.  Then, I added a generous quantity of caramelized red onions and some chopped pistachios to the finished farro.  Both of these added the subtle sweetness I had removed—and as a bonus, the pistachios added some nice textural interest. 


I also added some wilted Tuscan kale to the finished pilaf.  I think a scattering of arugula or mint instead (as in the original recipe) would have been nice, but one of my most favored culinary ruts is wilted greens with grains.... 

Finally, I served my pilaf with a dollop of labneh.  I tried the finished dish with the Feta crumbles—and this was good (goat cheese would be good too)—but found that I preferred the tangy contrast of yogurt to the salty contrast of the cheese.  If you are in the mood for something more salty, Feta might be the way to go.


It is worth observing that while the reason I originally stopped to examine Clark's recipe might be my own well-worn culinary path, that doesn't mean the resulting dish was boring in the slightest.  I found it to be totally delicious and satisfying.  As a matter of fact, it's the kind of thing I could happily cook and eat every day....


Farro with Winter Squash, Tuscan Kale & Pistachios

1 large or 2 small bunches (8 to 10 oz. total) Tuscan kale, stemmed (discard stems) and leaves cut cross-wise into 1-inch strips
About 4 T. olive oil, divided
1 medium to large red onion (8 to 10 oz.), halved and thinly sliced cross-wise
Salt & pepper, to taste
1/8 t. hot pepper flakes, or more, to taste
2 cloves garlic, minced
2 lb. Butternut squash, peeled, seeded halved and cut into 1/2-inch thick slices (see note)
1 c. pearled or semi-pearled farro
1 c. apple cider
1 T. to 1 1/2 T. cider vinegar, to taste
1/4 c. pistachios, toasted and coarsely chopped
3 oz. Labneh, yogurt or Feta (in large chunks)
Extra virgin olive oil for drizzling


Bring a large pot of salted water to the boil.  Add the kale and cook until just tender—about 5 to 7 minutes.  Drain the kale, reserving 1 1/2 cups of the blanching liquid.  Spread the kale on a baking sheet—or just spread out in a wide colander—and let cool. 

Warm 1 1/2 T. of olive oil in a wide sauté pan set over moderate heat.  Add the onion along with a good pinch of salt and the pepper flakes.  Cook until the onions are tender and slightly caramelized. If at any time the onions seem dry, add a bit more oil.  Add garlic and cook until fragrant. Add the kale and stir to coat in the oil and onions.  Cook over low heat until any water clinging to the kale has evaporated.  Set aside and keep warm.


Meanwhile, in a large bowl, toss the squash with a couple tablespoons of olive oil and salt & pepper to taste.  Spread in a single layer on a baking sheet and transfer to a 450° oven.  Roast until tender and caramelized—about 25 to 30 minutes, flipping the squash over after about 15 to 20 minutes (wait to turn until the squash has begun to become golden on the bottom).  Keep warm until ready to assemble the pilaf.

While the squash, onions and kale cook, cook the farro.  Place the cider and reserved kale cooking liquid in a saucepan and check for salt.  Bring to a boil and add the farro.  Cover and reduce the heat to maintain a simmer.  Cook until the farro is tender (but still has texture)—about 25 to 30 minutes.  Drain the farro and transfer to a large bowl. Add the kale/caramelized onions along with a tablespoon of cider vinegar.  Taste and correct the seasoning with salt, pepper and vinegar.

To serve, spread half of the farro mixture on a large platter or individual serving plates.  Top with half of the squash and a scattering of pistachios.  Repeat this layering.  If using labneh or yogurt, serve with a dollop on the side or drizzle yogurt over the whole pilaf.  If using Feta or goat cheese, crumble the cheese over all.  Drizzle with olive oil and serve.  Serves 4. 

Note:  Cut the cavity portion of the squash into 1/2-inch wide wedges. Cut the halved "neck" portion cross-wise into 1/2-inch thick slices.  If you like, you can further cut these half circles in half—into "sticks" or quarters...as you prefer.  I like this dish best made with all cavity portions as I think these 'wedges' look best in the dish.  (I save the necks for a preparation that calls for a neat dice). 

(Adapted from New York Times Cooking)

Printable Version


Tuesday, February 28, 2017

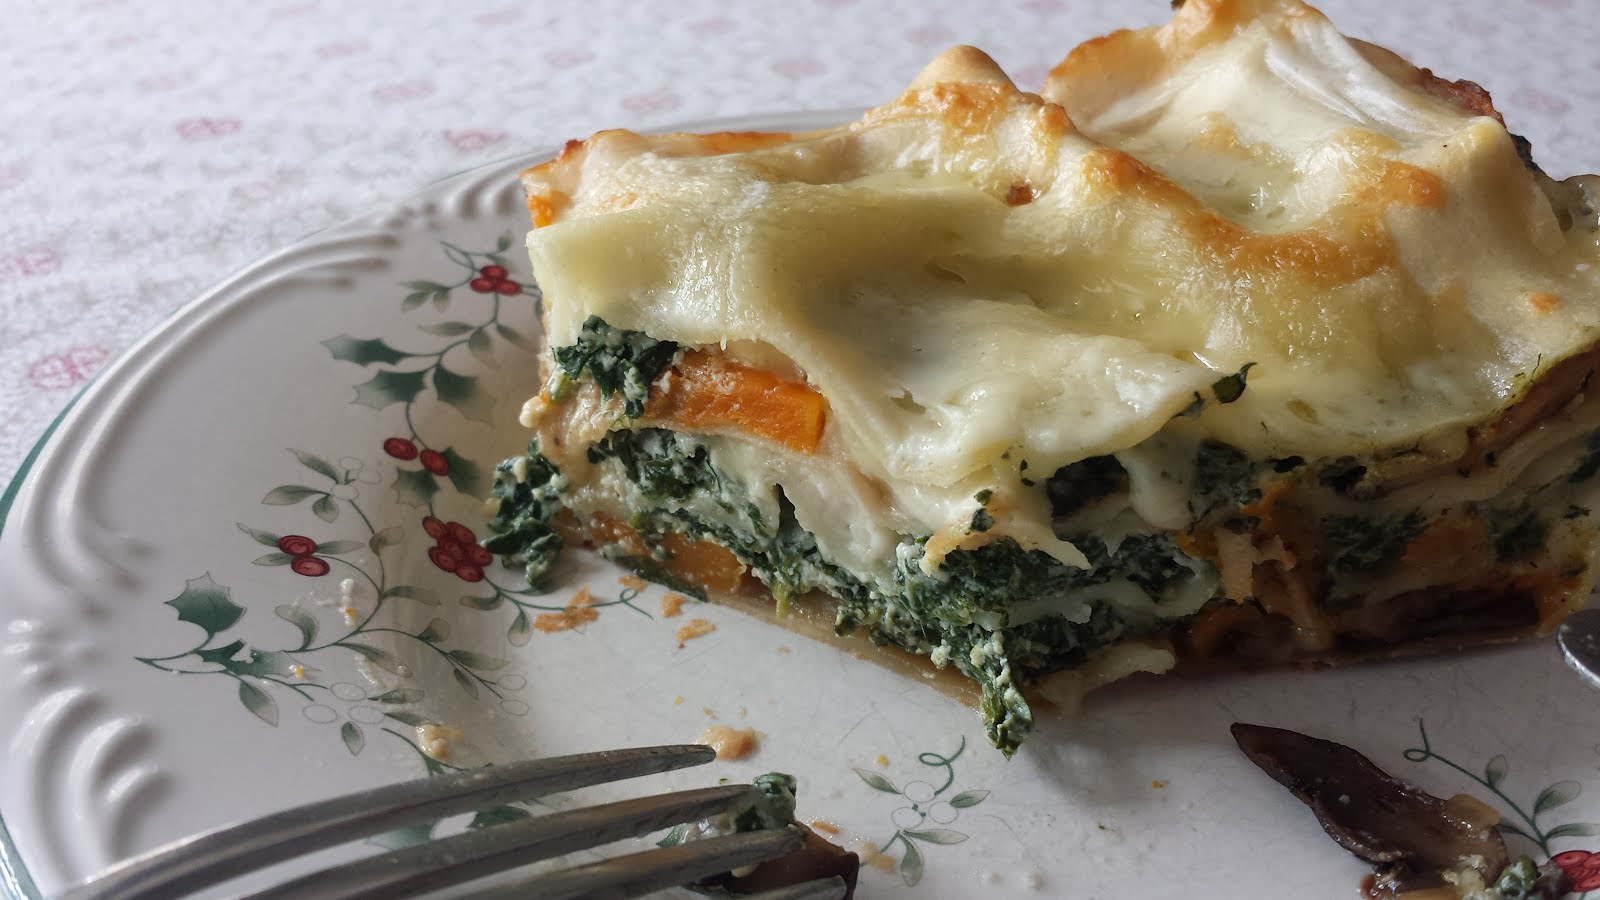
Winter Lasagne...with Spinach, Butternut Squash & Mushrooms


Last July I published a recipe for Summer Lasagne.  "Summer" because the main ingredient was corn—made into a pesto and also folded into some beautiful market chard.  This unusual and tasty lasagne was the serendipitous result of the intersection of an impulse purchase at the grocery store (no-boil noodles) and the bountiful produce of the summer market. 

I haven't been to the farmers' market in a while (for a lot of reasons...but the main one is that the winter market is new and I'm not in the habit of it yet), but the unforeseen contents of my pantry—an extra pound of baby spinach (!), a chunk of winter squash...and an unusual and continuous supply of ricotta (I'm not sure why I keep buying it other than I love it and it is so versatile)—once again provided the inspiration for lasagne. This time I purchased the no-boil lasagne noodles...along with some mushrooms and Fontina cheese...with the definite purpose in mind of a Winter Lasagne—with spinach, butternut squash and mushrooms.  


Although it is not always the case, some of the most delicious meals are the ones I make without a specific "recipe" or a real plan....  the ones where I just walk into the kitchen with an idea and start cooking.  Such was the case with this lasagne.  I had a general idea in mind, but hadn't bothered to plan too much. When you consider that making lasagne is always a project, this probably wasn't the wisest course to take....but in retrospect, I'm glad I did it that way.

I am almost never in my kitchen anymore without a camera.  This makes it so I can write a post if I particularly like something I have made.  Or, it gives me a way of revisiting something I have made if I have forgotten details.  On this particular occasion, about the time I started to build my lasagne, I quit taking pictures.  I was tired.  It was getting dark(er).  And most significantly, I was not happy with the way my lasagne was going together:  the ricotta/spinach mixture seemed a bit stiff....   I felt like I had underestimated the amount of each of the components (especially the béchamel)....  In any case, I was pretty sure I would be going completely back to the drawing board if I ever wanted to make this particular lasagne again. 

Then, a couple of things happened.  First, I got a break from it.  A lasagne takes 40 minutes to an hour to bake and as I cleaned and righted the kitchen, I began to think less about the work and more about dinner.  Then, I cut into it...and it sliced beautifully and evenly.  Then....  I tasted it.  I was astonished by how delicious and flavorful it was.  I even commented about it out loud as I simultaneously felt a bit disgruntled that I had stopped taking pictures.  The next day at lunch, it tasted even better.   Of course, I had to make another...


The second time around was a much better experience.  I knew what to expect, so it went together much more easily.  I'm happy to share that if you organize the succession of your vegetable, cheese and sauce preparation in a thoughtful way, you will probably be sitting down to dinner within two hours of the time you start cooking.  (And since you will be able to use part of that time—while the lasagne bakes—to clean up, it really doesn't seem like an unreasonable amount of time for a lasagne.)

To make your lasagne preparation experience as stream-lined as possible, start by cutting and roasting your squash.  While the squash roasts, collapse/cook the spinach and spread it out too cool.  Slice the mushrooms and dice the shallots and sauté while the spinach cools.  Squeeze out the spinach and mince.  At this point your vegetables should be done.  You can start grating the cheeses while all of this is happening...or wait until the vegetables are all done and then move on to the cheeses.  (Since you will have your microplane grater/zester out to grate the Parmesan, use it to grate the clove of garlic directly into the bowl of ricotta too.)  Finally, since this lasagne uses no-boil noodles (really, a much better product than traditional dried lasagna), all that is left is to make the béchamel and build the lasagne.

Like the summer lasagne, this one is pretty rich and will serve four to six.  I'm certain it could be doubled to serve more.  If you want to make sure that you can serve six with just one, you can make a tossed salad—or a simple blanched green vegetable (like green beans or broccoli)—to serve with it.  I was perfectly content with just the lasagne—not only is it filling, but the flavor is very satisfying.  I found that I preferred to enjoy some fruit afterwards (the Mandarins have been incredible this year).  


And if fruit isn't your favorite thing...or you would really prefer something a bit more decadent—then a little something chocolate would I think provide just the right note to round out your meal. 


Spinach Lasagne with Butternut Squash & Mushrooms

1 to 1 1/4 lb. Butternut squash, peeled, halved lengthwise, seeded and cut cross-wise into 1/4-inch thick slabs
2 T. olive oil, divided
Salt & freshly ground pepper, to taste
3 1/2 T. butter, divided
8 oz. crimini or white mushrooms, sliced 1/4-inch thick
1 medium shallot (about 1 1/2 oz.), peeled and minced
1/4 c. dry white wine
1 lb. baby spinach, washed
1 c. (240 g) whole milk ricotta
1 oz. (1/3 c) finely grated Parmesan
1 clove garlic, finely grated with a microplaner or smashed to a purée with a pinch of salt
Pinch nutmeg 
1 1/3 c. whole milk
2 T. flour 
6 oz. Fontina or Fontal, coarsely grated
8 "no-boil" lasagna (half of an 8 oz. box)


In a large bowl, toss the squash with a tablespoon or so of olive oil (enough to lightly coat all the squash) and season with salt and pepper.  Spread in a single layer on a baking sheet


and roast in a 450° oven until tender and caramelized—about 25 to 30 minutes.  (Flip the squash over about 2/3 of the way through for more even browning.)  Set aside when done.

While the squash roasts, place the spinach in a large stock pot with just the water clinging to the leaves from washing (or—if you have purchased a container of triple washed, add about a quarter inch of water to the pan before adding the spinach). Cover the pot and set over high heat.  When you hear the water begin to boil and steam, uncover and turn the spinach over and over in the pot (using tongs) until it has all collapsed.  This whole process should only take a minute or two.  Dump the contents of the pot into a strainer of colander to get rid of most of the water.  Spread the spinach on a sheet pan and let cool.  When cool, squeeze out the excess water a handful at a time. 


Chop the spinach medium fine.  


You should have 1 1/4 to 1 1/3 cups loosely packed chopped spinach.  Set aside.

While the squash roasts and the spinach cools, melt a tablespoon of butter with a tablespoon of olive oil in a wide sauté pan set over moderately high to high heat.  When the butter stops sputtering and the foam subsides a bit, add the mushrooms.  Sauté the mushrooms (tossing or stirring occasionally) until tender and golden and any liquid released has evaporated. (Season the mushrooms with salt when they have begun to take on some color.)  Reduce the heat under the mushrooms to medium/medium-low.  Push the mushrooms out towards the perimeter of the pan and add another tablespoon of butter to the center of the pan.  When the butter has melted, add the shallots and a pinch of salt and cook until tender and fragrant...this will just take a few minutes.  Add the wine to the pan, increase the heat slightly.  Allow the wine to reduce completely to a buttery glaze, scraping the bottom of the pan occasionally get all of the caramelized mushroom juices.  Taste and correct the seasoning.  Set aside.

Place the ricotta, parmesan, garlic, spinach and a pinch of nutmeg in a medium-sized bowl.  Mix until well combined, seasoning to taste with salt and pepper.

Prepare the béchamel: In a small saucepan, bring the milk to a simmer; keep hot.  (Alternatively, heat the milk in a microwave proof container of some kind.)  In another medium saucepan, melt 1 1/2 T. of butter over medium heat.  When the foam subsides, whisk in the flour.  Cook stirring constantly for a minute or so—the roux will be bubbly and straw yellow.  Remove from the heat and pour in half of the hot milk, whisking constantly until smooth—it will thicken immediately.  Add the remaining milk.  Return to the heat and stir constantly until the sauce returns to a simmer.  Taste and season as desired with salt and pepper.

When you are ready to build the lasagne, oil a square 2-quart baking dish (an 8 1/2- by 8 1/2-inch Pyrex is perfect) and bring a shallow pan of water just to the boil and remove from the heat.  Arrange these two items...along with all the other components—on your workspace so that you have easy access to everything.   


Add two of the noodles to the pan of hot water.  Spread a couple of tablespoons of béchamel in the bottom of the oiled dish.  Lift the noodles out of the pan. (They should not be soft or flexible at this point...you're just giving them a head start by soaking them briefly—less than a minute.)  Let the excess water drip back in to the pan and arrange them in a single layer in the prepared baking dish.  Add a couple more noodles to the pan of hot water (to soak while you build the first layer).  Scatter a third of the mushrooms and a third of the squash over the noodles.  


Daub a third of the ricotta mixture over the vegetables, spreading it out a bit using two forks.  


Drizzle a fourth of the remaining béchamel (about 1/3 cup) over the ricotta-spinach mixture (spreading if a big glob goes all in one place).  Scatter a quarter of the Fontina (1 1/2 oz.) over all.  Beginning with the noodles, repeat this layering two more times.  

Finish with two more (soaked) noodles, the remainder of the béchamel (spreading evenly) and a scattering of the remaining Fontina (1 1/2 oz.).


Cover the pan with a piece of aluminum foil that has been brushed on the underside with olive oil (or sprayed with pan spray), tenting the foil slightly if possible so that it isn't touching the top of the lasagne.  Bake in a 350° oven until the cheese on top has just melted—about 25 to 30 minutes.  Uncover and continue to bake until the lasagne is bubbling around the edges and the top is beginning to brown around the edges...another 10 to 15 minutes.  Let the lasagne rest for 5 to 10 minutes.  Cut with a sharp knife and serve.  Serves 4 to 6.


Notes:
  • The amounts of mushrooms and squash will seem very skimpy as you are building the lasagne. This is as it should be. 
  • The ricotta-spinach mixture may seem very stiff (depending on the moisture in your ricotta). Don't worry if it won't spread into an even layer—it is in fact very likely that it will not. Just daub it evenly over the vegetables and flatten it a bit with a fork. It will spread out—or at least give the impression of having spread out—as it bakes. 
  • I have never made this with frozen spinach, but I imagine that frozen chopped spinach—thawed and squeezed dry and measured to make 1 to 1 1/3 cup would be fine. 
  • Substitute Low-moisture Mozzarella for the Fontina/Fontal if you like. 
  • This makes a tall lasagne...so if you double the lasagne, it would be best to go with a 15- by 11-inch pan rather than a 13- by 9-inch.