Showing posts with label Ginger. Show all posts

Wednesday, January 25, 2023

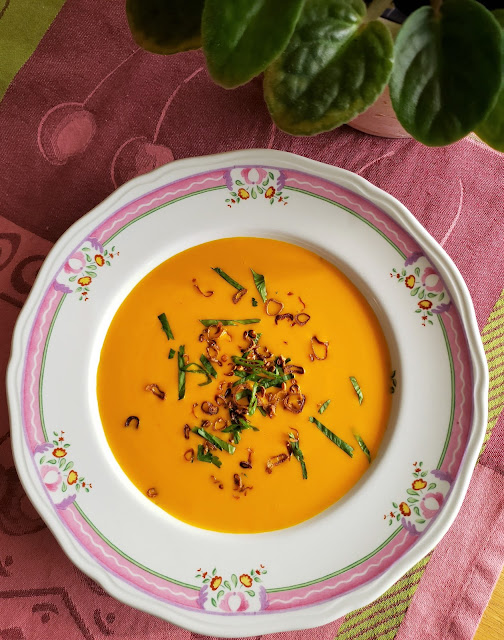
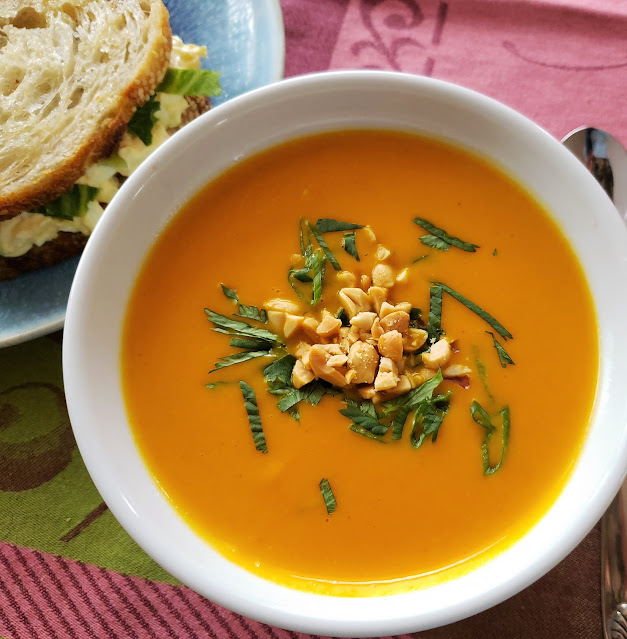
Creamy Gingered Carrot Soup

As is my habit during the early days of the new year, I have been making and enjoying lots of soup.  It really is the perfect food for January.  Not only is it soothing and warm on a dark, cold…and more often than not, wet…day—it is just the thing after the dietary excesses of the holidays.
 

Not surprisingly, this is also the time of year when I have traditionally taught soup classes.  Most of the recipes that were part of my class rotation have already appeared on my blog.  The carrot and ginger soup I’m posting today was always a class favorite.  I’m not sure why I never posted the recipe here.  It might be because the presence of fresh ginger…and lime…and cilantro…put it just outside the reaches of my normal home pantry.  But I have had fresh ginger on hand quite a bit in recent weeks for various things I’ve been working on…and since I always have carrots (and I’ve been in the mood for soup)…the other day I thought of this soup.  I was so glad I did.  The warm color—and tummy soothing ginger—make it a great post holiday/mid-winter soup.
 
I’m sure that in previous posts for puréed soups I have had a lot to say about the process.  But since it’s been a while since I wrote one of those posts, I’ll just repeat a few essentials here:
 
First…make sure you aren’t shortcutting the initial cooking of the onions and carrots in the fat.  This process allows the flavors of these vegetables to infuse the fats and give a deeper flavor to the final soup.  And along those lines, make sure your vegetables are fully cooked before you purée the soup, or you’ll have a coarse purée.  (The cooked vegetables should be tender to the tip of a knife—and you should be able to mash them against a plate with a fork or spoon).

Also, when adding liquid to a soup that is to be puréed, always hold back some—adding just what is necessary to cover the vegetables well and cook them through.  If too much liquid is added at this early stage, the final soup might be way too thin (and I say this as someone who prefers thinner soups).  You can always (and likely will) add more liquid while you are puréeing the soup.  I like the final consistency of my puréed soups to be like thick cream—it shouldn’t mound in the bowl or on the spoon (and should be “sippable”).
 
If you are using a traditional blender, don’t fill it too full with the hot soup (2/3 full is about right).  The pressure build up when you turn on the blender will push the cap up and off and if the blender is too full you’ll have a mess—and possibly a burn. 
 
Finally, I always pass my puréed soups through a fine meshed sieve.  I think it gives the most suave and velvety texture.  But I understand that some find this step to be a bit persnickety…and it also adds to the washing up.  Be assured that the soup will taste just as good without straining out the lingering fibrous bits.  Whether you are straining the soup or not though, take the time to run the blender until the soup is super smooth (you’ll be glad you did!). 
 

If you make this soup, be aware that its flavors are an interplay of strong and subtle…and that they change a bit over time.  On the day it is made, the ginger flavor is strong…and the soup has a warm spiciness.  The next day, the ginger flavor will be much more subtle.   If you like a stronger ginger flavor, simply add a grating of fresh ginger when you are reheating the soup on subsequent days.  If you want to eat it the day you make it…and you don’t like the strong flavor of the ginger, just add the ginger with the stock—its flavor will soften under the longer cooking time.  As far as the lime goes, it is added to balance not only the sweetness of the carrots, but also the honey.  It should not really be seen as the addition of lime flavor (although it will add a little)—but rather as a way to lift and brighten the flavors of the whole soup.  If you want a stronger lime flavor, add a grating of zest to the final soup (or as a garnish). 
 
As I type this post today, I have a lovely view of snow covered trees.  For the most part, people in my area are staying in after last night’s snowfall if they can.  It is just the right kind of day for this soup.  And even if you don’t typically keep fresh ginger in your home pantry, you can still make a carrot soup (without a run to the store) because this soup also happens to be a great template for a basic carrot soup.  Simply omit the honey, lime & ginger and you will have a delicious soup, the makings of which will already be in most home pantries. 


Gingered Carrot Soup
 
2 T. olive oil
1 large onion (8 to 9 oz.), thinly sliced
1 T. unsalted butter
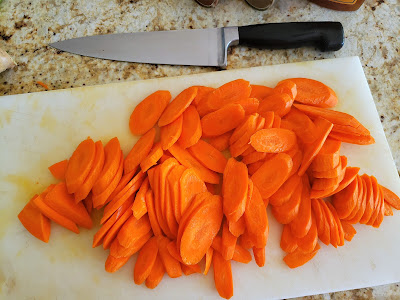
1 lb. carrots, peeled and thinly sliced
1 T. rice (Basmati, Jasmine, Arborio, etc.)
1/2  t. ground coriander
1 t. paprika
1 t. cumin
1 T. honey
3 to 4 c. chicken or vegetable stock
2 T. (18 g.) minced fresh ginger (or more to taste)
1/4 c. heavy cream
1 T. freshly squeezed lime juice (or to taste)
Salt & Pepper
Possible garnishes (alone, or in a combination that pleases you): Fresh Cilantro chiffonade, thinly sliced green onion tops, chopped peanuts, toasted pepitas, lime zest, olive oil, crispy fried shallots
 

In a medium stockpot or large saucepan, heat the olive oil over medium heat.  Add the onion along with a generous pinch of salt and sweat, covered, until the onions are soft and translucent—about 10 to 15 minutes.  


Add the butter and melt.  


Add the carrots another good pinch of salt and cook for 5 to 10 minutes—until carrots are beginning to soften.  


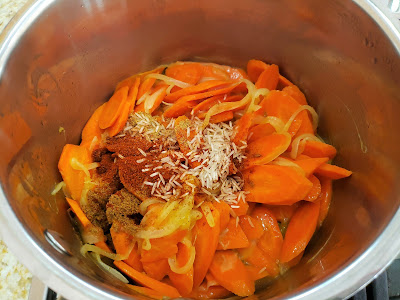
Add the spices and the rice and cook another 2 to 3 minutes to toast the spices and rice.
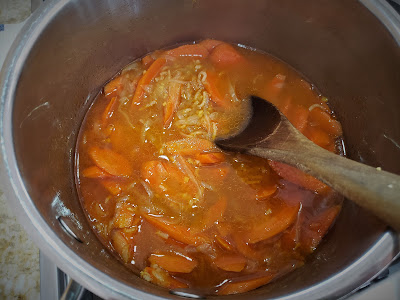
  Add the honey, stirring and cooking until the vegetables are coated and everything is sizzling nicely.  Add 3 cups of stock (or whatever you need to cover all the vegetables so that they are moving freely—reserve the remaining stock to add as needed when pureeing the soup).  Bring the soup to a simmer, cover and cook until the carrots are very soft—about 20 to 25 minutes, adding the ginger during the last 5 minutes of cooking.  


Purée the soup (using a traditional blender or an immersion blender), adding more stock as is necessary to produce a smooth, thin purée.  Pass through a fine meshed strainer if you like to achieve an even more suave and velvety texture.
 
Return the soup to the pot and add the cream.  Heat through.  Remove from the heat and add the lime juice to taste.  You may also add more freshly grated ginger if you like.  Correct the seasoning and serve immediately, garnished as you please.  Makes a scant 6 cups.


Wednesday, March 31, 2021

Golden Beet & Pear Soup

Whenever someone hires me to prepare a meal, the first thing I do is ask them about their food preferences.  Of course I want to make sure that I know about allergies and food dislikes…but mostly I’m interested in finding out what they really love to eat…or what they are in the mood for right now—basically what will make the meal special for them.  Most of the time people request a certain protein for the entrée…or a seasonal ingredient that they would love to have somewhere in the menu.  Occasionally someone will request a particular classic dish.  But most of the time the requests are general in nature.  Whether general or specific, I use their preferences to design a few menus (that sound delicious to me) that they can then choose from.


Recently as I was getting ready to prepare a special lunch for two women who have been coming to my classes since the very first class I taught (almost 20 years ago!), I was surprised to get a very specific request in response to my query:  Golden Beet & Pear Soup.  I had never thought of making a golden beet soup (a great idea because you get the delicious beet flavor without the shocking color of a magenta soup)…much less combining it with pear.  But beet and pear are a classic salad combination…and I knew the flavors would work well together.  So I included a golden beet and pear soup in my proposal.  I was not surprised when they chose it for their first course.

Almost all of my puréed soups follow the same formula:
  cook some aromatic vegetables (always some onion/leek/shallot…often garlic, carrot and/or celery…occasionally fennel or peppers) in a fat of some kind (butter, olive oil…sometimes bacon fat) in order to infuse the fat with the flavor of these vegetables.  This step gives depth and roundness of flavor to the finished soup.  (You should never skip it.)  You can add spices and herbs with the aromatic vegetables if you like.  Then, add the main vegetable(s)—either in their raw form or already cooked (roasted, for example)—along with some stock or water.  All of this is then simmered together to soften the vegetables (if they were raw) and blend the flavors.  You can also add herbs and other flavors towards the end of cooking if you would like their flavor to be more prominent (rather than the background flavor of those added at the beginning).  Finally, purée and pass the soup through a sieve (to give the most velvety texture) and finish with cream if you like. That’s all there is to it.

Most of the time the main vegetable will provide all the thickening that you need for a puréed soup (they don’t need to be super thick).
  Although occasionally you will find recipes that incorporate potato with the main vegetable since the potato will add thickness and body.  Frequently I will add a little rice to cook with the vegetables.  This provides a small amount of starch for thickening, but mostly I like it because it seems to help emulsify the liquids and solids together (adding to that aforementioned velvety texture).

Because I thought the beet and pear would make a subtle soup, I was careful not to get carried away with my additions.
  I didn’t add any carrot or celery, which could easily have overwhelmed.  To the onion-shallot-garlic base, I added a little coriander (to accentuate the sweetness of the beets and pear) and thyme (which I love with pear and apples in savory preparations).  I also added some ginger, which I thought would light up both main flavors (it did!).  I could have added it at the beginning with the aromatic vegetables, but in this case I felt this would soften the flavor too much.  Instead I opted to add it towards the end.

It is always a good idea to finish a puréed soup with a nice garnish of some kind.
  This will provide complimentary flavor…or a great textural contrast.  It also adds to the beauty of the final dish.  Something as simple as a drizzle of olive oil…or lightly frothed cream…or crème fraiche…and a sprinkling of herbs (maybe parsley or chives) is sufficient.  But all kinds of things are possible:  seasoned oils, bits of cheese, seeds, nuts, a complimentary or contrasting vegetable purée, pesto, croutons or garlic/cheese toasts.

For this soup I added a drizzle of olive oil and some crumbled blue cheese and minced toasted walnuts—which complimented both the beets and the pears…as well as each other.
  It seemed like an obvious finish to me.


I was astonished by this soup.  It is subtle…and suave…tasting of beets, with a fragrant, slightly sweet finish from the pear.  A truly special and elegant soup.  I wouldn't have thought of if it hadn't been suggested to me.  It will now have a permanent place in my repertoire.  I hope that you will give it a try.  I know that I will remember my friends…and their special lunch…every time I make it.

Golden Beet & Pear Soup

1 1/2 T. olive oil
1 large onion (about 1/2 lb.), thinly sliced
1 shallot (1 oz.), thinly sliced
1 fat clove of garlic, sliced
1/2 t. coriander seed
1/2 T. picked thyme
1 T. unsalted butter
1 lb. gold beets, peeled, halved if small, quartered if large, and sliced a scant 1/4-inch thick
1/2 T. Arborio rice
1 large firm, but ripe, pear (about 1/2 lb.)
3 c. Chicken stock, plus more as needed for consistency
1 T. minced fresh ginger (or more to taste)
1/4 c. heavy cream
Freshly squeezed lemon juice, if needed
Salt & Pepper
Garnish of your choice:  drizzle of olive oil, spoonful of crème fraiche, crumbled blue cheese (something like a Danish Blue or an aged Gorgonzola), minced toasted walnuts, etc.

In a large saucepan, heat the olive oil over medium heat.  Add the onion, shallot, garlic, coriander and thyme, along with a generous pinch of salt.  Cover and gently sweat until the onions are soft—about 15 minutes.  Add the butter and melt.  Add the beets and cook for 5 to 10 minutes—until they are beginning to soften.  Add the rice and cook another 2 or 3 minutes.  Add the pear and cook for a minute or two.  Add the stock and bring to a simmer.  Cover and cook until the beets are beginning to be tender—about 40 minutes, add the ginger and continue to cook until the beets are tender—about 20 minutes more. (It will seem like the beets are taking forever to cook.  But don’t worry…at right about the one hour mark the will go from being a bit crisp to tender.)  Purée the soup and pass through a fine meshed strainer.

Return the soup to the pot and add the cream.
  Add water or more stock if the soup is too thick for your liking.  Heat through.  Remove from the heat.  Taste and correct the seasoning with salt & pepper.  If the soup tastes flat or out of balance, add a small squeeze of lemon. The effect of the lemon should be to make the sweet flavors in the soup pop.  You won’t need much…maybe a teaspoon.  If you add too much, the soup will become tangy (which is not the goal).  You may also add more freshly grated ginger if you like—but be careful, the flavors of the soup are subtle and too much ginger will overwhelm the beet and pear.  Serve with a spoonful of crème fraiche, or a drizzle of olive oil, blue cheese crumbles and minced toasted walnuts.

Makes 5 cups or four servings (recipe is easily multiplied for more)

Printable Version

Friday, July 6, 2018

Brined Pork Chops with Fresh Apricot & Ginger Compote


Over the years the things I have chosen to post to my blog have been driven by a lot of different things.  Sometimes I post foods I make for my private dinner clients.  Occasionally—not often as I had originally planned—I post explanations and descriptions of basic cooking and baking techniques.  Most of the things I share come from two sources: the things I am working on/testing for my classes…and the seasonal/market driven foods I am making for my own table.  Recently I decided to design a class around things that were all already on my blog—a class filled with recipes from the latter of these two categories….things that I had come up with for my home table that we loved so much they ended up on my blog.
 
As I was putting the class together—gathering some favorite early summer recipes from over the years (Potato Salad with Spring Herb Pesto & Peas, Gemelli with Mushrooms, Sugar Snap Peas &Goat Cheese, Market Coleslaw with Sweet Corn, Kohlrabi & Carrots, and Pistachio & Strawberry Friands)—I thought of a recipe that has been on my “to make someday” list for a long time:  Pork Chops with Fresh Apricot Glaze from Maria Helm Sinskey’s book Vineyard Seasons.  I decided to add it to the class in order to force myself to finally make it.  I knew if I liked it that it would end up here.

I was so glad I added it to the syllabus.  It was delicious!  And I have to say that I wasn’t surprised.  I love Sinskey’s recipes.  I did end up altering the recipe quite a bit—not because I didn’t like the flavors…or her method…but rather because she cooked her chops on the grill (which I’m certain makes for very tasty chops…I’m just not a fan of standing out in the hot sun over a hot grill when I could be cooking in my cool(er), air-conditioned kitchen….) and she used bone-in chops.  Frankly, I think the bone-in chops would be delicious—but for my purposes both at home and in class, boneless makes more sense (the boneless chops slice nicely so that you can get two servings out of one thick chop for a dinner for smaller appetites….or nice tasting portions for a class).


The brine I used is a simple, basic brine from Samin Nosrat’s book Salt, Fat, Acid, Heat.  It is a brine that is intended to add moisture and seasoning. It has less salt (four percent salinity by weight) than a lot of brines (and less than the one Sinskey uses), but I like it like this because when I use it I just get a nice, juicy piece of pork—and not something that seems cured or ham-like.  Following Sinskey’s recipe I added some fresh ginger to the brine…but you could leave it out.  You can also add other aromatics, herbs and/or spices of your choice.  Because the brine is mild, you don’t have to rinse the brined meat, but I do any way.  When it comes to brined meats, when in doubt, I always rinse.  The meat will be fully seasoned within…and you don’t risk having way too much salt/sugar on the exterior.  Whether you rinse or not, be sure to dry the surfaces of the meat well before put it in the sauté pan or on the grill (if it’s wet it will stick and it won’t caramelize properly).


The brined pork is delicious.  But it is the apricot sauce/compote/glaze (it is quite versatile) that is the star of the show here.  Sweet….tangy…savory…  with a hint of heat (you can add more if you like)….  It is just so tasty.  The recipe makes what will seem like a generous quantity, but you will want it all.  It could also be used with chicken…or turkey…or even some nice baby back ribs.  I will be making it every summer from now on.


I altered the sauce from the original in only a couple of ways.  I leave it chunky instead of blending it to a purée.  Not only do I prefer the appearance of a chunky sauce, leaving it this way advertises the fact that you used fresh apricots (instead of jam or preserves, for example).  If you want to use it as a glaze or final swab for grilled meats, I think it would be best in its puréed form.

The other change is also fairly minor.  I have given a range for the amount of sugar to add as opposed to a set amount.  Apricots vary widely in sweetness and one batch might need very little sugar...while the next will be quite tart and need a lot.  I always start the sauce with the lesser amount and then after about twenty minutes of cooking—when the sauce is nearing its final consistency—I start tasting and adding more if necessary.  You are aiming for a sauce that is nicely balanced between tangy and sweet. 

The first time I made these pork chops I served it with Toasted Pine Nut Couscous and Wilted Greens.  I couldn’t believe how good it was. (Unfortunately I didn’t take a picture….)  I was so enamored with the these chops that I decided to make it for our Fourth of July celebration this year.  I served it with Sweet Corn Coleslaw and Étuvéed Baby Potatoes.  It was just the thing.  Hopefully I will discover a few other delicious pairings before the fleeting season for apricots is past....


Brined Pork Chops with Fresh Apricot & Ginger Compote

Brine:
1/3 c. Morton’s kosher salt (or 80g. salt of your choice)
1/4 c. sugar (50 g.)
4 large cloves of garlic, peeled and lightly crushed
1/2 t. red pepper flakes
2 T. peeled and minced fresh ginger (20 g.—if you are weighing, simply slice the ginger)
1 bay leaf
 6 to 8 pork chops (Boneless loin or bone in rib—as you prefer, as long as
            they are nice thick—1 inch or more—chops)

Place the salt, sugar, garlic, pepper flakes, ginger and bay in a pot with 3 cups of water.  Bring to a simmer and simmer gently until all the salt & sugar has dissolved.  Remove from the heat and add 6 cups of cold/ice water.  Allow the brine to cool to room temperature.  Submerge the pork chops in the brine and refrigerate for 8 to 24 hours.  An hour before cooking, remove the chops from the brine (rinse, or not, as you prefer).  Pat dry before cooking.  Discard the brine.

Apricot Sauce:
2 to 2 1/2 T. olive oil
1 large or 2 medium shallots (about 2 oz.), finely diced
2 t. minced garlic
2 T. minced fresh ginger (20 g)
1/4 t. red pepper flakes
2 lbs. ripe apricots, halved, pitted and roughly diced
1/2 to 1 c. brown sugar (adjust to the sweetness of the apricots)
3 T. white wine vinegar
1 t. salt
2/3 c. water


Warm the olive oil in a wide sauce pan set over moderate heat.  Add the shallots, garlic, ginger and pepper flakes and sweat until tender—about 10 minutes.  Add the apricots and cook briefly, stirring until well coated in the shallot mixture. 


Add the remaining ingredients (starting with the smaller amount of sugar) 


and simmer until thickened and glossy—about 30 minutes (you should have about 2 2/3 to 3 c. compote).  


After about 20 minutes of cooking, begin tasting and add sugar as needed.  When the sauce is finished, taste again and correct the seasoning with salt, sugar and vinegar.

Prepare the pork chops:
Olive oil
Brined Pork Chops
Finished Apricot Glaze
1/2 to 2/3 c. white wine or water, optional

Preheat the oven to 400­°.  Heat an ovenproof sauté pan large enough to hold the chops in a single layer (or use two pans) over moderately high heat.  Film the pan with oil.  Add the chops to the pan.  Sear, turning once, until the chops are nicely browned.  


Smear the chops with some of the apricot glaze and turn a couple of times to coat.  Transfer the pan to a preheated 400° oven and cook until the chops are done to your liking (an instant read thermometer will read between 130° and 135° for medium).  Total cooking time (including the time on the stove and in the oven) will be about 7 to 10 minutes (for 1 inch boneless chops—more for bone -in or thicker chops).  Remove the pan from the oven and transfer the chops to a platter.

If the apricot glaze on the chops didn’t get too dark in the pan, make a quick pan sauce while the chops rest.  Place the pan over medium-high heat and add the white wine.  Bring to a simmer, scraping the pan well to release all the caramelized bits (if using two pans, combine the drippings into one pan) and reducing by half to two-thirds.  Add the remaining apricot glaze, along with any resting juices from the pork, to the pan and warm through.  


If the sauce is too thick, let it out with water…if too thin, reduce briefly.

Serve the pork chops with the warm apricot compote.  Serves 6 to 8 

Variation:  If you prefer, you may grill or broil the pork chops.  Puree the compote to make a smooth sauce.  After the first side is cooked, turn, brush with the sauce.  When the pork is almost done, turn again, brushing the remaining surface with the sauce and allowing each glazed surface to be exposed to the heat for a minute or two so the sauce will caramelize, but not burn.  Obviously there will not be any deglazings to combine with the remaining sauce.  Simply serve the remaining sauce on the side as you would with your favorite BBQ sauce. 

(Recipe adapted from The Vineyard Kitchen by Maria Helm Sinskey)

Printable Version


Sunday, November 23, 2014

Rounding out the Thanksgiving Spread with Sweet Potato Biscuits and Roasted Cranberry Relish


Thanksgiving is probably my favorite holiday.  How could it be otherwise?  It is all about food…and the table…and gratitude for both.   The sheer volume of Thanksgiving-appropriate recipes that I have posted to my blog is the proof of my love.  I have not yet posted a recipe for turkey, but if you are looking for ways to fill out your Thanksgiving menu, you will find many ideas right here….appetizers, desserts, vegetable side dishes…as well as pumpkin baked goods of all kinds. 


Sadly, right up until yesterday I thought I wasn’t going to find the time…or even the material…to post anything new for this year.  Returning from my idyllic vacation to the beginning of what is known as “the busy season” in the food service industry felt a bit like being plunged into a cold swimming pool without benefit of having tried the water with my toe beforehand.  I knew I was going to be busy…but I wasn’t quite ready for it.  From the moment I unpacked I have scarcely been able to catch my breath.  But just as suddenly as it started, I have hit a momentary lull…and even discovered that it is in my power to add a couple of more Thanksgiving recipes to those collected here.

During the past week I taught two Thanksgiving themed classes.  On Thursday I taught the third incarnation of a class all about ways to use winter squash and sweet potatoes.  Although not specifically about Thanksgiving recipes, these two ingredients are such traditional elements of the Thanksgiving spread that almost any of the things I teach in this class would be at home on a Thanksgiving table. 

In these classes I always talk about roasting and puréeing squash and sweet potatoes…and ways of using the results.  Happily for me, I roasted too much sweet potato and returned home with just enough to make a small batch of sweet potato biscuits to go with a salad for dinner the next evening.


Since I teach these biscuits in the first version of this class—and I am now on version three—it has been a while since I made them.  And they are so delicious.  As we enjoyed them, I realized they would make a good Thanksgiving recipe for my blog.  If you are a southerner, these biscuits are probably already in your repertoire….and probably make up part of your Thanksgiving menu.  But if you are not, or you have never made or tasted sweet potato biscuits, you should give them a try.  They are easy to make (can even be frozen in their raw form and baked from frozen) and are a great way to keep the traditional sweet potato element on the Thanksgiving table.

When you make the dough for these biscuits, you will be tempted to add too much liquid.  As I explain in my post for pumpkin scones, the flour doesn’t absorb the liquid from the vegetable purée as quickly and readily as it absorbs milk (or cream…or buttermilk).  Start with about a third cup of the milk and then if the dry looking crumbles of dough won’t adhere when pressed together, go ahead and add a bit more milk.  The final mixture will not look like a traditional, cohesive, soft biscuit dough…so don’t be alarmed.  As long as it can be pressed together, you are on the right track.  


The other class I taught this week was a Thanksgiving Favorites class with my friend (and chef) Nancy.  My contribution to the class included my grandmother’s dinner rolls as well as two recipes that have already made an appearance here (Sweet Potato & Mushroom Gratin and Pumpkin Pot de Crème).  One of the recipes that Nancy brings to the class is a wonderful—and different—recipe for roasted cranberry sauce.  I have never made it for my family because my family is pretty attached to their style of cranberry sauce, but every time we teach this class together, I love getting to sample it afterwards, and I am always struck by the brilliance of the method. 


Instead of simmering the cranberries in a sugar syrup, they are simply tossed with the sugar and a few aromatic seasonings, spread on a parchment- or foil-lined baking sheet and then roasted until they begin to burst and bubble.  The roasting process—as well as the fact that the recipe doesn’t have nearly as much added liquid as most recipes—results in a sauce with a rich and concentrated cranberry flavor. 

The original recipe was flavored with julienne strips of orange zest and jalapeño, whole cardamom pods and cloves, as well as a cinnamon stick.  After roasting, the sauce is finished with port and orange juice.  Nancy has substituted ground cloves and ground cardamom for the whole spices in her version of the sauce.  It is just too tedious to root around in the sauce to find the whole spices and remove them.  The cinnamon stick is of course quite easy to find…but I suppose you could replace it with ground cinnamon if you prefer.

After class this week, I decided I wanted to try this method with a different set of flavors…a more traditional, chutney-like mix of spices.  In addition to the clove, cinnamon and cardamom, I added some yellow mustard seeds.  I also added julienne fresh ginger and shallots and omitted the jalapeño.  I was very pleased with the result: complex and spicy…a perfect little exclamation point for the Thanksgiving menu.


I should emphasize that I didn’t change the cranberry sauce recipe because I didn’t like the original…I do like it…a lot.  Rather, I was so enamored with the method that I wanted to try it with other flavors.  Either version would make a delicious addition to your Thanksgiving festivities….  Or, you could come up with your own preferred mix of aromatic additions.   

I sampled my finished relish with cheese and digestives for an afternoon snack.  It was very good.  So good in fact, that if you prefer, instead of including it on the table to accompany your turkey, you could make it a part of a cheese and relish tray with which to greet your hungry guests. 


I do hope that I will have some time to squeeze in another post before the holiday.  But if I do not, I want to take the time now to wish everyone a very Happy Thanksgiving.  May you find yourself at a table laden with delicious food and surrounded by those you love (and who love you) best.


Spiced Roasted Cranberry Relish with Orange & Ginger

1 orange
12 oz. fresh cranberries
1 cup sugar
1 1/2 T. extra-virgin olive oil
3/4 t. kosher salt
1/8 t. ground cardamom
1/8 t. ground cloves
1/2 t. yellow mustard seed
1 or 2 sticks cinnamon
1 medium shallot (about 1 oz.), peeled and thinly sliced lengthwise (about 1/4 c.)
a 1 1/2-inch piece of ginger (about 1 oz.), peeled and cut in a fine julienne (about 1/4 c.)
1 to 1 1⁄2 T. port


Heat oven to 450°.  Using a peeler, remove peel from the orange, taking off as little of the white pith as possible. Cut peel into a very thin julienne about 1 1⁄2" long.  Squeeze juice from the orange; strain and reserve.


In a bowl, combine peel, cranberries, sugar, olive oil, salt, cardamom, cloves, mustard seed, cinnamon, shallot and ginger. 


Toss and transfer to a rimmed baking sheet that has been lined with parchment or foil.  


Spread the mixture out into an even layer and transfer the pan to the oven and roast until cranberries begin to burst and release their juices, about 12 to 15 minutes.


Scrape the cranberry mixture to a bowl; stir in the port and a quarter cup of the reserved orange juice.  Let sit for at least 1 hour so that the flavors meld. Remove and discard cinnamon stick before serving.  The relish may be served at room temperature or chilled.

Makes about 2 cups

(Recipe adapted from Saveur Magazine, October 2008)


 Sweet Potato Biscuits

1 c. roasted sweet potato purée (240 grams), chilled
2 2/3 c. all-purpose flour (300 grams)
4 t. baking powder
2 T. Sugar
1 t. kosher salt
1/4 t. cayenne pepper
8 T. unsalted butter, chilled and cut into small pieces
6 to 8 T. milk

Preheat oven to 425°.

In a large bowl, combine the flour, baking powder, sugar, salt and cayenne.  Using your fingers, or a pastry cutter, cut the butter into the dry mixture.  Combine until mixture resembles a coarse meal.

Whisk together 6 T of the milk and the sweet potato.  Using a fork or rubber spatula, combine the liquid with the dry ingredients until the mixture is homogenous.  It will look a bit dry, but if when you squeeze some of it together, it adheres, you have added enough liquid.  If necessary add the remaining 2 T. milk. 

Turn out the mixture out onto a lightly floured surface.  Press the dough together and give it a gentle knead or two to bring it together into a soft dough.  Press the dough out into a 3/4- to 1-inch thick disc.  


Using a 2- to 2 1/4-inch round cookie cutter, cut out rounds and transfer them to a parchment-lined baking sheet.  Press the scraps of dough together to cut out more rounds.   Brush the tops with melted butter 


and bake in the top third of the oven until the biscuits are  golden brown and springy to the touch,  about 15 to 20 minutes.

Makes 12 to 20 biscuits, depending on the size cutter you choose to use.

(Recipe adapted from Martha Stewart's Hors d'oeuvres Handbook, by Martha Stewart)

Note:  You will need about a pound of sweet potatoes to produce 1 cup of purée.  Roast the sweet potatoes in a 400° oven.  Prick the sweet potatoes in several spots with a fork or paring knife and transfer to a baking sheet.  Bake until easily pierced with the tip of a knife, about 40 to 60 minutes.  When cool enough to handle, cut open the sweet potatoes and scoop out the flesh.  Purée in the food processor, or press the flesh through a sieve or mesh strainer.