Showing posts with label Cheese. Show all posts

Monday, September 25, 2023

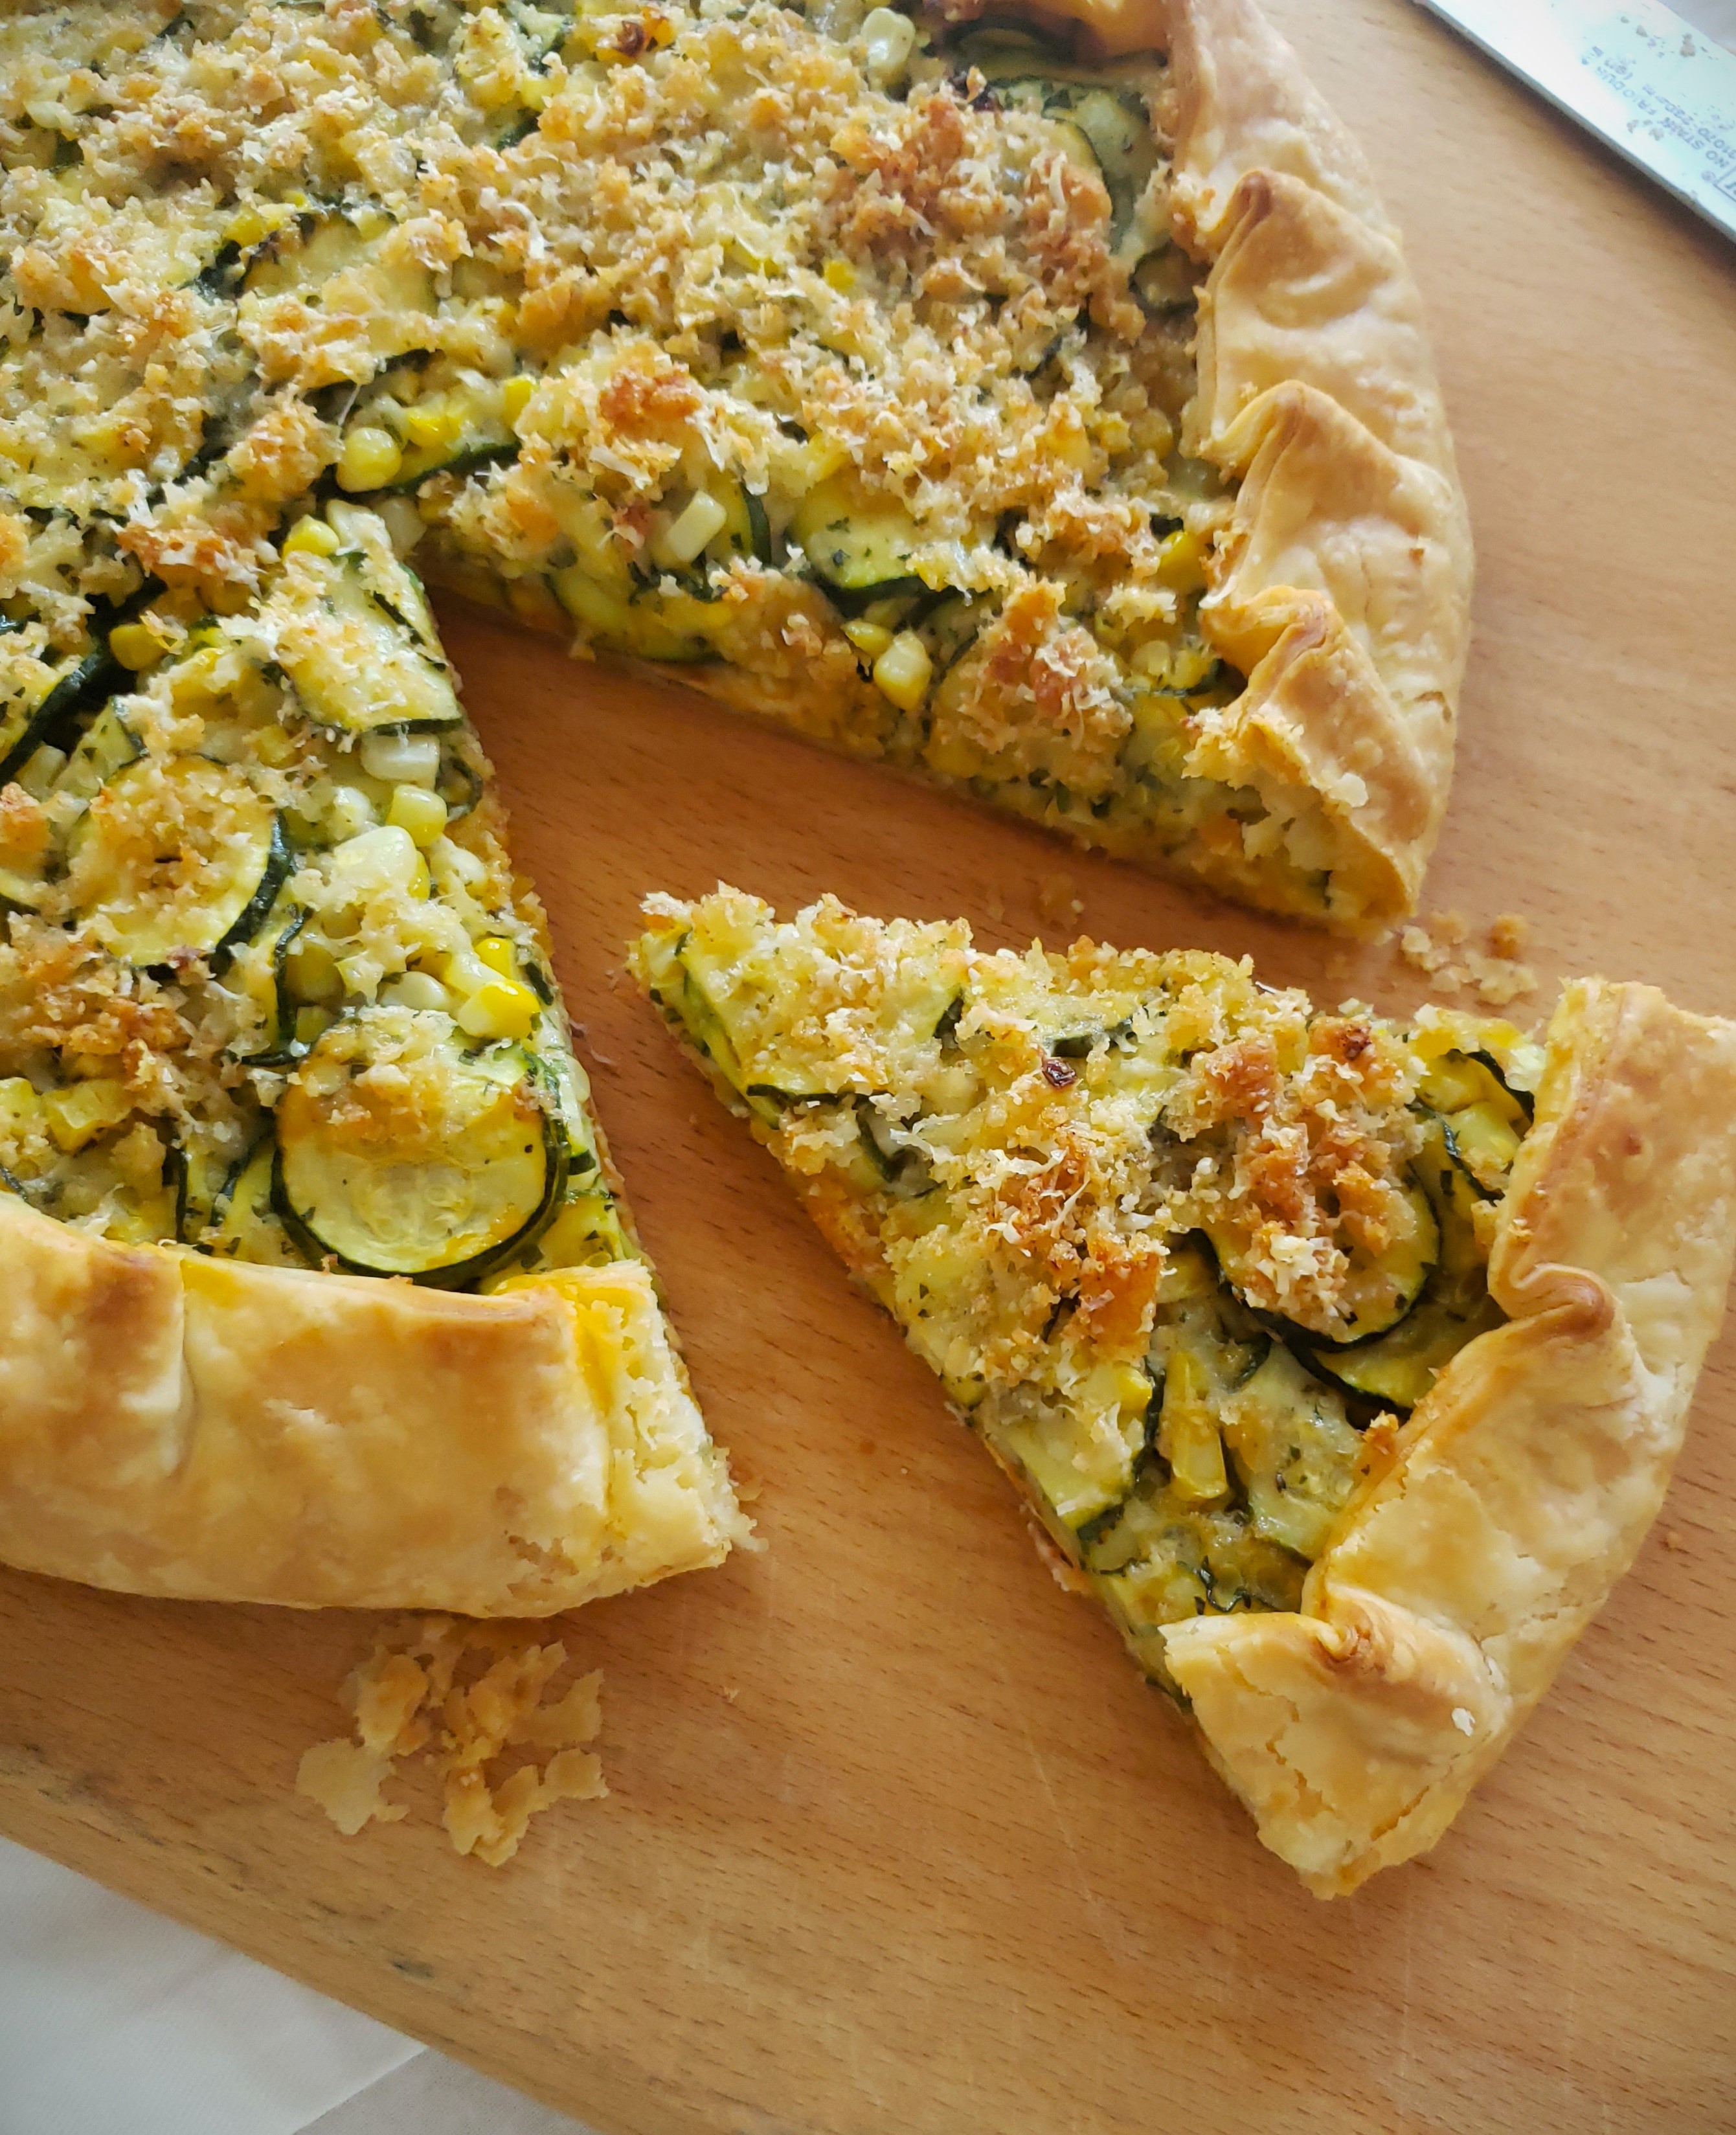
Late Summer Zucchini & Corn Galette with Tomato & Browned Butter Breadcrumbs


In the early days of the pandemic I started doing curb side pick up dinners. It was a good option for people who wanted to "eat out", but didn’t want to eat in a restaurant filled with people. The dinners were 3 courses and packaged with instructions for any last minute heating/dressing/etc. I enjoyed the change of pace…as well as the additional work…so have continued to do them occasionally—even though there is no longer the same “need” for them.

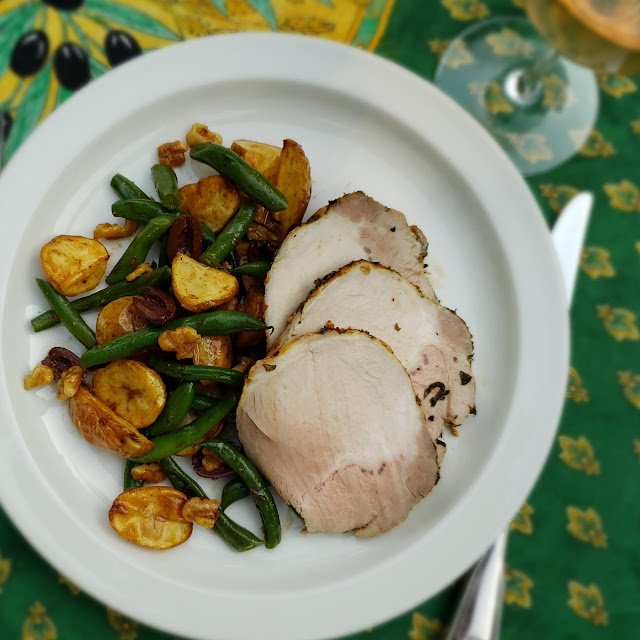
Just as with my private dinner menus I’m sure it comes as no surprise that my menus for these dinners always highlight seasonal ingredients. I usually start with an idea for one course and then create the remaining two courses around it. For the recent September dinner I started with the idea of Applesauce cake. It is still warm where I live so I opted for a room temperature roast pork with green bean and potato “salad” for the entrée. 

This meant I didn’t really want to do a true salad for the first course (it seems repetitive to have a salad in 2 of 3 courses…). Since the dessert was cake, a tart or pizza seemed like a good starter.

As I considered my seasonal options, corn and zucchini…and tomato!...came to mind. These things are at the end of their season. I always feel a nostalgic desire to eat lots of the waning fruits of the season—even as I look forward to the new crops coming in. (The “cusp” seasons are always exciting moments in the culinary year.)


I found a couple of interesting savory tarts on line that included these ingredients. And what I ended up making is a bit of a blending of these two…plus my own style of savory galette (with a creamy ricotta base)…and a favorite summer squash gratin. I was struck by the observation from the creator of one of the tarts I found that her tart was “something in between” a quiche and a gratin. I didn’t want to make a quiche, but the “gratin” part appealed to me and that favorite summer squash gratin came to mind as I was drifting off to sleep one night, noodling on how I was going to build my tart.


There are a lot of component parts to this galette. If you just want to make dinner, it will seem a bit fiddly. But it is actually pretty easy to put together once you have the components (all of which can be made ahead except for the salted squash)—making it perfect for entertaining. If you have your own favorite tomato sauce on hand, you can use it as long as it is very thick (cook it down a bit until it no longer weeps and it mounds on a spoon). You will need about 3/4 cup. The one I use here is my favorite summer tomato sauce—nothing more than vibrant, vine ripened tomatoes (skin, seeds and pulp) cooked down with a generous amount of garlic, pepper flakes and olive oil. You could likely omit the ricotta—the thick tomato sauce providing enough of a barrier to keep the crust from becoming soggy—but I like the richness that it adds. (If you were to omit the ricotta, I would probably increase the Gruyère a bit.) The tomato sauce, on the other hand, should not be skipped. Its tartness adds essential balance and interest to the other mild flavors.

The tart made a great first course for my curbside dinner—a wonderful addition to the end-of-summer theme. I enjoyed the leftovers for lunch…and then a light dinner…along with a nice green salad. I’m only sorry that the season for these vegetables is rapidly coming to a close and it will probably be next year before I make this vibrant tart again. Maybe you will find a way to squeeze it in this year.


Late Summer Zucchini & Corn Galette with Tomato & Browned Butter Breadcrumbs

Pâte Brisée (tutorial):
175 g. all purpose flour (about 1 1/3 c.)
1/2 t. salt
132 g. cold butter (about 9 T.)
50 to 66 g. water (about 3 1/2 to 4 1/2 T)

Combine the flour and the salt in a medium-sized bowl. Rub/cut the butter into the flour until the mixture has the appearance of cornmeal and peas. Drizzle 3 1/2 T. ice water over the flour/butter mixture. Using your hands, fluff the mixture until it begins to clump (if you grab a handful and squeeze it will adhere), adding more water if necessary. Turn the dough out onto a counter and form into a mound. Using the heel of your hand, gradually push all of the dough away from you in short forward strokes, flattening out the lumps. Continue until all of the dough is flat. Using a bench scraper, scrape the dough off the counter, forming it into a single clump as you do. Form the finished dough into a thick disk. Chill for at least 30 minutes (overnight is even better, if you have time).

To roll out the dough, let it warm up for a moment or two at room temperature. Line a baking sheet (preferably rimless) with parchment paper; set aside. Roll out the dough on a lightly floured surface into a circle that is about 1/8-inch thick and is 14 inches across. Brush off the excess flour. Trim any ragged or uneven edges if you like. Transfer the dough to the prepared sheet. Cover loosely with plastic wrap and chill for at least 30 minutes.

Ricotta Base:
150g whole milk ricotta (drained before weighing if very wet)
2 t. olive oil
2 t. flour
Salt & pepper

In a small bowl, combine the ricotta with the olive oil and flour. Season to taste with salt & pepper. Chill until ready to use (can be made a day or two ahead).

Summer Tomato Sauce:
2 1/2 T. olive oil
2 cloves garlic, minced
Pinch hot pepper flakes
340g. vine ripened tomatoes (preferably red or yellow), cored and cut into a rough dice

Place the oil, along with the garlic and pepper flakes in a wide sauté pan and place the pan over moderately high to high heat. When the garlic begins to sizzle enthusiastically and is just on the verge of taking on a bit of color, add the tomatoes (along with all of the juices) to the pan. The tomatoes should immediately begin to simmer rapidly. Allow the tomatoes to cook, shaking the pan back and forth occasionally, stirring at regular intervals and regulating the heat in order to maintain a brisk simmer, until the tomatoes have broken down and the sauce is thickened and emulsified (a path should remain when you draw a spoon across the pan and the sauce should mound on a spoon). You should have a scant 3/4 cup. Taste for seasoning and remove from the heat. Sauce may be made ahead.

Browned Butter Breadcrumbs:
3/4 c./41g. fresh breadcrumbs
1 1/2 T. butter

Place the bread crumbs in a bowl. In a small sauté pan cook the butter over medium heat for a few minutes, whisking occasionally, until it begins to brown and smells nutty. Pour the browned butter over the breadcrumbs, scraping in all of the browned bits. When cool enough to handle, toss to combine. Set aside.

Vegetable and Cheese Filling:
400g (about 2 large) zucchini, sliced 1/8-inch thick (use a mandolin)
1/ 2 t. kosher salt
41 g. (1/2 c.) finely grated Pecorino
100 g. (a scant cup) grated (medium fine) Gruyère
1 T. minced fresh thyme
2 T. minced parsley
2 T. olive oil
1 1/2 c./225g fresh corn kernels (cut from 1 large or 2 small ears)

Cut the squash into 1/8-inch thick rounds (use a mandolin slicer). Toss the squash slices with 1/2 t. kosher salt and place in a colander set over a plate. Let stand 10 minutes. Spread two layers of paper towels on your work surface and transfer the squash to the towels, shaking off as much of the liquid as possible as you do. Blot with another layer or two of paper towels. (The squash does not need to be spread in perfect single layers—you just want to have it spread out so that you can blot away the majority of the liquid).

Combine the pecorino with the buttered breadcrumbs and set aside.

Build the tart: Spread the ricotta mixture in a circle in the center of the chilled pâte brisée, leaving a 2-inch border of dough. Dollop and spread the cooled tomato sauce over the ricotta. Scatter half of the Gruyère over the tomato sauce.


In a large bowl, combine the squash, half of the pecorino/breadcrumb mixture, the remaining Gruyère, the herbs, olive oil and corn. Taste and correct the seasoning. Arrange this mixture on top of the ricotta/tomato/ Gruyère base on the pastry crust. Use your hands to do this, simply grabbing a handful of the mixture at a time and arranging the mixture in and even layer (your hands work best—rather than just dumping it out—because you can make sure you get a nice mix of corn and zucchini with each handful). Spread the remaining pecorino/breadcrumb mixture over all.

Pull up the edges of the crust and gently flip them over the filling to form a rustic edge. Pleat the dough as necessary, pressing lightly into place.

Bake the tart in a 400° oven on the lowest rack (or in the middle with the sheet pan sitting directly on a preheated baking stone). Bake until the filling is bubbling in one or two spots, the breadcrumbs are golden, and the crust is crisp and golden brown—about 30 to 40 minutes. Slide the tart onto a rack and let rest for 15 minutes (or cool until just tepid) before serving. The tart is also delicious made a day ahead. Slice while cold to get beautiful, clean slices and reheat for 15 minutes in a 350° to 375° oven. Tart serves 6 to 8.


Monday, July 29, 2019

Homemade Fresh Cheese (“Ricotta”)


I’m not sure when I first discovered that making fresh, ricotta-like cheese at home was not only possible—but actually doable for anyone with a stove, some milk, a coagulant (lemon juice, vinegar or buttermilk) and a cheesecloth-lined sieve.  It was Michael Chiarello’s recipe in his aptly named Casual Cooking that tipped me off to the fact that making a fresh cheese was a simple—even quick—process.  Once I discovered his recipe I immediately began making—and teaching—fresh cheese.

Unfortunately my results weren’t always very consistent.  Sometimes my cheese was light and spreadable.  And then on other occasions it was stiff and a bit sticky.  It always tasted good…but I was unhappy about the unevenness of the results from a textural standpoint.  As a professional cook, consistency is something I always strive for. Whenever I visited one of my favorite restaurants (for Kansas City Locals: Extra Virgin), I nibbled their fresh ricotta and grilled bread platter with a mixture of pleasure and envy.  What were they doing to get such a consistently light and spreadable result?

As I stated at the beginning, the basic method for making fresh cheese is very straight forward and simple.  Place the milk in a saucepan.  If using buttermilk as your coagulant, add that with the milk.  Heat the milk.  If using an acid (lemon juice or vinegar) for your coagulant, add it to the heated milk.  Stir and watch the curds form.  Let the mixture sit (off the heat) for a few minutes to allow the curds to firm up.  Drain through a cheese cloth.  That’s it.  But clearly I was missing something.

If you take the time to look around, you will discover that the method truly doesn’t vary too much from site to site and cook to cook.  Some cooks add a bit of cream to the milk (for added richness and a slightly higher yield).  The recipe from Chiarello that I had started out with used buttermilk to set the curds.  I found that most recipes use lemon juice or distilled white vinegar.  Since I always have lemons on hand…and rarely keep buttermilk around…I switched to lemon juice.  My results were about the same.

There seems to be a bit of disagreement about the temperature to which the milk should be heated before adding the acid.  Most recipes take it to at least 180°.  Many go a bit higher than this.  Some even tell you to bring the milk to the boil.  My impression is that somewhere in the range of 180° to 190° is optimal.

The greatest amount of variation among the recipes that I looked at centered around the draining process—how it was accomplished and how long the curds should be allowed to drain.  And in the end, this seems to have been the source of my difficulty.  I think I had been allowing too much of the whey to drain away.  No one tells you this, but the cheese when it is at the correct, soft consistency for serving as a light and fluffy spread, will still look like it is way too wet.  But if you can scoop some of the curd up with a fork or spoon and you are rewarded with a substance that sits on your utensil in a soft, delicate, trembly mound, you are done.  Depending on how you transfer the curd into the cheesecloth, the time it takes to reach this point could be anywhere from 2 or 3 minutes to about 15 minutes. 


At 15 minutes.  If you scrape a bit a the edge with a rubber spatula--or even just lift
 the cheesecloth around the edges--you can see that the cheese is holding a shape.
Most recipes recommend 15 minutes as the minimum draining time…and suggest draining anywhere from an hour and up to overnight.  The only reason to do allow it to drain for this length of time is if your goal is super firm cheese (to be used in gnocchi, for example).   If this is the case, you may let the cheese continue to drain for up to an hour.  I have never found the need to drain it for longer than this.  No matter how long you drain it, the cheese becomes much firmer as it sits…and even firmer still under refrigeration.  Cheese drained for an hour will, after chilling, be as firm as cream cheese.  (If you beat the chilled cheese with a wooden spoon or rubber spatula, you will smooth out the curd to the point that you really will have something that is very much like cream cheese.)

There are several methods that I have seen for draining the curd.  Michael Chiarello tells you to gently push the raft of curds aside and to ladle the whey (which is underneath the curds) into your cheesecloth lined sieve, getting rid of as much of the whey as possible before spooning the curds themselves into the sieve along with any remaining whey.  Patricia Wells in The Provence Cookbook directs you to prepare two cheesecloth lined sieves…and to spoon the majority of the curds into the first sieve—and then pour the whey and remaining solids into the second.  The few curds from the second sieve can be moved to the first.  Almost every other method I have ever seen tells you to just ladle or pour everything into the cheesecloth lined sieve and let it drain. 


The above cheese after lifting the cheesecloth all the way around.  It is still very soft.


Obviously getting rid of most of the whey (using either Chiarello’s or Wells’s methods) will shorten the amount of time the curds need to drain.  But even if you unceremoniously dump the whole mixture into the sieve, you should still not have to drain the curds for longer than about 15 minutes (unless—as already mentioned—you are specifically going for a dryer, firmer cheese).  Because I learned how to make fresh cheese with Chiarello’s recipe, I am in the habit of a sort of hybrid method: I ladle off as much of the whey as I have the patience for before I pour the curds and whey that remains into the sieve.  You should use whatever method works best for you.

I should mention that not everyone adds salt to the milk along with the acid.  I suspect that adding the salt at this point has an effect of some kind on the formation of the curds.  I don’t know if adding it at this point is detrimental or not.  What I do know is that adding salt to taste to the finished cheese requires some stirring of the curd—which I think can have a detrimental effect.  I have noticed that stirring the finished curds can give them a sticky quality that I find unpleasant.


When the cheese has drained to your liking, you may eat it right away.  And frankly, I dare you not to. It is at this point that it is at its most sublime…mounded onto a toast and topped with something tasty (marinated roasted peppers…balsamic roasted fresh figs…).  Or all by itself with nothing but a drizzle of good olive oil, some flaky salt and freshly ground pepper.  It also makes a fantastic addition to a meze platter.  Anything that might be left can be placed in the fridge and should last for about a week.


With crusty bread and melon for lunch....

With Zaalouk and olives as part of a Meze spread....


On bruschetta and topped with Marinated Roasted Sweet Peppers....


Homemade Fresh Cheese—"Ricotta"

This cheese is similar to—and can be used as you would—ricotta.  Most recipes that you will find for "Homemade Ricotta" look pretty much like this recipe—the type and amount of acid will vary from recipe to recipe...and methods will vary slightly...but the process (and end product) is pretty much the same.  But none of these are really ricotta.  Ricotta is traditionally not made from milk.  It is made instead with whey and is therefore a byproduct of the cheese making process (most often the Pecorino making process).  If I understand the process correctly, you could make fresh ricotta at home.  You just have to have access to a large quantity of whey.

1 quart whole milk
1/2 c. heavy cream
A scant teaspoon of kosher salt
3 to 4 T. fresh lemon juice


Pour the milk and cream (if using) into a non-reactive saucepan.  Place over high heat and bring to just under a simmer (180° to 190°F), stirring the mixture frequently with a rubber spatula and making sure to scrape the whole pan bottom to prevent scorching.  Remove from the heat.  Add  the salt and 3 T. of lemon juice and stir—you should almost immediately observe curds forming and separating from the translucent whey.   If this isn't happening, gradually add more lemon juice until it does.  Let the mixture sit undisturbed in a warm place for 10 to 20 minutes.

While the mixture sits, line a wide sieve or colander with several layers of cheesecloth and place over a deep bowl, or directly over the sink.


Working from the side of the pan, push aside some of the curd and gently ladle the whey into the prepared cheesecloth.  Try not to break up the curds too much as you work.  When you have removed as much of the whey as you can without pulverizing the curd, pour the remaining contents of the pan into the sieve.  Lift the sides of the cloth once or twice to help the liquid drain.  Don’t press on the curds.  Let the curds drain for 15 to 60 minutes, depending on how dry you want your cheese to be.  (I like to drain for 15 minutes and serve the cheese right away while it is still soft and warm. Draining it longer will produced something with a texture like cream cheese.  No matter how long you drain it, it will firm up considerably upon chilling. For this reason, I always save some of the whey to add back in if the chilled cheese is too firm.)  Taste and correct the salt.  The cheese will keep for several days in the refrigerator.  Makes 1 1/2 cups.  Less if it drains longer than 15 minutes.
 
Printable Version

On crostini and topped with Slow-Cooked Zucchini....

Saturday, May 11, 2019

Savory Beet Greens & Mushroom Quiche...two ways...


This spring has been for me a season of beet greens.  It started when I saw some beautiful beets at the store and suddenly realized I hadn’t had beets in a while and that I was really hungry for them.  These particular beets had beautiful tops…so I saved them and added them to a pasta (or perhaps a grain pilaf…the exact preparation escapes me now).  Then suddenly I had a couple private dinners in a row that included roasted beet salads.  So I had more beet greens—because when you buy nice beets you almost always get the greens too…which basically makes them free.  So I made more pastas and pilafs…and a fantastic soup (with pasta) that I hadn’t had in a while… 
 
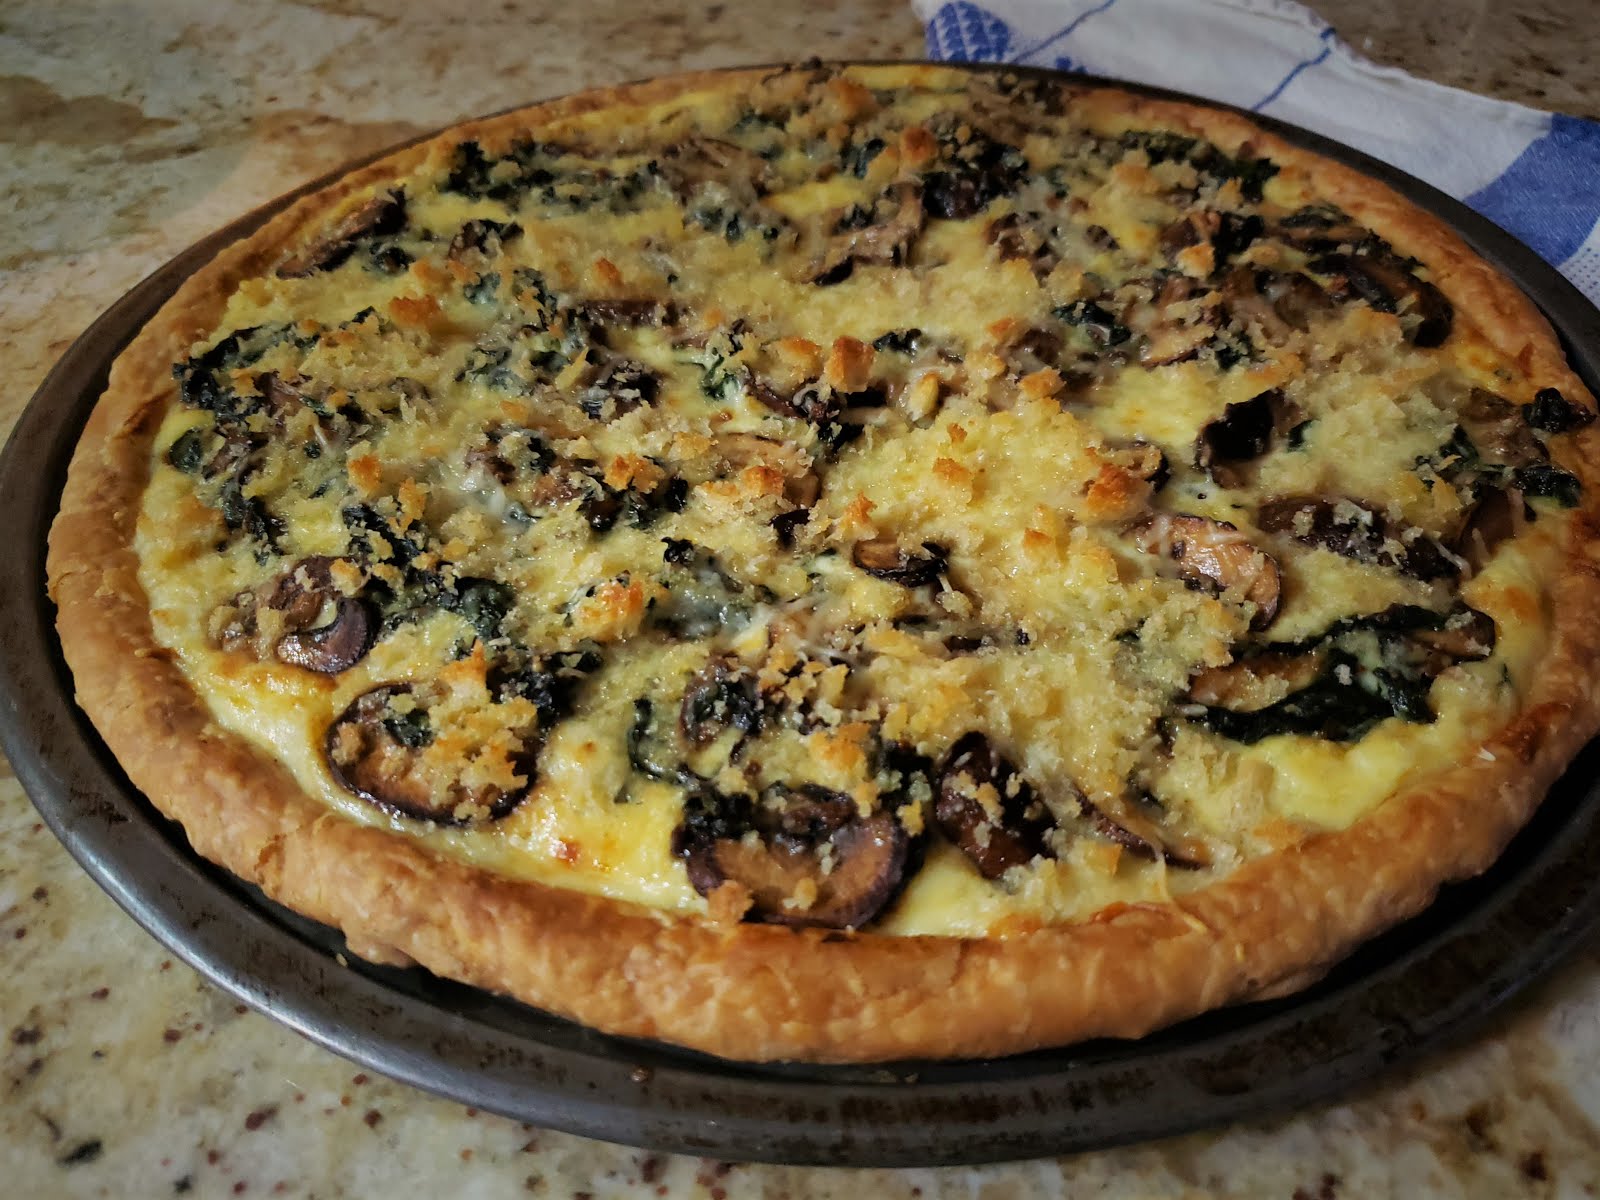
And still there were more.  So when I came home from a class with a pastry shell left from the demonstration, I decided to make a beet greens tart.  Greens of all kinds make fantastic fillings for tarts, so a tart of nothing but the greens…shrouded in a custard and enhanced with a little onion and garlic…or bacon or sausage…would have been delicious.  But at the time I happened to have some mushrooms on hand.  I remembered a good pasta I made a year or two ago with mushrooms, greens and bread crumbs.  So I decided to turn that pasta into a tart. 


I hadn’t planned on posting the recipe—there are after all, many, many tart recipes on my blog—but this tart was the thing I decided to make again when I ended up with another windfall of beet greens.  Anytime I like something so much that I make it twice in a short span of time, it’s usually a good indication that I should post the recipe—if for no other reason than I know I will be glad I did when at some point down the road I want to make a well-liked dish again and I can’t find my notes.

Aside from selfish reasons, I thought the post would be instructive.  It is the season of greens at the markets…and people are always looking for ways to use this abundance.  This tart is a great way to do this.  Even if you don’t have beet greens:  You can of course replace the beet greens with spinach or chard…even kale (just remember to blanch kale before adding it to the pan with the onions).

The second time I made the tart I didn't really have enough of the beet greens (on the left)...
so I supplemented with a handful of spinach and a few chard leaves... 
Almost any green would be good in this tart.

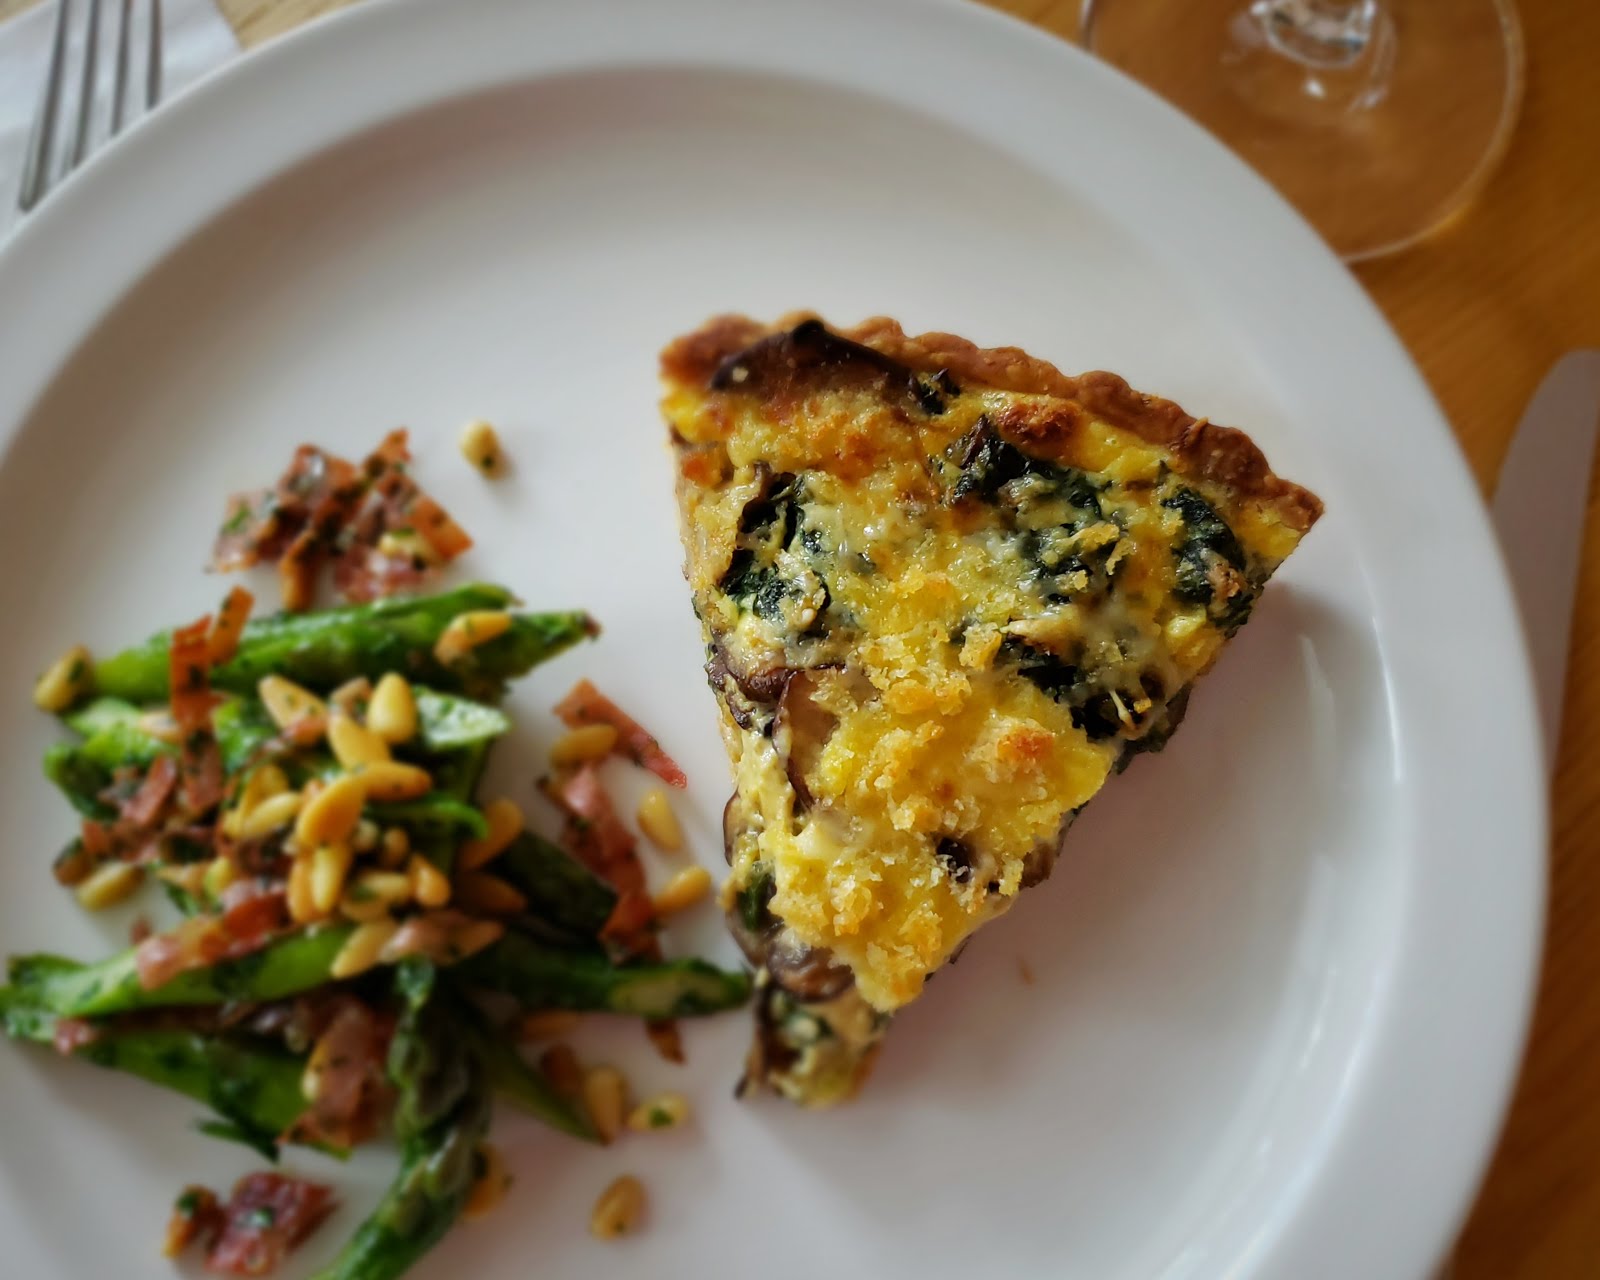
But beyond the tart being a great place to use some of your greens, I had another reason to post this recipe.  The glut of beet greens continued until I had another leftover tart shell from a class—a tart shell that was a different shape.  The first tart shell was the large, almost flat, pizza style that I tend to favor (it shows off ingredients to great advantage...plus, it has a higher proportion of crust to filling…which I love).  The second was a traditional shell (baked in a removable bottom, 9-inch tart pan).  I have always told people that these two shells (the 12-inch pizza pan crust and the 9-inch standard crust) held the same amount of filling…but I think this is hard for most people to believe.  (They certainly don’t look like they would hold the same amount of filling.)  Posting this recipe is my chance to demonstrate that this is in fact true.  Both the tarts pictured in the post used exactly the same amount of vegetable filling and custard.  You can make it either way.  The traditional style will appeal to people who really think tarts are all about the filling.  The “pizza style” will appeal to those who—like me—always want more crust.


Before I close I want to make a couple of observations about the ingredients.  The first time I made the tart I used red onion and mature garlic.  When I made it the second time I had spring onions and green garlic in my pantry…so of course I used those!  You should use what you have on hand.  I have given instructions for both.   

And while on the subject of ingredients, I want to mention the rosemary.  I normally don’t make a big deal about the addition of particular herbs, because I think they fall into the category of seasoning to your preferences.  But for this recipe, if you have it—and you like it—you should include it.  It is delicious with both mushrooms and greens…and it really adds to the savory and complex flavor of this tart.  I’m sure the tart would be good without it…but it is exceptional with it.

Finally, you may have noticed in the title of the post that I have called this recipe a “quiche”…yet I have referred to it as a “tart” throughout the post.  I was going to call it a tart in the title…because it is a tart:  It’s baked in a tart pan…and the filling is cradled in a flaky pastry crust.    But it is also a quiche—a specific class of tarts in which the filling that goes into the crust is suspended in an egg custard.  I bring this up only because I was asked this very question in a class recently:  Was I making a tart? Or a quiche?  And, what exactly is it that makes something a tart or a quiche?  I then realized I had been using the words interchangeably as I taught the class…because the thing I was making happened to be both.  But of course this is not always the case.  As far as I know, all quiches are tarts.  But it is not true that all tarts are quiches since all tarts (savory or sweet filling baked in a pastry crust) don’t necessarily include custard.  So now you know the difference (if you didn’t before…).  In any case, whatever you choose to call it, I hope you will find it to be as satisfying and delicious to eat as I have.  And I also hope you will find it to be a useful way to use and enjoy the greens that are flooding the markets right now.


Beet Greens & Mushroom Quiche

Olive oil
1/2 medium red onion, finely diced, or 2 or 3 spring onions, finely sliced or minced
1 clove garlic, minced, or one stall green garlic, finely sliced or minced
A small sprig of rosemary, picked and minced (to make about 1/2 to 3/4 t. minced)
1/8 t. hot pepper flakes
5 oz. (trimmed weight—no stems or ribs) beet greens, Swiss chard or kale, rinsed in several changes of water
8 oz. crimini mushrooms, sliced 1/4-inch thick
1 12-inch “pizza-style” tart shell or 1 standard 9-inch tart shell, blind baked (see below)
100 gr/3 1/2 oz. Gruyère cheese, finely grated (about a cup)
2 eggs
1 c. heavy cream
1/3 to 1/2 c. coarse, fresh breadcrumbs, tossed with a teaspoon of melted butter
salt & pepper


Film a wide sauté pan set over moderate heat with olive oil. If you using red onions and mature garlic, add the onions along with a pinch of salt and cook, stirring occasionally until the onions are tender and beginning to become golden at the edges. Add the garlic, rosemary and pepper flakes and cook until fragrant. If using spring onions and green garlic, add the onions and garlic to the pan along with a pinch of salt and cook until tender and translucent. Add the pepper flakes and rosemary and cook until fragrant. The red onion base will probably take about 15 minutes…the spring onion base will take less time—perhaps 5 minutes or so. For both kinds of onions, regulate the heat as necessary to allow the mixtures to sizzle gently, reducing the heat if the onions threaten to scorch. If the pan ever looks dry, drizzle in a bit more oil.

When the onions are cooked, add the greens. If using beet greens or chard, add them a handful at a time, turning with tongs to coat them in the fat and expose them to the heat and adding more as they begin to collapse. If the greens were recently washed, there should be enough water clinging to them to create steam and help them cook…if they were washed ahead (or spun dry) you may need to add a few tablespoons of water to the pan. Cover the pan and cook until the greens are tender. Uncover and continue to cook until any liquid has evaporated. Season to taste with salt and pepper and set aside in a warm spot. 

If using kale, bring a large pot of water to a boil. Add the kale and cook until tender (about 7 minutes). Lift the kale out and spread on a baking sheet to cool. When cool enough to handle, squeeze out the excess water. Add the cooked kale to the onion mixture and cook gently for a few minutes to infuse the greens with the flavor of the onions. Set aside.

While the greens cook, sauté the mushrooms: Depending on the size of your pan, you may need to sauté in batches—don't overcrowd the pan. Heat a sauté pan (non-stick, if you have one) over high heat. Add oil to coat the pan (a tablespoon or so), then add the mushrooms. Cook, shaking the pan occasionally, until the mushrooms are browned, tender and any liquid that they have given off has evaporated. If they seem dry at any time as they cook, drizzle in a bit more oil. Transfer the mushrooms to a plate and season with salt & pepper. When the greens are cooked, add the mushrooms to the greens. Set aside.

Preheat the oven to 375°. Place the baked crust on a baking sheet. Scatter about 2/3 of the cheese over the baked crust. Scatter the greens and mushrooms over all. Whisk together the eggs and the cream. Season with salt and pepper—and a pinch of freshly grated nutmeg if you like.

Slowly pour the custard over the vegetables, jiggling the pan a bit so the custard will be evenly distributed and will penetrate the vegetables. Be careful not to let the custard flow over the edge.


If there are any low places in the edge of your crust, you will not be able to use it all. Scatter the remaining cheese over the tart, followed by the buttered breadcrumbs. Bake the tart until the custard is set—about 20 minutes for the pizza-style tart, 25 for the traditional (a knife inserted in the center will come out clean). Slide the tart under the broiler to brown slightly if you like. Serves 6 as an entrée (with a salad or vegetable side), 8 to 10 as a light first course with a fluff of lightly dressed greens.


Pâte Brisée
(Short Crust Pastry)

For a 12- to 13-inch “pizza-style” crust
1 3/4 c. all-purpose flour (200g)
1/2 t. salt
11 T. cold unsalted butter, cut into pieces (150g)
1/4 to 1/3 c. ice water

For a 9- to 10-inch tart shell

1 1/3 c. all-purpose flour (150g)
3/8 t. salt
8 T. cold unsalted butter, cut into pieces (113g)
3 to 4 T. ice water

Combine the flour and the salt in a medium-sized bowl.  Rub the butter into the flour until the butter is in small pea-sized pieces. Drizzle the smaller measure of ice water over the flour/butter mixture.  Using your hands, fluff the mixture until it begins to clump, adding more water if necessary.  Turn the dough out onto a counter and form into a mound.  Using the heel of your hand, gradually push all of the dough away from you in short forward strokes, flattening out the lumps.  Continue until all of the dough is flat.  Using a bench scraper, scrape the dough off the counter, forming it into a single clump as you do.  Form the finished dough into a thick disk.  Chill for at least 30 minutes.

To roll out, let dough warm up for a moment or two.  Butter/spray the a pan and set it aside.  Roll out the dough on a lightly floured surface into a circle that is about 1/8- to 1/6–inch thick and with a diameter 2 to 3 inches larger than that of the pan.  Trim any ragged edges.  Brush off the excess flour and fold the dough circle in half.  Transfer it to the prepared pan.  Unfold the dough and ease it into the pan being careful not to stretch it.  Fold the edges to form a ½-inch rim of a double thickness of dough for the pizza-style crust.  For the traditional tart pan, simply press the dough against the sides of the pan (being sure not to stretch the dough) and cut the dough off flush with the edge of the tart pan.  Chill for at least 30 minutes.

To blind bake, line the pastry with aluminum foil or parchment paper, pressing it into the corners and edges.  Add a layer of pie weights or dried beans.  Bake in a 400° to 425° oven for 20 to 25 minutes.  When the pastry begins to color on the edges and is cooked through, remove the foil and weights and continue baking until the pastry dries out and turns a golden brown (another 5 minutes or so).

Printable Version


Friday, November 30, 2018

Kale Strata with Italian Sausage


Most of the classes I teach during the holidays feature the festive…sometimes labor intensive…foods that most of us associate with the weeks between Thanksgiving and New Year’s.  But occasionally I tuck in a class that is all about making the season a little bit easier on the cook.  Next week I will be teaching a class with a slate of quick weeknight meals.  This week I taught a class featuring foods to make or keep on hand when your house is filled with out of town guests.

One of the recipes in the class was for a strata filled with kale and Italian sausage.  I think perhaps a lot of people have grown up with stratas…often called a breakfast casserole….  But I did not.  I didn’t have a strata until well into my adulthood (and my cooking career).  The first one I tasted was one I made—a “savory bread pudding” filled with asparagus and goat cheese.  It was delicious. 

And of course, that’s exactly what strata is…a savory bread pudding.  As the word strata implies, traditional versions of this dish are made by layering sliced, stale bread with cooked fillings (meats and vegetables) and cheese. In the version I make, the bread is cubed and tossed (or layered) with the other ingredients.  


Both styles then get soaked with an egg-rich custard.  


The dish is left to sit for at least half an hour before baking (so the bread can have a chance to absorb the custard)…and can be left in the fridge overnight.  And therein is the thing that makes it so appropriate for feeding houseguests.  You can make the whole thing ahead—and whether you are feeding it to people for breakfast, brunch, lunch or dinner (it is appropriate for all of these), when you are ready to eat, you just pop it in the oven.  It’s ready in an hour—during which time you can do other things with your guests—or make something simple to serve with it (green or raw vegetable salad, roasted potatoes, etc.).

In my classes, I always teach specific recipes—but the recipes are often intended to be a vehicle for teaching basic techniques, standard methods and classic formulas/ratios. To my mind, this is how I can best help people to learn how to really cook.   So I was especially pleased when, while working on my strata recipe, I ran across a post at epicurious.com about how to make a strata without a recipe.  The author of the article offered a basic formula for the components of the dish, along with an outline of how to put it all together.  I don’t agree with her on all the details, but I think the article is excellent and definitely worth reading.

The basic idea presented in the article is that you can ratio all of your components from the volume of your bread.  I have adapted the formula to suit my preferences as follows:  For every cup of bread, I add a half cup of cooked fillings, a quarter cup (1 oz.) of grated cheese, and 1cup of custard. 

The custard is of course just a mixture of eggs and dairy.  You will find stratas that have as little as 2 eggs for every cup of dairy…and some that have 4 eggs for every cup (basically equal quantities of egg and dairy).  The higher the percentage of eggs, the firmer the resulting strata will be.  I prefer a slightly softer set and use roughly 2 1/2 eggs for every cup of dairy.  As for the dairy, almost every strata recipe I have ever seen uses all milk.  But I add just a touch of heavy cream.  That first savory bread pudding I made (mentioned above) included a small amount of cream…and it was exceptional.  It’s a bit counterintuitive, but that little bit of extra fat makes the strata seem even lighter.

I thought my kale and sausage strata was delicious…and I hope you will give it a try.  But I hope you will feel free to experiment, using the recipe as a template, too....taking simple things from your pantry—stale bread, eggs, milk, cheese—and using them as a starting point to create a satisfying and delicious meal.  


Savory Kale Strata

1 large bunch kale (Red Russian, Siberian or Tuscan), stems stripped away (you should have about 150 g./1/3 lb. trimmed leaves) and leaves rinsed in several changed of water
1 T. olive oil, plus more as needed
1/2 lb. bulk Italian sausage (or 2 links, casings removed)
1 yellow onion (about 5 oz.), finely diced (1 c.)
1 t. minced rosemary
1/2 lb. day-old bread, crust intact, cut into 1-inch cubes (5 c.)
1 c. (4 oz.) coarsely grated Gruyère (or other well-flavored melting cheese)
1/3 c. (1 oz.) grated Parmesan
8 eggs
2 1/2 c. milk
3/4 c. heavy cream
1 t. kosher salt
Freshly cracked black pepper


Butter a 2 1/2- to 3-quart shallow and wide casserole or baking dish and set aside.

Bring a large pot of lightly salted water to the boil.  Add the kale and cook until just tender—about 6 to 7 minutes.  Lift the kale out of the pot and spread on a baking sheet to cool.  When cool enough to handle, gently squeeze out the excess water.  Chop very coarsely and set aside. 

While the kale cooks, place a tablespoon of olive oil in a cold, wide sauté pan.  Crumble in the sausage and set the pan over medium heat.  Cook, stirring occasionally, until the sausage is cooked through—about 8 to 10 minutes.  Using a slotted spoon, lift out the sausage and transfer to a plate.

Return the pan to medium heat.  Add the onion and rosemary along with a good pinch of salt.  Sweat, stirring occasionally, until the onion is tender and beginning to caramelize a bit on the edges—about 10 to 15 minutes.  If the pan appears to be dry at any time while the onion cooks (because the sausage was very lean) add a drizzle of oil.  When the onion is ready, add the kale and toss/stir to coat in the onions.  Let the mixture sizzle and cook for a minute or two to allow the flavors to blend.  Set aside to cool.

Place the bread, sausage, kale-onion mix, the Parmesan and all but a small handful of Gruyère in a large bowl.  Toss so that everything is evenly distributed.  Transfer to the prepared baking dish.

Crack the eggs into the same bowl and whisk until smooth.  Whisk in the milk, cream, 1 t. of salt and several grindings of pepper.  Pour the egg mixture over the bread and mix ins.  Jiggle the dish a bit to make sure everything is evenly distributed.  Press down on any bread that isn’t coated in custard.  Cover the dish with plastic wrap and let sit at room temperature for 30 to 60 minutes.  (Or, transfer to the fridge and chill overnight…let sit at room temperature for an hour or two before baking.)


Remove the plastic wrap and once again, lightly press down on the bread (using a spatula or fork) to make sure everything is submerged or coated in the custard.  Scatter the reserved cheese over all.  Cover the pan with a buttered and tented piece of foil and transfer to a 350° oven. 

Bake covered for about 30 minutes.  Remove the foil and continue to bake until the strata is bubbling around the edges and the custard is set in the center (the tip of a paring knife inserted in the center will come out clean and an instant read thermometer will read between 160° and 180°)—another 15 minutes or so. If the strata is not browned to your liking, run under the broiler for a minute or two (watch carefully so it won’t burn). 

Let the strata rest at room temperature for 10 to 15 minutes before serving.  Serves 8.

Notes/Variations:
  • Substitute 1 1/4 c. diced ham for the sausage. 
  • Substitute milk for some or all of the heavy cream.
  • This recipe is a template for any strata.  For every 5 cups of bread you will need about 5 cups of custard (eggs and dairy combined) and 2 1/2 c. total mix ins (this recipe has 1 1/4 cup each cooked kale & cooked sausage).


Printable Version

Monday, October 2, 2017

Nancy's Queso Fundido ...with Goat Cheese & Pepitas

A little over a year ago I sampled something called queso fundido at the home of my friend...and fellow chef...Nancy.  Since Nancy's food is unfailingly delicious I always look forward to gathering around her table.  But beyond that, Nancy has a wide experience of ethnic foods that I lack.  Frequently she will serve something that I have never heard of, much less tasted.  This simple and fantastic little dish of melted cheese was one of those things.


Many people, myself included, have had Nachos—a sort of dumbed-down, processed food variation of classic Mexican queso fundido.  But the dish I had on that particular evening was definitely not an ordinary platter of Nachos.  When Nancy stepped out onto her patio that evening with a piping hot cast iron skillet filled with sizzling cheeses (a nice Monterey Jack and some creamy Goat cheese) and freshly made rajas (strips of onions and roasted poblano peppers with garlic and oregano), studded with crunchy, toasted pepitas, I knew I was looking at something special.  It did not disappoint.  I could have made a meal out of it, but I knew there was more deliciousness to come (Salmon with a tomato and green olive relish, if I recall correctly), so I held back.  But I had to have the recipe.   Luckily for all of you, Nancy graciously shared it with me.

I have since discovered that queso fundido is not as unknown to most Americans as it was to me.  Many, many recipes are available on line.  Nancy's recipe is unusual, first and foremost because of her inclusion of goat cheese.  Most recipes use one (or more) of several good melting cheeses:  Monterey Jack, mild Cheddar, Wisconsin Brick, Chihuahua, Asadero, etc.  But the inclusion of goat cheese into the mix adds a fantastic tang...and also cuts down on what I consider to be the objectionable oily-ness and stretchiness that melted cheeses can sometimes have.  Her other unusual addition is the final topping of toasted pepitas.  They add great flavor and wonderful texture and the dish wouldn't be the same without them.

The rajas are a fairly standard addition.  Nancy's recipe for them follows a Rick Bayless recipe fairly closely.  He calls this sautéed mixture of onions and roasted poblanos an essential element of Mexican food and cooking—something that can be used as a filling for tacos, an addition to soups/stews, an accompaniment for grilled meats, a filling for cheese quesadillas, etc.  They are wonderful in the queso fundido, and they are frankly the reason that I suddenly started thinking about this dish again, one year later. 


There are of course a lot of other delicious things to do with poblanos, but a couple of weeks ago when I noticed that fresh poblanos were abundant at my farmers' market, this was this dish I wanted to make.  The weather is cooling down...and a dish of hot cheese seemed like a pretty fine idea.  Since peppers freeze well in their roasted form, I bought more than I needed so I would have them handy throughout the fall and winter months when queso fundido would be the perfect addition to a family game night...or a Sunday afternoon football party...or even for a simple evening meal. 

If you have never prepared roasted poblanos, follow the method I outline for roasting and peeling bell peppers on my red pepper and potato pizza post from a few years ago.  If you have access to plastic gloves, it might be a good idea to wear them when you're peeling and seeding the peppers.  Poblanos are sort of mild to medium hot and if you handle enough of them, your hands will definitely feel it.  If you don't have gloves, wash your hands well with soap and water after working with the peppers and before doing anything else.  


And, while on the subject of heat, definitely sample your roasted poblanos before you use them in your recipe so you will know if they happen to be extra hot.  I purchased an extra fiery batch of them last year.  I knew they were hot and still made my queso fundido with the full amount.  It was delicious, but would not have been acceptable to anyone who is sensitive to heat.  If the ones you buy are super hot, you might consider cutting back on the quantity that you add. 

To freeze your roasted peppers, simply lay the roasted and peeled peppers flat, stacking them and  laying a piece of plastic wrap in between each pepper.  Slide the stack of peppers into a Ziplock bag, press out the air and lay the bag on a flat surface until the peppers are frozen hard.  By separating each of the peppers in this way, you will be able take out as few or as many as you like when you want to thaw them.

Not particularly photogenic...but oh so tasty....
Every time I have made queso fundido I have served it exactly as Nancy did...with a big pile of crunchy tortilla chips. I like it this way whether I'm eating it as a shared appetizer...or for dinner with a green salad.  But it also makes a wonderful filling for soft tortillas...or a topping for toast (sort of an open faced and very savory grilled cheese sandwich).  However you decide to serve it, be sure to make more than you think you and your friends will eat, as it is addictively delicious.

Nancy's Queso Fundido with Goat Cheese

1 lb. fresh poblanos (about 6 medium)
2 T. olive oil, plus more for peppers
1 medium yellow or white onion (8 oz.), sliced 1/4-inch thick
Salt and pepper
3 large cloves of garlic, minced
1/2 t. dried oregano
1/3 to 1/2 c. heavy cream, crème fraiche, or Mexican crema
1/2 lb. Monterey Jack, coarsely shredded
1/2 lb. soft fresh goat cheese, crumbled
1/4 to 1/3 c. toasted pepitas (see note)
Tortilla chips...or warm, soft tortillas


Rub the poblanos with olive oil and place on a baking sheet.  Broil the peppers, turning as the skin chars, until they are blackened and blistered all over.  Set aside to cool.  When cool enough to handle, remove and discard the blackened skin, the stems and cores, white ribs, and seeds.  (Use gloves if you hands are sensitive to the heat of chiles.)  Cut into 1/4-inch strips and set aside.

In a heavy oven proof skillet (cast iron is perfect) with a 10-inch cooking surface (see note), heat the oil over moderate heat.  Add the onions along with a pinch of salt and cook until soft and beginning to caramelize—about 5 to 10 minutes.  


Add the garlic and oregano and cook just until fragrant (less than a minute).  Add the poblanos, tossing to coat in the onion/garlic mixture.  Heat through and season to taste with salt & pepper.  If you are working ahead for a party, you may stop at this point and set the mixture aside at room temperature for a couple of hours.  If you are working further ahead than that, scrape the mixture into a container and chill.  Return to the pan and heat through before continuing. 


Add the cream to the hot rajas and bring to a simmer (this will happen almost immediately).  Remove from the heat and scatter the Monterey Jack over all, followed by the goat cheese. 


Place the skillet under the broiler (set on high) and broil until the jack cheese is melted, the goat is beginning to be tinged with gold and the cheese is bubbling at the edges.  Sprinkle with the pepitas and serve immediately with tortilla chips or warm soft tortillas.  Serves 4 to 8 (depending on appetites and  other items being served).

(Recipe adapted from The Elote Cafe Cookbook by Jeff Smedstad)


Notes:
  • Toast the pepitas in a dry skillet set over medium high heat. Cook, tossing and stirring constantly until the pepitas are browned in spots and slightly puffed. Transfer to a cool plate. 
  • If you have roasted poblanos in your freezer (and don't know their original fresh weight), weigh out about 7 oz. of the roasted peppers for this recipe. 
  • A wide skillet (10-inch surface) is the best thing for this recipe. It keeps the layer of cheese thin so it will melt quickly and completely without becoming unpleasantly oily and stretchy. If you would like to make half a recipe, us a skillet with a 7-inch cooking surface. 
  • If you would like to make open faced sandwiches, toast slices of a sturdy artisanal loaf and spread on a baking sheet. Before adding any of the cheese, divide the creamy rajas over the bread slices and top with the cheeses. Broil until melted and bubbling. Scatter pepitas over and serve. 
Printable Version