Tuesday, February 28, 2017

Winter Lasagne...with Spinach, Butternut Squash & Mushrooms


Last July I published a recipe for Summer Lasagne.  "Summer" because the main ingredient was corn—made into a pesto and also folded into some beautiful market chard.  This unusual and tasty lasagne was the serendipitous result of the intersection of an impulse purchase at the grocery store (no-boil noodles) and the bountiful produce of the summer market. 

I haven't been to the farmers' market in a while (for a lot of reasons...but the main one is that the winter market is new and I'm not in the habit of it yet), but the unforeseen contents of my pantry—an extra pound of baby spinach (!), a chunk of winter squash...and an unusual and continuous supply of ricotta (I'm not sure why I keep buying it other than I love it and it is so versatile)—once again provided the inspiration for lasagne. This time I purchased the no-boil lasagne noodles...along with some mushrooms and Fontina 
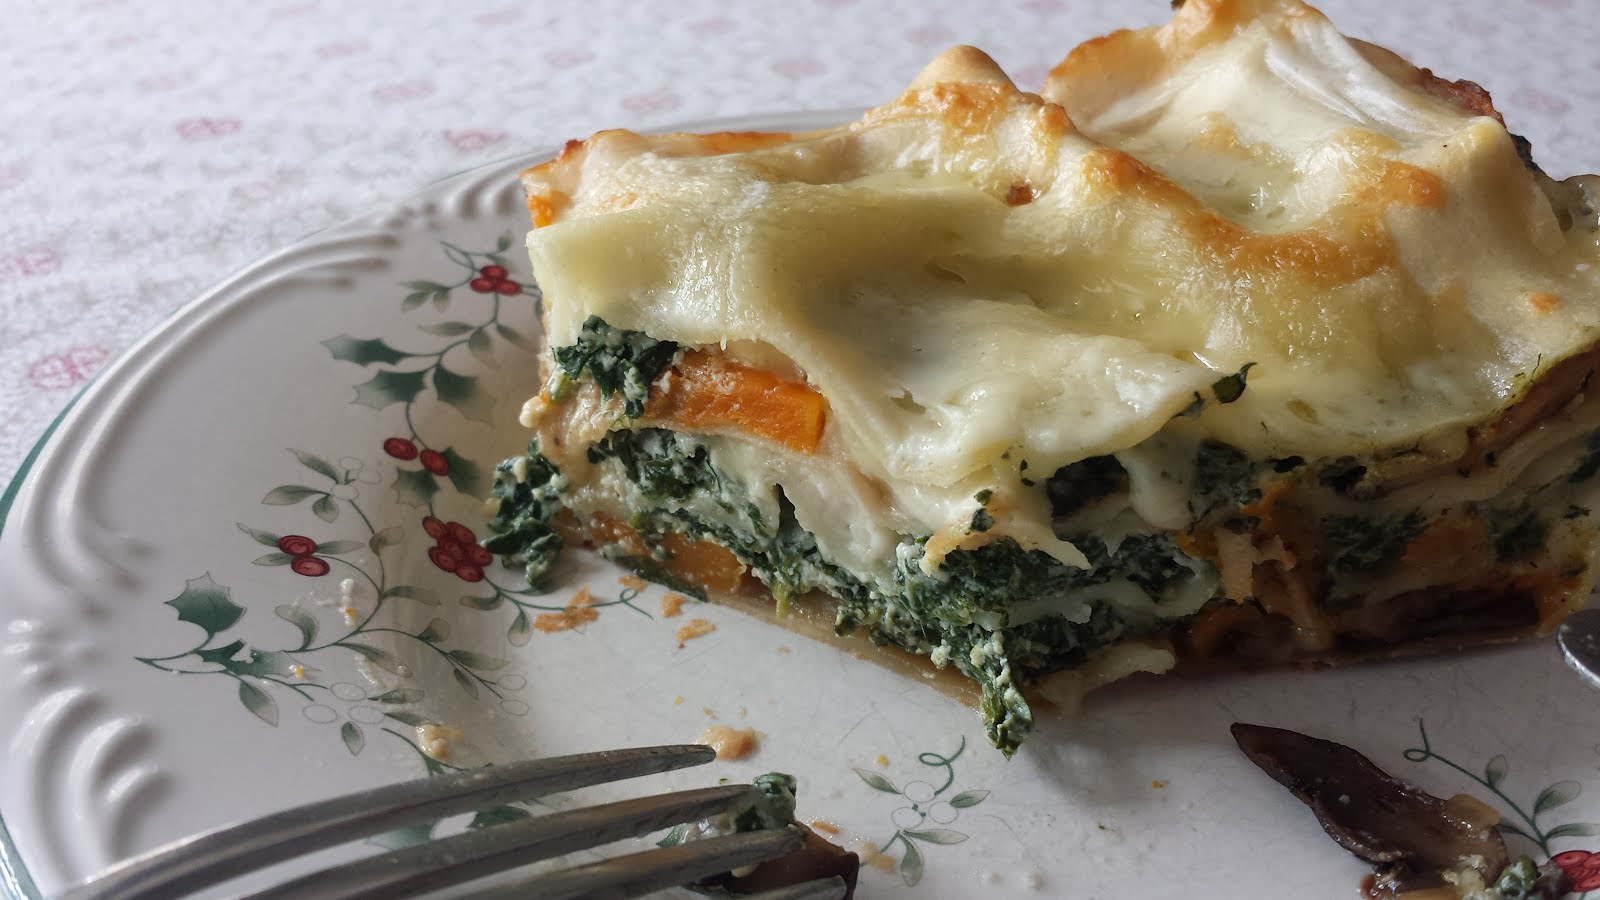
cheese...with the definite purpose in mind of a Winter Lasagne—with spinach, butternut squash and mushrooms.  


Although it is not always the case, some of the most delicious meals are the ones I make without a specific "recipe" or a real plan....  the ones where I just walk into the kitchen with an idea and start cooking.  Such was the case with this lasagne.  I had a general idea in mind, but hadn't bothered to plan too much. When you consider that making lasagne is always a project, this probably wasn't the wisest course to take....but in retrospect, I'm glad I did it that way.

I am almost never in my kitchen anymore without a camera.  This makes it so I can write a post if I particularly like something I have made.  Or, it gives me a way of revisiting something I have made if I have forgotten details.  On this particular occasion, about the time I started to build my lasagne, I quit taking pictures.  I was tired.  It was getting dark(er).  And most significantly, I was not happy with the way my lasagne was going together:  the ricotta/spinach mixture seemed a bit stiff....   I felt like I had underestimated the amount of each of the components (especially the béchamel)....  In any case, I was pretty sure I would be going completely back to the drawing board if I ever wanted to make this particular lasagne again. 

Then, a couple of things happened.  First, I got a break from it.  A lasagne takes 40 minutes to an hour to bake and as I cleaned and righted the kitchen, I began to think less about the work and more about dinner.  Then, I cut into it...and it sliced beautifully and evenly.  Then....  I tasted it.  I was astonished by how delicious and flavorful it was.  I even commented about it out loud as I simultaneously felt a bit disgruntled that I had stopped taking pictures.  The next day at lunch, it tasted even better.   Of course, I had to make another...


The second time around was a much better experience.  I knew what to expect, so it went together much more easily.  I'm happy to share that if you organize the succession of your vegetable, cheese and sauce preparation in a thoughtful way, you will probably be sitting down to dinner within two hours of the time you start cooking.  (And since you will be able to use part of that time—while the lasagne bakes—to clean up, it really doesn't seem like an unreasonable amount of time for a lasagne.)

To make your lasagne preparation experience as stream-lined as possible, start by cutting and roasting your squash.  While the squash roasts, collapse/cook the spinach and spread it out too cool.  Slice the mushrooms and dice the shallots and sauté while the spinach cools.  Squeeze out the spinach and mince.  At this point your vegetables should be done.  You can start grating the cheeses while all of this is happening...or wait until the vegetables are all done and then move on to the cheeses.  (Since you will have your microplane grater/zester out to grate the Parmesan, use it to grate the clove of garlic directly into the bowl of ricotta too.)  Finally, since this lasagne uses no-boil noodles (really, a much better product than traditional dried lasagna), all that is left is to make the béchamel and build the lasagne.

Like the summer lasagne, this one is pretty rich and will serve four to six.  I'm certain it could be doubled to serve more.  If you want to make sure that you can serve six with just one, you can make a tossed salad—or a simple blanched green vegetable (like green beans or broccoli)—to serve with it.  I was perfectly content with just the lasagne—not only is it filling, but the flavor is very satisfying.  I found that I preferred to enjoy some fruit afterwards (the Mandarins have been incredible this year).  


And if fruit isn't your favorite thing...or you would really prefer something a bit more decadent—then a little something chocolate would I think provide just the right note to round out your meal. 


Spinach Lasagne with Butternut Squash & Mushrooms

1 to 1 1/4 lb. Butternut squash, peeled, halved lengthwise, seeded and cut cross-wise into 1/4-inch thick slabs
2 T. olive oil, divided
Salt & freshly ground pepper, to taste
3 1/2 T. butter, divided
8 oz. crimini or white mushrooms, sliced 1/4-inch thick
1 medium shallot (about 1 1/2 oz.), peeled and minced
1/4 c. dry white wine
1 lb. baby spinach, washed
1 c. (240 g) whole milk ricotta
1 oz. (1/3 c) finely grated Parmesan
1 clove garlic, finely grated with a microplaner or smashed to a purée with a pinch of salt
Pinch nutmeg 
1 1/3 c. whole milk
2 T. flour 
6 oz. Fontina or Fontal, coarsely grated
8 "no-boil" lasagna (half of an 8 oz. box)


In a large bowl, toss the squash with a tablespoon or so of olive oil (enough to lightly coat all the squash) and season with salt and pepper.  Spread in a single layer on a baking sheet


and roast in a 450° oven until tender and caramelized—about 25 to 30 minutes.  (Flip the squash over about 2/3 of the way through for more even browning.)  Set aside when done.

While the squash roasts, place the spinach in a large stock pot with just the water clinging to the leaves from washing (or—if you have purchased a container of triple washed, add about a quarter inch of water to the pan before adding the spinach). Cover the pot and set over high heat.  When you hear the water begin to boil and steam, uncover and turn the spinach over and over in the pot (using tongs) until it has all collapsed.  This whole process should only take a minute or two.  Dump the contents of the pot into a strainer of colander to get rid of most of the water.  Spread the spinach on a sheet pan and let cool.  When cool, squeeze out the excess water a handful at a time. 


Chop the spinach medium fine.  


You should have 1 1/4 to 1 1/3 cups loosely packed chopped spinach.  Set aside.

While the squash roasts and the spinach cools, melt a tablespoon of butter with a tablespoon of olive oil in a wide sauté pan set over moderately high to high heat.  When the butter stops sputtering and the foam subsides a bit, add the mushrooms.  Sauté the mushrooms (tossing or stirring occasionally) until tender and golden and any liquid released has evaporated. (Season the mushrooms with salt when they have begun to take on some color.)  Reduce the heat under the mushrooms to medium/medium-low.  Push the mushrooms out towards the perimeter of the pan and add another tablespoon of butter to the center of the pan.  When the butter has melted, add the shallots and a pinch of salt and cook until tender and fragrant...this will just take a few minutes.  Add the wine to the pan, increase the heat slightly.  Allow the wine to reduce completely to a buttery glaze, scraping the bottom of the pan occasionally get all of the caramelized mushroom juices.  Taste and correct the seasoning.  Set aside.

Place the ricotta, parmesan, garlic, spinach and a pinch of nutmeg in a medium-sized bowl.  Mix until well combined, seasoning to taste with salt and pepper.

Prepare the béchamel: In a small saucepan, bring the milk to a simmer; keep hot.  (Alternatively, heat the milk in a microwave proof container of some kind.)  In another medium saucepan, melt 1 1/2 T. of butter over medium heat.  When the foam subsides, whisk in the flour.  Cook stirring constantly for a minute or so—the roux will be bubbly and straw yellow.  Remove from the heat and pour in half of the hot milk, whisking constantly until smooth—it will thicken immediately.  Add the remaining milk.  Return to the heat and stir constantly until the sauce returns to a simmer.  Taste and season as desired with salt and pepper.

When you are ready to build the lasagne, oil a square 2-quart baking dish (an 8 1/2- by 8 1/2-inch Pyrex is perfect) and bring a shallow pan of water just to the boil and remove from the heat.  Arrange these two items...along with all the other components—on your workspace so that you have easy access to everything.   


Add two of the noodles to the pan of hot water.  Spread a couple of tablespoons of béchamel in the bottom of the oiled dish.  Lift the noodles out of the pan. (They should not be soft or flexible at this point...you're just giving them a head start by soaking them briefly—less than a minute.)  Let the excess water drip back in to the pan and arrange them in a single layer in the prepared baking dish.  Add a couple more noodles to the pan of hot water (to soak while you build the first layer).  Scatter a third of the mushrooms and a third of the squash over the noodles.  


Daub a third of the ricotta mixture over the vegetables, spreading it out a bit using two forks.  


Drizzle a fourth of the remaining béchamel (about 1/3 cup) over the ricotta-spinach mixture (spreading if a big glob goes all in one place).  Scatter a quarter of the Fontina (1 1/2 oz.) over all.  Beginning with the noodles, repeat this layering two more times.  

Finish with two more (soaked) noodles, the remainder of the béchamel (spreading evenly) and a scattering of the remaining Fontina (1 1/2 oz.).


Cover the pan with a piece of aluminum foil that has been brushed on the underside with olive oil (or sprayed with pan spray), tenting the foil slightly if possible so that it isn't touching the top of the lasagne.  Bake in a 350° oven until the cheese on top has just melted—about 25 to 30 minutes.  Uncover and continue to bake until the lasagne is bubbling around the edges and the top is beginning to brown around the edges...another 10 to 15 minutes.  Let the lasagne rest for 5 to 10 minutes.  Cut with a sharp knife and serve.  Serves 4 to 6.


Notes:
  • The amounts of mushrooms and squash will seem very skimpy as you are building the lasagne. This is as it should be. 
  • The ricotta-spinach mixture may seem very stiff (depending on the moisture in your ricotta). Don't worry if it won't spread into an even layer—it is in fact very likely that it will not. Just daub it evenly over the vegetables and flatten it a bit with a fork. It will spread out—or at least give the impression of having spread out—as it bakes. 
  • I have never made this with frozen spinach, but I imagine that frozen chopped spinach—thawed and squeezed dry and measured to make 1 to 1 1/3 cup would be fine. 
  • Substitute Low-moisture Mozzarella for the Fontina/Fontal if you like. 
  • This makes a tall lasagne...so if you double the lasagne, it would be best to go with a 15- by 11-inch pan rather than a 13- by 9-inch.

Thursday, February 23, 2017

Grated Carrot Salad with Coriander & Pistachios

Monique Jamet Hooker in her book Cooking with the Seasons makes the observation that "The French eat carrot salad the same way Americans eat carrot sticks." Leave it to the French to turn the humble, raw carrot into something special.  I'll eat that plain, ubiquitous carrot stick when it shows up in a picnic basket or on a party relish tray...but only because it is less dubious than some of the other things that might be on offer.  The difference between noshing on a horse fodder-like carrot stick and a chic little dish of grated carrots dressed with a tangy and garlicky or herbaceous vinaigrette pretty well sums up the chasm between the French and the American manner of dining.  David Lebovitz tells us that the ability to produce this simple little salad is "in your DNA" if you're French.  Fortunately for the rest of us, Carottes Râpées is an easy thing to learn to make.

In its most basic form, a grated carrot salad is nothing more than grated (or julienned) carrots dressed in a simple vinaigrette.  I like it best if the vinaigrette is a lemony one...but a red wine vinaigrette will work fine too.  The vinaigrette should be on the tangy side.  It should not be overly sweet.  The sweetness in this salad should come primarily from the carrots themselves...not an abundance of added sugar or honey.  It is fine to correct carrots that are not as naturally sweet as you would like with a pinch of sugar or a drizzle of honey.  But the overall effect of the salad should be lively, tangy and zippy. 

Other additions to this basic salad are minimal and vary from cook to cook.  When starting out without a vinaigrette (just dressing the carrots directly with lemon juice or red wine vinegar and olive oil) it is usual to include garlic or shallot.  Some cooks add a bit of Dijon mustard.  Freshly toasted and ground spices like coriander, cumin and fennel are also common.  And the salad is almost always finished with fresh herbs...flat leaf parsley, cilantro, tarragon, chervil or chives.  Every recipe I have ever seen or made includes a bit of cayenne or hot pepper flakes.  David Tanis makes a fantastic Moroccan version that is finished with lime and a scattering of green olives

When I make a grated carrot salad I add a couple of steps that I think improve its taste, texture and shelf life.  The first is something you won't have to worry about if you are making your salad with a vinaigrette you already have on hand, and that is to allow the minced/smashed garlic and/or minced shallots to macerate briefly in the lemon juice or vinegar before adding them to the carrots.  This brief soak is how I always begin when I make a vinaigrette and its purpose is to soften the harshness of these two ingredients.  Not only will the flavor of garlic or shallot be stronger and harsher if you don't do this, their presence will become more and more prominent as the salad sits...making for a salad that tastes overwhelmingly of garlic or shallot on subsequent days.  Since one of the things I like about grated carrot salad is the fact that it keeps really well for several days, it would be a shame if it became inedible because the garlic or shallot had become too strong.


The second thing I do is something I picked up in David Tanis's Moroccan version.  Instead of making a vinaigrette and pouring it over the carrots...or simply throwing all the ingredients into a bowl and combining them, Tanis adds the ingredients in stages, adding the olive oil last.  The reason for this is that if allowed to sit on the carrots for a short length of time, the salt and the acidity of the lemon or vinegar will begin to soften the carrots by drawing out some of their liquid.  If you wait to add the oil until after the carrots have started to soften, you will use less oil and you won't end up with a pile of grated carrots sitting in a pool of oil.  The other benefit of waiting to add the oil is that the seasonings will be absorbed by the carrots better if there is no oil coating them and acting as a barrier.   

Obviously recipes for Carottes Râpées are easy to find...and I do hope you will look for one to try.  The one I am sharing today would be a good place to start.  It is from Jody Williams' book Buvette and it is a bit unusual.  Like the basic versions I have described, it is simple and streamlined.  But, it contains the surprise of chopped, toasted pistachios.  The pistachios add color... subtle crunch... and sweetness.  They are, I think, a genius touch...and make this salad my new favorite version of the grated carrot salad.    


Grated Carrot Salad with Coriander & Pistachios

2 T. freshly squeezed lemon juice...or more, to taste
1 small clove garlic, grated with a microplaner or smashed to a purée with a pinch of salt
1 lb. carrots, trimmed and peeled
1/2 t. kosher salt, plus more to taste as needed
1 t. coriander seeds, toasted and crushed in a mortar and pestle
pinch cayenne, or to taste
1/4 c. pistachios, toasted and coarsely chopped
3 to 4 T. cilantro chiffonade
about 3 T. olive oil


Place the lemon juice in a small bowl and add the garlic.  Stir to distribute the garlic and set aside.  (This is an important step, whether you are using garlic...or making another carrot salad with minced shallot.  Allowing the smashed/minced garlic—or shallot—to macerate for a bit in the acid will soften its harshness considerably.)


Coarsely grate the carrots using the large holes of a box grater or the grating disc of your food processer (see note). Put the carrots in a large bowl, sprinkle with the salt, and toss. Add the coriander and cayenne and toss.  Pour the lemon-garlic mixture over all.  Toss well and let soften a bit (20 to 30 minutes).


Add enough olive oil to coat and fold in the pistachios and cilantro.  Taste and adjust the seasoning with lemon juice, salt, black pepper and cayenne.  If the carrots are not as sweet as you would like, add a pinch of sugar or drizzle of honey.  Cover and set aside at cool room temperature for up to several hours, or refrigerate and then return to room temperature to serve.  The salad keeps, well covered and in the refrigerator for several days. 

(Recipe adapted from Buvette, by Jody Williams)


Note:  I recently read an article in the premier issue of Christopher Kimball's Milk Street that explained how grating actually enhances the sweetness of the carrots.  Since grating ruptures more of the carrot's cells, more natural sugars are released into the salad.  You will find French Carrot Salads that feature julienned carrots...and these are delicious too...but if you want to enhance the sweetness of the carrot, grating is the way to go.  Just make sure you grate them coarsely or you will have soggy carrot pulp instead of nice strands of crisp carrot.  


Thursday, February 16, 2017

Italian Ricotta Cookies

During the summer months, as each local crop hits its stride and begins to fill the market stalls to overflowing, I am never surprised when consecutive blog posts seem to be variations on a theme (corn....  tomatoes....  summer squash....  etc.).  I don't expect this kind of thing to happen in the dead of winter.  But so far this year, that's exactly what seems to be happening...although not with fresh produce....  Last month turned out to be the month of Aidells Roasted Garlic & Gruyère Chicken Sausage.  This month looks to be the month of Ricotta cheese.  After today,  I will be two for two this month.  First gnocchi, and today....cookies.  


It was just a year ago when I first became acquainted with the soft ricotta cookies I'm sharing today.  This is surprising.  They are without a doubt the kind of thing I should have grown up on.  They look just like something that would come out of a grandmother's kitchen (I ate lots of soft, frosted, drop cookies at my maternal grandmother's house).  But more than that, they are apparently a traditional Italian-American baked good....and my home town has a large population of people with Italian-American roots.  I'm certain many of the family owned bakeries around town would have sold their own versions of this cookie.  Since I've always been a bit of a Cookie Monster, I don't know how I missed them. 

One of the things that you will notice about these cookies is that they are decidedly unprofessional and homey in appearance.  (You can correct this a bit...making them more uniform by using a cookie scoop...or making them perfectly round by chilling the dough and rolling it into smooth balls before baking—but even then, they are not a particularly neat or precise cookie....)  You might even be tempted to bypass this cookie for a more beautiful one.  But I can assure you, if you did this you would be missing out.  Soft, fluffy and tender—and topped with a drippy icing (sort of a cross between a simple American-style buttercream and a traditional cookie glaze)—they are more like little miniature cakes than cookies.  And they have an addictive vanilla-y and almond-y flavor.  It is difficult to stop eating at one...or two....  


Recipes for this cookie can be found all over the web, and they don’t really vary too much from one to the next.  I am passing along the one I like best.  I have adapted it slightly in order to suit my preference—the first bakery version I tried was fragrant with almond, so I have omitted the orange zest and added almond extract to the cookie and the icing.  If you look around a bit, you might find a version that appeals to you more.  Maybe it would be a good idea to sample more than one variation—to compare and contrast.  If you have never had one, I think you will find that you will want to become better acquainted with this tender and delicious little cookie as soon as possible.


Italian Ricotta Cookies

4 1/2 c. (500 g.) all purpose flour
1 t. baking powder
1 t. baking soda
1 t. salt
1/2 lb.unsalted butter, softened to room temperature
2 c. (400 g.) sugar
2 eggs
1 t. vanilla extract
1/2 t. almond extract
15 oz. full-fat Ricotta cheese (drained if very wet)


8 T. (4 oz.) unsalted butter, melted
4 c. (1 lb.) powdered sugar
6 T. (87 g) heavy cream
2 t. vanilla extract
1 t. almond extract

In a medium bowl, whisk together flour with baking powder, baking soda and salt.  Set aside.

In the bowl of an electric mixer, briefly cream together butter and sugar until smooth.  Add the eggs one and a time, beating until fully incorporated and scraping down the sides.  Add the vanilla and almond extracts and blend in.  Add Ricotta cheese and mix until smooth and fully incorporated (the mixture will probably look curdled).


Add the flour mixture and mix on low speed until the ingredients come together to make a soft dough.  Chill the dough for an hour or two. 

Drop the dough (see note) onto a parchment-lined baking sheet leaving at least 2 inches between the mounds of dough.  


Bake in a preheated 350-degree oven for 10 to 14 minutes (this will depend on size of cookies and your oven so keep an eye on them). Cookies will just be started to get lightly golden around the bottom edges. If you press them lightly they will feel tender, but they will spring back.  Be careful not to over bake—you want them to remain soft and cake-y.
.
Slide the parchment off the baking sheet and onto a rack. Repeat with all of the dough. 

While the cookies are cooling, make the glaze:  Mix together melted butter, powdered sugar, heavy cream, and extracts in a bowl until smooth and no lumps remain. Add additional splashes of milk or cream if you want a thinner glaze.  You don't want it to be so thick that it will tear the cookies...but also not so thin that it runs off of the cookies. 


When the cookies are completely cool, spread with the glaze and add colored sprinkles of your choosing.  Allow the glaze to set before storing air tight (separate the layers of cookies with parchment or waxed paper). 

Note:  You may make these cookies in the traditional manner of drop cookies by simply dropping mounds of dough from a spoon onto the baking sheets...or you may use a cookies scoop.  I like to use a scant half tablespoon sized scoop (about 20 grams of dough)...but they are traditionally made larger.  It doesn't really matter what size you make them, as long as they are all the same size (so they will bake evenly).  Depending on the size you make them, you will get 4 to 7 dozen cookies.

(Recipe adapted from the blog Wishes & Dishes)


Tuesday, February 7, 2017

Ricotta Gnocchi

A couple of years ago I posted a recipe for Ravioli Nudi (sometimes called Gnudi or Spinach & Ricotta Gnocchi).  As delicious as they are, they are not something that I would typically be inclined to make on short notice...  Making them is a bit of a project and they are special occasion fare (at least in my world they are...perhaps an Italian might feel differently). 

Plain ricotta gnocchi (a close cousin of ravioli nudi) are another matter.  As long as you remember to drain the ricotta 12 to 24 hours ahead of time, these delicious little dumplings can come together very quickly.  If you have never made gnocchi of any kind (varieties abound), these would be a great place to start.


As with the gnudi, the goal when making the dough for the ricotta gnocchi is to add as little flour as is necessary to make a dough that can be handled.  If your main ingredient (greens... or cheese....) is wet, you will need to add more flour to make this possible.  The more flour you add, the denser and heavier the gnocchi will be (not what you want).  Hence, the necessity of thoroughly drying the greens (for the gnudi) and draining the ricotta of excess whey (for both the gnudi and the ricotta gnocchi). 

The other main ingredient in the gnocchi is egg.  The egg proteins coagulate during the cooking process and basically hold the gnocchi together.  Not enough egg and the gnocchi will disintegrate in the water.  Too much egg and the gnocchi will be kind of firm and a bit rubbery.  One whole egg is about the right amount to bind a pound of drained ricotta.  Since I prefer the texture of gnocchi made with a higher percentage of yolks, I follow Nate Appleman's (of A16 in San Francisco) lead of using one yolk and half an egg, which is about equivalent to the weight of a whole egg.  This arrangement provides just the right amount of puff (from the small amount of white) without any rubbery effect.  (It also leaves half of an egg available for repairing the dough if your tester gnocchi disintegrates in the water.)

As long as you remember that the idea is to make fluffy pillows of well seasoned ricotta—and that the flour and egg are just structural background players—you should have good success with your gnocchi.  Simply season the cheese (salt, Parmesan, a little olive oil), beat in the egg and then work in the flour with brief, deft movements.  Overworking will create tough dumplings. 

Forming the ricotta gnocchi is also comparatively easy.  Just divide the dough into manageable lumps, flour the work surface very lightly, roll into even (about 1/2-inch in diameter) ropes and cut cross-wise into uniform (a scant 1-inch) lengths.  You can stop at this point and you will have ricotta gnocchi.  Because I have been making potato gnocchi for many years (I'm not sure why I have never written a post...)—and I love the look of the grooves and indentations (not to mention the way they hold the sauce) of traditional potato gnocchi—I go one step further and roll the little cylinders of dough off the tines of a fork.  I have given instruction for how to do this in the recipe, but please don't feel like you are not making true ricotta gnocchi if you don't execute this extra step.


Ricotta gnocchi are very versatile and may be sauced in numerous ways.  I am including a recipe for a rich ragout of butternut squash and mushrooms (similar to one I posted for pasta a few years ago)—but this sauce is actually sort of complex as far as sauces for gnocchi go.  Most of the time they are sauced simply:   A basic tomato sauce...   or a light cream sauce...  or an herbaceous pesto of some kind...   or nothing but butter and Parmesan.   Any simple pasta sauce will work well.  They can also be floated in a richly flavored clear broth ("in brodo")...  alone, or with a few fresh vegetables.  And like other styles of gnocchi, they are excellent when cooked, cooled and given a quick sauté in a bit of butter.  No matter how you sauce them, I think you will find them to be delicious.


Ricotta Gnocchi


1 lb. drained (see note) whole milk ricotta
2 T. olive oil, plus more for cooking
3/4 t. kosher salt
1 oz. finely grated Parmesan
1 egg, beaten
1 egg yolk
1 c. all-purpose flour (4 ounces)
Semolina flour


Place the ricotta in a bowl with the olive oil and salt.  Beat until smooth (some ricotta has prominent curds and you want the ricotta to be smooth) and starting to get fluffy.  Add the Parmesan and beat in.  Beat in half of the egg and the yolk (save the remaining half egg). 


Place half of the flour onto a clean counter and turn the ricotta mixture out onto the flour.  Sprinkle half of the remaining flour over the mound of ricotta.  With a bench scraper, cut the flour into the ricotta mixture just until it has disappeared and the dough begins to come together, adding as much of the remaining flour as is necessary to form a soft, slightly springy dough.  The dough may be tacky to the touch, but it shouldn't stick to your fingers.

Test the dough for seasoning and structure by pinching off a 1-inch by 1/2-inch piece and dropping it into a pan of simmering salted water and cooking for a minute after it floats to the surface.  If it falls apart, work in some of the reserved egg and if necessary more flour and test again.  Taste and correct the salt if necessary. 

Cut the finished dough into six pieces.  On a lightly floured surface, roll each piece out into a long rope that is about a half inch in diameter and about 20 inches long. 


Dust the work surface and the ropes with semolina and using a bench scraper, cut the ropes crosswise into 1 inch pieces.  To finish shaping, place one of the cut surfaces of the gnocchi on a semolina-dusted fork and with your thumb (floured if necessary) press the other cut surface down and away from yourself, rolling the gnocchi off of the fork as you do.  


You should end up with a dumpling that has the marks of the fork on one side and a dimple from your thumb on the other.  Place the gnocchi onto a semolina dusted sheet pan as you form them.  The gnocchi may be held at a cool room temperature or uncovered in the refrigerator, for a few hours.  They may also be frozen at this point (see notes).

To cook the gnocchi, bring a large pot of well-salted water to a simmer (a hard boil will encourage the gnocchi to disintegrate).  Add the gnocchi.  Carefully stir or gently slide the pan back and forth to make sure the gnocchi aren't sticking to the bottom.  Monitor the pot to make sure a gentle simmer is maintained.  The gnocchi will begin to bob to the surface.  Continue to cook for 1 minute after they float to the surface.  (They are done when they feel slightly springyrather than squishyto the touch.)   Lift the gnocchi out of the water with a mesh strainer and place in a wide dish with a few tablespoons of olive oil.  Toss to coat.  


Serve immediately dressed with your favorite sauce or set aside for up to an hour.  Reheat in the sauce the gnocchi will be served in. 

Makes about 120 gnocchi (possibly more, depending on how thick you make your ropes and how wide you make your cuts), serving 4 to 6.

(Recipe adapted from A16 Food+Wine, by Nate Appleman & Shelley Lindgren)

Notes:
  • Most commercially available ricotta is wet. You will probably be able to pour some of the water off when you open the container. Even if it looks firm and dry, I always place it in a paper towel-lined sieve and suspend it over a bowl to let it drain overnight (in the fridge). Often there will be no liquid in the bowl, but the paper towel will be saturated. If you don't drain the ricotta, you may need to add more flour to the dough, which can make the gnocchi stodgy and tough. 
  • To freeze the gnocchi, place them in the freezer in a single layer on a semolina dusted sheet pan. When the gnocchi are hard, transfer them to a freezer bag. To cook, spread the frozen gnocchi on a sheet pan (with some of the semolina from the bag, or fresh semolina) and let them sit uncovered at room temperature to thaw. This should take about 15 to 20 minutes. Cook as for fresh. 
  • Recipe is easily halved or multiplied. 
  • If you do not have a large stock pot, poach the gnocchi in two batches.

Tossed with browned butter, lemon and broccoli....

Ricotta Gnocchi with Mushrooms, Butternut Squash & Herbs

2 T. Olive oil
5 to 6 T. unsalted butter, cut into 1/2 T. slices and divided
12 oz. crimini mushrooms, trimmed and sliced 1/4-inch thick
salt & freshly ground pepper
3 cups diced (1/4- to 1/3-inch) butternut squash (about 14 oz. net weight)
1 T. chopped fresh thyme
1/2 T. minced fresh rosemary or 1 T. chiffonade fresh sage
2 large shallots (about 4 oz.), minced (to make 2/3 c.)
3/4 c. chicken stock or low-salt canned broth
2 T. chopped Italian parsley
1 recipe ricotta gnocchi, cooked as directed and lightly filmed with olive oil


Warm the olive oil in a large sauté pan (large enough to hold the squash in a snug single layer) set over medium high to high heat. When the oil is hot (you should see a thin wisp of smoke), swirl in a tablespoon of butter.  When it foams, add the mushrooms.  Toss to coat the mushrooms in the fat and then leave the pan alone to allow the mushrooms to begin to brown.  When the edges are beginning to brown, give the mushrooms a toss/stir, season with a good pinch of salt and scatter half of the thyme and rosemary over all.  Continue to sauté, stirring occasionally and regulating the heat as necessary to maintain a very active sizzle without allowing the mushrooms to scorch, until the mushrooms are browned and tender—about 4 to 5 minutes total.  If the mushrooms seem dry at any point, add another half tablespoon or so of butter. 

Transfer the mushrooms to a plate and return the pan to the heat.  Add three tablespoons of butter to the pan.  When it melts and foams, add the squash along with a pinch of salt and the remaining thyme and rosemary.  Sauté, regulating the heat to maintain the activity in the pan and cooking until the squash is beginning to caramelize nicely—about 5 to 7 minutes.  Add another tablespoon of butter to the pan.  When it is melted, add the shallots, along with a pinch of salt.  When the shallots have softened (about 3 minutes), return the mushrooms to the pan and add the stock.     The stock should come up almost to the top of the vegetables—add more if the vegetables aren't almost covered.  Taste and season with salt and pepper. 


Cook at a bare simmer (uncovered and stirring every now and then) until the squash is just tender—about 20 minutes after adding the stock. As the liquid reduces, add hot water and continue to cook.  You should maintain a level of liquid in the pan that comes 2/3 to 3/4 of the way up the vegetables. 

When the squash is tender, add the gnocchi and parsley.  Toss to coat. If the gnocchi have cooled since cooking, gently heat through.  


Taste and correct the seasoning.  If the sauce seems tight, add more warm water...or you may use the water the gnocchi were cooked in (taking into consideration that this water is well salted).  Divide the gnocchi and sauce among warm plates or shallow pasta bowls and serve immediately.  Serves 4 to 5.


 Printable Version