Showing posts with label Onions. Show all posts

Wednesday, January 25, 2023

Creamy Gingered Carrot Soup

As is my habit during the early days of the new year, I have been making and enjoying lots of soup.  It really is the perfect food for January.  Not only is it soothing and warm on a dark, cold…and more often than not, wet…day—it is just the thing after the dietary excesses of the holidays.
 

Not surprisingly, this is also the time of year when I have traditionally taught soup classes.  Most of the recipes that were part of my class rotation have already appeared on my blog.  The carrot and ginger soup I’m posting today was always a class favorite.  I’m not sure why I never posted the recipe here.  It might be because the presence of fresh ginger…and lime…and cilantro…put it just outside the reaches of my normal home pantry.  But I have had fresh ginger on hand quite a bit in recent weeks for various things I’ve been working on…and since I always have carrots (and I’ve been in the mood for soup)…the other day I thought of this soup.  I was so glad I did.  The warm color—and tummy soothing ginger—make it a great post holiday/mid-winter soup.
 
I’m sure that in previous posts for puréed soups I have had a lot to say about the process.  But since it’s been a while since I wrote one of those posts, I’ll just repeat a few essentials here:
 
First…make sure you aren’t shortcutting the initial cooking of the onions and carrots in the fat.  This process allows the flavors of these vegetables to infuse the fats and give a deeper flavor to the final soup.  And along those lines, make sure your vegetables are fully cooked before you purée the soup, or you’ll have a coarse purée.  (The cooked vegetables should be tender to the tip of a knife—and you should be able to mash them against a plate with a fork or spoon).

Also, when adding liquid to a soup that is to be puréed, always hold back some—adding just what is necessary to cover the vegetables well and cook them through.  If too much liquid is added at this early stage, the final soup might be way too thin (and I say this as someone who prefers thinner soups).  You can always (and likely will) add more liquid while you are puréeing the soup.  I like the final consistency of my puréed soups to be like thick cream—it shouldn’t mound in the bowl or on the spoon (and should be “sippable”).
 
If you are using a traditional blender, don’t fill it too full with the hot soup (2/3 full is about right).  The pressure build up when you turn on the blender will push the cap up and off and if the blender is too full you’ll have a mess—and possibly a burn. 
 
Finally, I always pass my puréed soups through a fine meshed sieve.  I think it gives the most suave and velvety texture.  But I understand that some find this step to be a bit persnickety…and it also adds to the washing up.  Be assured that the soup will taste just as good without straining out the lingering fibrous bits.  Whether you are straining the soup or not though, take the time to run the blender until the soup is super smooth (you’ll be glad you did!). 
 

If you make this soup, be aware that its flavors are an interplay of strong and subtle…and that they change a bit over time.  On the day it is made, the ginger flavor is strong…and the soup has a warm spiciness.  The next day, the ginger flavor will be much more subtle.   If you like a stronger ginger flavor, simply add a grating of fresh ginger when you are reheating the soup on subsequent days.  If you want to eat it the day you make it…and you don’t like the strong flavor of the ginger, just add the ginger with the stock—its flavor will soften under the longer cooking time.  As far as the lime goes, it is added to balance not only the sweetness of the carrots, but also the honey.  It should not really be seen as the addition of lime flavor (although it will add a little)—but rather as a way to lift and brighten the flavors of the whole soup.  If you want a stronger lime flavor, add a grating of zest to the final soup (or as a garnish). 
 
As I type this post today, I have a lovely view of snow covered trees.  For the most part, people in my area are staying in after last night’s snowfall if they can.  It is just the right kind of day for this soup.  And even if you don’t typically keep fresh ginger in your home pantry, you can still make a carrot soup (without a run to the store) because this soup also happens to be a great template for a basic carrot soup.  Simply omit the honey, lime & ginger and you will have a delicious soup, the makings of which will already be in most home pantries. 


Gingered Carrot Soup
 
2 T. olive oil
1 large onion (8 to 9 oz.), thinly sliced
1 T. unsalted butter
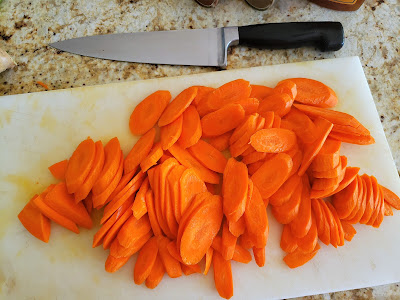
1 lb. carrots, peeled and thinly sliced
1 T. rice (Basmati, Jasmine, Arborio, etc.)
1/2  t. ground coriander
1 t. paprika
1 t. cumin
1 T. honey
3 to 4 c. chicken or vegetable stock
2 T. (18 g.) minced fresh ginger (or more to taste)
1/4 c. heavy cream
1 T. freshly squeezed lime juice (or to taste)
Salt & Pepper
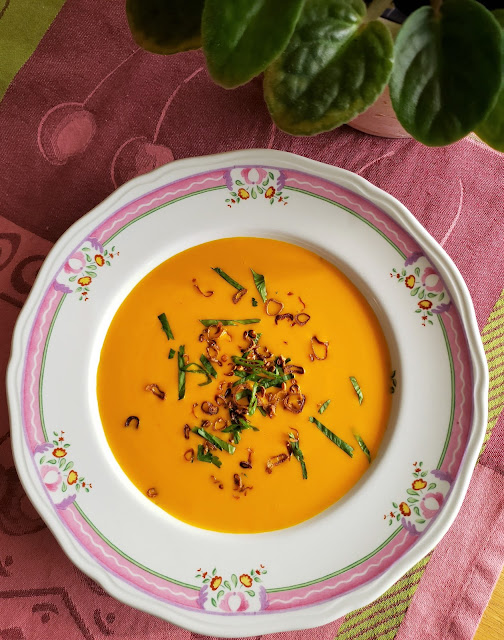
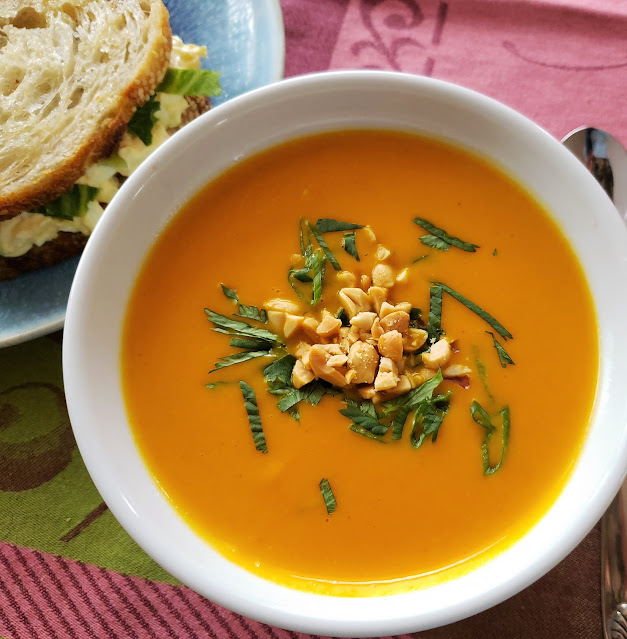
Possible garnishes (alone, or in a combination that pleases you): Fresh Cilantro chiffonade, thinly sliced green onion tops, chopped peanuts, toasted pepitas, lime zest, olive oil, crispy fried shallots
 

In a medium stockpot or large saucepan, heat the olive oil over medium heat.  Add the onion along with a generous pinch of salt and sweat, covered, until the onions are soft and translucent—about 10 to 15 minutes.  


Add the butter and melt.  


Add the carrots another good pinch of salt and cook for 5 to 10 minutes—until carrots are beginning to soften.  


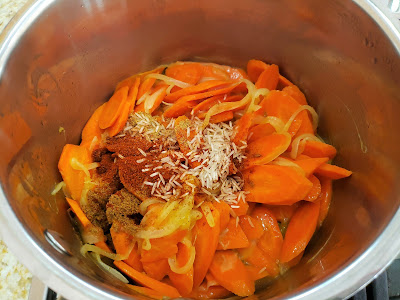
Add the spices and the rice and cook another 2 to 3 minutes to toast the spices and rice.
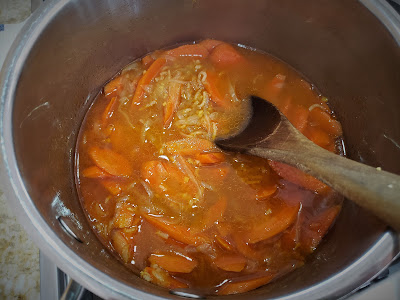
  Add the honey, stirring and cooking until the vegetables are coated and everything is sizzling nicely.  Add 3 cups of stock (or whatever you need to cover all the vegetables so that they are moving freely—reserve the remaining stock to add as needed when pureeing the soup).  Bring the soup to a simmer, cover and cook until the carrots are very soft—about 20 to 25 minutes, adding the ginger during the last 5 minutes of cooking.  


Purée the soup (using a traditional blender or an immersion blender), adding more stock as is necessary to produce a smooth, thin purée.  Pass through a fine meshed strainer if you like to achieve an even more suave and velvety texture.
 
Return the soup to the pot and add the cream.  Heat through.  Remove from the heat and add the lime juice to taste.  You may also add more freshly grated ginger if you like.  Correct the seasoning and serve immediately, garnished as you please.  Makes a scant 6 cups.


Wednesday, April 12, 2017

Tarte Flambée (Alsatian Bacon & Onion Tart)

Every time I teach the class in my rotation that includes Tarte Flambée, I tell myself that I really do need to share the recipe on my blog.  But since I usually teach this class in late spring, my attention is always quickly diverted to the wonderful spring vegetables and fruits that are filling the markets ...and I forget.... 


But this year, even though the produce departments are brimming with artichokes, peas of all kinds, asparagus, greens, strawberries and rhubarb, I have been too busy to think very much about anything other than work.  Of course work for me means I'm cooking...but I haven't had much time to record what I'm doing...much less take a lot of pictures (I've just been racing to get dinner on the table before I move on to the next thing....).  Fortunately, since I have always wanted to do a post on Tarte Flambée, I already have pictures....  So it seems that the moment for featuring this classic from France has finally arrived.

If you have never encountered Tarte Flambée, it is somewhat like a white pizza...with bacon.  In fact, it is often referred to as the pizza of Alsace.  I have always heard that the origins of this tart lie in the village bread ovens of Alsace.  Once a week, when the ovens were fired up for bake day, the local workers and farmers would take advantage of the intense heat of the freshly fired oven—which would have still been too hot to bake bread—to make a quick lunch.  The ingredients—a scrap of yeast dough, fresh cheese, bacon and onions—would have been readily available, so it would have been the simple, sensible and delicious thing to do. 


I'm not sure where and when I first encountered this delicious tart.  I know that I had it once many years ago at a home in Normandy.  I was totally enamored by it, but unfortunately didn't get the recipe.  I also remember watching Andre Soltner make his restaurant version (on puff pastry instead of a simple yeast dough) many years ago.  The video for this version is still available on line and is well worth watching.    When I make it now, it is Soltner's topping that I use on a traditional yeast dough crust.

Apparently in its original guise the bacon and onions would have been placed raw onto the cheese smeared round of dough.  In the wood fired oven, the flames—attracted to the rendering fat—would have reached up and over the tart, singeing the edges of the tart and the tips of the bacon and onions.  The name—Tarte Flambée (in French) or Flammekueche (in the dialect of Alsace)—is a reference to this:  the tart is 'cooked in the flames'.  In most home settings, Soltner's method of rendering the bacon a bit first is a great idea since it avoids a flood of bacon grease in the oven.


Not surprisingly, there are many, many recipes for Tarte Flambée available on line (it is one of the most famous dishes from Alsace).  If you have never tried it, I hope you will give my recipe—or one of the others—a try.  I am of course partial to mine, but most recipes are similar and I would only encourage you to avoid recipes that use a heavier hand with the topping.  As delicious as it is, adding more doesn't make it more delicious, it just makes it soggy and greasy.  There are some great variations out there—a scattering of Gruyère for a finishing touch...a few sautéed mushrooms added to the mix...even a dessert version with apples and cinnamon sugar (instead of bacon and onions)....  But I admit... I have never tried one of these.  Maybe someday.  For now, I think it's perfectly delicious in its original (and simplest) form.


 Tarte Flambée
(Alsatian Bacon & Onion Tart)

For the Crust:
3/4 c. warm water (105° to 115°)
1 1/2 t. active dry yeast
2 to 2 1/2 cups all-purpose flour
1/2 t. Salt
2 T. unsalted butter, softened

Combine the water, yeast, and 1 1/4 cups of the flour in a large bowl.  Whisk until smooth.  Add the butter and salt and beat until the butter is incorporated.  Begin stirring in the remaining flour, adding just enough flour to form a soft dough that holds its shape.  Sprinkle some of the remaining flour on a smooth surface.  Scrape the dough out of the bowl and sprinkle with a bit more flour.  Knead the dough, adding just enough flour to keep the dough from sticking, until the dough is smooth and springs back when pressed lightly with a finger—about 10 minutes.  Transfer the dough to a lightly buttered bowl and cover the bowl with plastic wrap.  Let the dough rise until it has doubled in size—about 1 hour. 

Note:  Originally, Tarte Flambée was a snack made with extra dough in the community bread baking oven while the oven was still too hot to bake bread.  Any simple dough will work.  Use a half pound of dough per tart.

Building and Baking the Tarte:
6 oz. thick-sliced bacon, cut crosswise into 1/2" wide strips
1 medium white onion, very thinly sliced (about 9 to 10 oz.)—see note
1/2 c. cottage cheese
1/2 c. crème fraîche*
1 T. vegetable oil
2 t. flour
Salt & Pepper


 Preheat oven to 500°F.  If you have a baking stone, place it in the oven while the oven is heating.

In a large sauté pan, set over medium low heat, cook the bacon until most of the fat is rendered and the bacon is beginning to color—it does not need to be crisp.  


Drain off the excess fat and increase the heat to medium. 


Add the onions and sweat until just wilted—they should still have a bit of crunch.  If you removed too much of the bacon fat...or the onions look dry, you may add back some of the bacon fat that you poured off.  


Remove from the heat and season generously with freshly ground black pepper.  Set aside.


 While the bacon and onions cook, place the cottage cheese in the food processor and process until smooth.  Add the crème fraîche, oil & flour and process in.  Season to taste with salt and pepper and set aside. 


Punch down the dough and divide it in half and form each half into a ball.  Place the balls on a flour dusted counter and cover the balls of dough with a towel and let rest for 10 to 15 minutes.  Working with one ball of dough at a time, stretch or roll the dough out (with lightly floured hands or on a lightly floured surface) to make a thin circle that is about 10-inches across. Transfer the dough to a semolina dusted peel or pizza pan/baking sheet.   


Spread half of the crème fraîche mixture over the crust, leaving a half-inch border. Scatter half of the onion and bacon mixture over the cream.  


If using a pizza pan or baking sheet, place the tart in the pan on a pre-heated pizza stone in a pre-heated 500° oven.  To insure a crisp crust, slide the pizza off of the pan and directly onto the pizza stone as soon as the crust is set (after 4 or 5 minutes). If using a peel, slide the pizza directly onto the preheated baking stone. 

Bake the tart until the edge of the crust is crisp and brown, the cream is bubbling and golden and some of the tips of the onions are beginning to caramelize, about 8 to 15 minutes (time depends greatly on your oven).  Quickly build and bake the second tart while you enjoy the first.  If you happen to have two stones, build and bake both the tarts at the same time.  Makes 2 tarts, serving 8 as a first course or 4 as an entrée.

Notes:
  • I have no recollection now of where I heard this, but I remember being told once that the white onion—which is sweeter than a yellow onion—is the best choice for this tart. Since it makes a delicious tart, I have never been inclined to make it with anything else.
  • Sold at most supermarkets. If unavailable, heat 1 cup whipping cream to lukewarm (85° F). Remove from heat and mix in 2 T. buttermilk. Cover and let stand in warm, draft-free area until slightly thickened, 24 to 48 hours, depending on temperature of room. Refrigerate until ready to use.
(Topping adapted from Andre Soltner)



Sunday, March 5, 2017

Farro with Butternut Squash, Kale & Pistachios

Anyone who cooks on a regular basis will tell you they feel like they get into culinary ruts.  The very notion of a rut implies somehow being stuck...or maybe being boring.  But the fact that we gravitate toward the familiar can be a good thing.  The pull of particular foods/ingredients...  favored styles or food cultures...   certain cookbooks/food magazines or blogs...   or a group of chefs/cooks whose recipes cause you stop and take a second look, is often the source of much deliciousness.  Recently, every single one of these bells went off for me when I saw Melissa Clark's recipe for Farro with Roasted Squash on the New York Times Cooking site. 


No matter what Clark had chosen to do with this set of ingredients, I'm pretty sure I would have liked the result....  I appreciate her style and her approach to food.  And I love farro and winter squash.  All of this together made me stop and look.  What inspired me to try my own spin on her recipe was the liquid she used to cook her farro:  apple cider.  I don't know why using cider in this way has never occurred to me (it happens to be a favored winter ingredient...I pretty much always have some in the fridge during the fall and winter months...).  What a great idea.  Cider adds subtle flavor, sweetness and acidity....and compliments the squash perfectly.  I love apples with winter squash. 

As usual, I departed from the original recipe in a couple of ways.  Instead of adding sugar and spices to the squash, I just tossed it with olive oil and salt and pepper.  Then, I added a generous quantity of caramelized red onions and some chopped pistachios to the finished farro.  Both of these added the subtle sweetness I had removed—and as a bonus, the pistachios added some nice textural interest. 


I also added some wilted Tuscan kale to the finished pilaf.  I think a scattering of arugula or mint instead (as in the original recipe) would have been nice, but one of my most favored culinary ruts is wilted greens with grains.... 

Finally, I served my pilaf with a dollop of labneh.  I tried the finished dish with the Feta crumbles—and this was good (goat cheese would be good too)—but found that I preferred the tangy contrast of yogurt to the salty contrast of the cheese.  If you are in the mood for something more salty, Feta might be the way to go.


It is worth observing that while the reason I originally stopped to examine Clark's recipe might be my own well-worn culinary path, that doesn't mean the resulting dish was boring in the slightest.  I found it to be totally delicious and satisfying.  As a matter of fact, it's the kind of thing I could happily cook and eat every day....


Farro with Winter Squash, Tuscan Kale & Pistachios

1 large or 2 small bunches (8 to 10 oz. total) Tuscan kale, stemmed (discard stems) and leaves cut cross-wise into 1-inch strips
About 4 T. olive oil, divided
1 medium to large red onion (8 to 10 oz.), halved and thinly sliced cross-wise
Salt & pepper, to taste
1/8 t. hot pepper flakes, or more, to taste
2 cloves garlic, minced
2 lb. Butternut squash, peeled, seeded halved and cut into 1/2-inch thick slices (see note)
1 c. pearled or semi-pearled farro
1 c. apple cider
1 T. to 1 1/2 T. cider vinegar, to taste
1/4 c. pistachios, toasted and coarsely chopped
3 oz. Labneh, yogurt or Feta (in large chunks)
Extra virgin olive oil for drizzling


Bring a large pot of salted water to the boil.  Add the kale and cook until just tender—about 5 to 7 minutes.  Drain the kale, reserving 1 1/2 cups of the blanching liquid.  Spread the kale on a baking sheet—or just spread out in a wide colander—and let cool. 

Warm 1 1/2 T. of olive oil in a wide sauté pan set over moderate heat.  Add the onion along with a good pinch of salt and the pepper flakes.  Cook until the onions are tender and slightly caramelized. If at any time the onions seem dry, add a bit more oil.  Add garlic and cook until fragrant. Add the kale and stir to coat in the oil and onions.  Cook over low heat until any water clinging to the kale has evaporated.  Set aside and keep warm.


Meanwhile, in a large bowl, toss the squash with a couple tablespoons of olive oil and salt & pepper to taste.  Spread in a single layer on a baking sheet and transfer to a 450° oven.  Roast until tender and caramelized—about 25 to 30 minutes, flipping the squash over after about 15 to 20 minutes (wait to turn until the squash has begun to become golden on the bottom).  Keep warm until ready to assemble the pilaf.

While the squash, onions and kale cook, cook the farro.  Place the cider and reserved kale cooking liquid in a saucepan and check for salt.  Bring to a boil and add the farro.  Cover and reduce the heat to maintain a simmer.  Cook until the farro is tender (but still has texture)—about 25 to 30 minutes.  Drain the farro and transfer to a large bowl. Add the kale/caramelized onions along with a tablespoon of cider vinegar.  Taste and correct the seasoning with salt, pepper and vinegar.

To serve, spread half of the farro mixture on a large platter or individual serving plates.  Top with half of the squash and a scattering of pistachios.  Repeat this layering.  If using labneh or yogurt, serve with a dollop on the side or drizzle yogurt over the whole pilaf.  If using Feta or goat cheese, crumble the cheese over all.  Drizzle with olive oil and serve.  Serves 4. 

Note:  Cut the cavity portion of the squash into 1/2-inch wide wedges. Cut the halved "neck" portion cross-wise into 1/2-inch thick slices.  If you like, you can further cut these half circles in half—into "sticks" or quarters...as you prefer.  I like this dish best made with all cavity portions as I think these 'wedges' look best in the dish.  (I save the necks for a preparation that calls for a neat dice). 

(Adapted from New York Times Cooking)

Printable Version


Sunday, January 31, 2016

Quinoa and Winter Vegetable Soup

For an upcoming class on grains, I decided I wanted to teach a quinoa soup.  I tend to use quinoa only in salads and pilafs, but soup is a very traditional use of quinoa in its native Peru...and it is becoming more common here in the states if its presence in the blogosphere is any indication.  I thought it was time that I expanded my quinoa horizons a bit.


As I looked around at the kinds of soup people were making with quinoa, I found it varied from those that contained little more than quinoa (cooked in a simple broth) to soups with loads of vegetables, beans and greens in addition to the quinoa.  Inspired by one of these latter soups and a quinoa "chili" I found, I eventually decided to make a soup with a spiced tomato-y base, black beans and a short list of winter-y vegetables.   The balance of flavors in this soup is remarkable.  Tangy tomato, sweet spices (coriander and paprika) and vegetables (carrots, sweet potatoes and squash are all quite sweet), and slightly bitter and earthy cumin and quinoa all make for a soup of astonishing complexity and depth.  I couldn't get over how much I liked it. 

 
I was also surprised by my reaction to the way the quinoa tends to swell even more as it continues to absorb broth during storage.  Many grains and starches tend to do this as they sit in a liquid.  Sometimes this results in unpleasantness (think about bloated pasta in minestrone)...and other times in an even better product (as in beans...which become plumper and creamier as they sit).  When I looked at my leftovers the day after I first prepared the soup, I was dismayed to see how swollen the quinoa had become.  I expected the soup to be gloppy and texture-less...and I anticipated that I would have to alter my recipe so that the quinoa was cooked separately and then added in fresh to each portion of reheated soup (which would have been a shame since cooking the quinoa in the soup adds wonderful flavor to the broth).   But I was wrong.  The soup was not at all gloppy. It still had a delightfully broth-y texture (after adding a bit of water upon reheat)...and of course, as with most soups, the flavor was even better after sitting over night.

When I first made this soup, I don't think my plan was for a soup that was almost entirely a study in oranges and reds, but that's what I ended up with.  And as I sat down to dinner on that first night...and then lunches over the next few days...I have to say that the colors made for meals that were a bright and happy spot in the midst of a spate of cold and gray winter days. 

a warm bowl of leftovers for lunch...

Quinoa & Winter Vegetable Soup

1/4 c. olive oil
1 medium onion (about 7 oz.), cut in 1/3-inch dice (to make about 1 1/3 cups)
2 to 3 carrots (about 1/2 lb.), trimmed and peeled and cut in a 1/3-inch dice (to make about 1 1/3  cups)
2 ribs celery, trimmed and cut in 1/3-inch dice (about 1/2 to 2/3 c.)
3 cloves garlic, minced
1 t. cumin
1/2 t. paprika
1/2 t. coriander
1 medium (about 8 oz.) sweet potato, peeled and cut in 1/3-inch dice (to make 1 1/2 to 1 2/3 cup)
1 8 oz. chunk of butternut squash, peeled, seeded and cut in 1/3-inch dice (to make 1 1/2 to 1 2/3 cup)
1 14 oz. can (or half a 28-oz. can) peeled plum tomatoes, pulsed in the food processor to yield rough chop
1 quart chicken or vegetable stock
1 14 oz. can black beans, drained and rinsed
1/2 cup white quinoa, well rinsed and drained
Boiling water (or more hot stock), as necessary to achieve desired consistency


Warm the olive oil in a soup pot set over moderate heat.  Add the onion, carrot and celery along with a good pinch of salt.  Sweat until the onion is translucent and tender and the carrot and celery are just tender....about 15 minutes.

Add the garlic and spices and continue to cook until fragrant and sizzling.  Add the squash and sweet potato, along with a good pinch of salt.  Continue to cook for about five minutes, stirring regularly to make sure the vegetables are well coated with the seasonings and are not sticking to the bottom of the pan. 


Add the tomatoes, stock, beans and quinoa.  Stir well and bring to a boil.  Check the seasoning again (adding salt as necessary). Cover the pot with a lid that is slightly ajar and reduce the heat to a simmer.  Cook until the vegetables are tender and the quinoa has unfurled its germ...about 15 to 20 minutes.  Correct the consistency with boiling water...or more hot stock...if the soup is too thick.  Let the soup stand for 5 minutes off the heat.  Check the consistency and seasoning again and serve.

Makes 2 to 2 1/2 quarts soup (or about 6 servings)

Notes:
  • The goal with the sweet potatoes and squash is to obtain 3 to 3 1/2 cups diced vegetables...if your sweet potato is small, use more squash...if it is large, use less squash. You could use all one or the other too...I just like the idea of the slight variation in color, texture and flavor.
  • If you prefer, you may use chickpeas instead of black beans.
  • The spices were measured with a slightly rounded spoon, rather than a level spoon.
  • The soup is delicious after the first day...but the quinoa will have absorbed more liquid. Be prepared to add a bit more water to the soup as it is reheating in order to obtain the consistency you prefer.
Printable Version


Sunday, July 26, 2015

Summer Simplicity


At a lunch with friends recently I was reminded of the beauty and fragility of that oh-so-desirable quality of simplicity.  The restaurant we ate at was by and large a disappointment.  I had looked forward to our visit there with great anticipation because of the buzz surrounding it—a restaurant featuring food touted as nose-to-tail, farm-to-table simple.  Unfortunately the food we were served was for the most part poorly executed...and other items I looked at on the menu seemed a bit ill-conceived—odd combinations of ingredients, too many things on the plate, etc.  All of this reminded me of what Mario calls the elusive nature of simplicity.  His definition of simplicity* is probably the best I have ever read: "pristine ingredients, combined sensibly and cooked properly." It sounds straightforward enough...but in practice it truly is difficult to achieve and to find.  Elusive indeed.  That day, the ingredients on our plates might have been pristine...but as is often the case, the way they had been combined and prepared hid their beauty from us. 


I am happy to say that all of our food was not so disappointing.  Our shared appetizer scored on all points.  It was nothing more than a spare platter of ripe heirloom tomatoes, a scattering of shaved raw summer squash and sweet red onion, some crusty baguette and a few fluffs of microgreens.  The whole platter was seasoned judiciously with crunchy sea salt and freshly ground black pepper and drizzled generously with olive oil and balsamic.  Everything was fresh, at its seasonal peak, combined in a complimentary way, handled minimally and seasoned to advantage—a perfect example of simplicity done right.  It was so good...  I could have licked the plate. 


The good news in all of this is that in the summer, if you shop at a farmers' market or are a member of a CSA, this kind of deliciousness is available to you at home every day.  Even if you just shop at your local grocery store, so many stores are now purchasing at least some of their produce from local sources, you will find that you have access to wonderful, peak of the season ingredients, throughout the growing season in your area.   I have made my own version of that wonderful platter at least three times since for lunch... doing so is just a matter of arranging the ingredients on the plate...and seasoning them well.  For this kind of dish, you don't even need to cook if you don't want to.


Every time I made this dish, I included almost all of the ingredients the restaurant used: beautiful, vine-ripened tomatoes, fresh summer squash, red onions, toasted bread (drizzled with olive oil), coarse salt & pepper, balsamic vinegar and olive oil. For a little extra crunch I added some toasted pine nuts (but they could be left off).  A couple of times—because corn is so delicious with both summer squash and tomatoes—I added a scattering of roasted corn (but raw would be delicious too).  And since each time I was making an entrée (rather than an appetizer), I included a bit of creamy buffalo mozzarella for more substance. 


You probably noticed I didn't mention the microgreens...which I never have...  Instead, I used arugula...for which I have a good local source.  But if you don't, a scattering of torn, fresh basil leaves would be pretty fine in place of the microgreens too.  The arugula is set off to great advantage by lemon, so to finish my platter of summer vegetables, I tossed a small fluff of arugula with a squeeze of lemon and a drizzle of olive oil and placed it on top.


I mentioned it earlier, but I want make sure I emphasize the role of the salt, pepper, balsamic and olive oil in this dish.  Do not skimp on these items.  The salt and the acidity of the vinegar will make the flavors of your pristine ingredients pop.  The vegetables might seem bland and uninteresting without them (one of the failings of the other items we had at the restaurant was lack of salt).  A nice flakey salt (Maldon's...or Fleur de sel...or even a simple, moderately coarse sea salt) will add even more interest since it will add a pleasant crunch.  Coarsely ground pepper will add a bit of spice and heat...and olive oil will add fruity flavor...and needed moisture.


The interplay of the flavors (tangy, nutty, sweet, hot and salty) and the textures (crunchy, crisp, juicy and creamy) of this dish are a delight to the palate and the senses.  It is a totally satisfying...and simple!...dish.  And since our weather has turned steamy and hot this past week, I have found it to be wonderfully refreshing too....just the thing for a light dinner....or a special lunch.


Of course, the idea of this platter—an artful arrangement of a thoughtful combination of peak of the season produce—can be transferred to all kinds of other ingredients.  Today as I was working on this post, when I took my lunch break, I assembled another platter—this one featuring fruit.  With slabs of fragrant, juicy cantaloupe as my foundation, I added blueberries, toasted pecans and chunks of sheep's milk Feta.  I seasoned it with salt, pepper, a generous squeeze of lime and drizzles of honey and olive oil.  Topped with a little olive oil-dressed arugula (a scattering of fresh mint would have been nice instead), it was another delicious example of the magic of summer simplicity—a well-seasoned mix of complimentary flavors and textures that was greater than the sum of its parts. 


Thursday, April 30, 2015

Soup for a Cool Spring Day…Minestra Verdissima


We are having one of the most beautiful Spring seasons in my recent memory.  There have been no late freezes to nip back the early blooming bulbs, trees and shrubs….and we haven’t had a lot of the unseasonably hot days that tend to force the cool season flower progression into warp speed.   Spring has been long, mild and delightful.  We have probably had what many people would consider too many cool, cloudy and damp days….but I don’t mind them at all.  They encourage all the lovely blooms to linger and they have a calm, quiet beauty that forces you to take time…and look …and absorb.  And they make the sunny days seem all the more lovely.


This past weekend we were cool enough that it was downright chilly.  As the day progressed I became hungry for a warming bowl of soup.  Since I had a batch of freshly made arugula pesto on hand, the soup that immediately came to mind was a Spring soup called Minestra Verdissima….or “a very green soup”.  Minestra Verdissima is a light minestrone made with all green Spring and early Summer vegetables.  Like minestrone it is finished with pesto…usually arugula or spinach pesto since these are both abundant in the Spring. 


Because I didn’t have all of the traditional ingredients on hand, I decided to improvise a little…using what I had on hand (going to the grocery store on a Sunday isn’t my idea of fun).  For the soup base, I used a bunch of the spring onions I had purchased at Saturday’s farmers market.  If I hadn’t had them, I could have used onion or, even better, leek.  Most recipes for Minestra Verdissima are finished with the addition of some cooked shell beans or rice or small pasta….or some combination thereof.  But instead of adding these at the end, I decided to follow Judy Roger’s method for a delicious asparagus and rice soup in her Zuni Café Cookbook: she cooks the rice in the water which ultimately becomes the soup’s broth.  And since I had some pink-eyed peas in my freezer (frozen during the height of the season last summer) I decided to add these along with the rice rather than adding the more traditional cooked dried beans at the end. 


Pink-eyed Peas from the market...last August.
I always purchase extra for the freezer...

For the remaining additions, I again simply used what I had:  Asparagus (from the market) and English peas (like the pink-eyed peas, socked away in my freezer last summer).  I chose again to follow Judy Roger’s lead and stew the asparagus and peas in a bit of fat (I used butter, but if I had had some pancetta, rendering it and cooking the vegetables in the rendered fat would have been a delicious way to go) before adding them to the soup when the pink-eyed peas and rice were done cooking. 


You could of course just add the raw vegetables to the soup during the last five to ten minutes of cooking, but I think you get a richer vegetable flavor if you cook the vegetables in some fat first.  (Don’t forget to rinse out the pan the asparagus and peas have been cooked in with some of the soup broth…you don’t want to lose any of the flavor.)

I imagine it is obvious, but I want to point out that this soup can be made with almost any combination of green vegetables that you have on hand:  Artichokes….fennel…green beans….zucchini….broccoli…and of course, asparagus and English peas.  Simply cut your chosen vegetable in uniform (smallish) pieces and add them at an appropriate moment—stewing the artichokes and fennel for perhaps 20 minutes or so (until almost tender) before adding the other, more yielding, green vegetables.   The idea is to achieve a soup that is a tapestry of greens… 


with touches of ivory, white or beige from the additions of pasta, beans, rice…or even farro or diced potatoes.  The pesto…swirled in at the table…is the crowning touch.  It magically turns the soup a vibrant spring green….


Over the years I have come to believe that eating seasonally is about so much more than eating what the earth around me is currently producing.  It also has to do with (among other things) eating foods that are in sync with the weather and my mood.  On Sunday I was hungry for a homey soup because of the chill in the air and the slow, lazy pace of my afternoon.  But while a hearty, traditional minestrone might have seemed perfect, to me it would have seemed jarring with its bold flavors and deep colors.  But my little minestra was just perfect.  It was filled with ‘seasonal’ produce… was warm and soothing to ward off the chill in the air….and was at the same time permeated with the subtle vibrancy of a cloudy and cool spring day.


Minestra Verdissima


2 T. unsalted butter (or olive oil)
5 or 6 spring onions, halved and thinly sliced (white and pale green only) to make 1 cup—substitute thinly sliced leeks (white and pale green only), or finely diced onion, if spring onions aren't available
1/4 to 1/3 c. Arborio or Carnaroli rice
1/2 c. frozen shell beans (pink-eyed peas, crowder peas, lady peas, etc.)
3 1/2 to 4 c. water or light chicken stock
1 T. unsalted butter (or olive oil)
4 oz. trimmed asparagus, cut into 1/4-inch lengths on a short diagonal (a generous cup)
1/2 cup English peas (fresh or frozen)
Arugula (or Spinach) pesto, room temperature


Heat 2 T. butter in a medium saucepan set over medium-low heat.  Add the spring onions and a pinch of salt and sweat until very tender and translucent—about 5 minutes (leeks or onions will take 10 to 15 minutes…don’t shortcut this step).  Add the rice, shell beans and 3 1/2 cups water (or stock) and bring to a simmer.  Cover and cook until the rice and beans are  tender (about 15 minutes). 

About 10 minutes before the rice and beans are done, melt the remaining tablespoon of butter in a sauté pan set over medium heat. Add the asparagus and peas along with a pinch of salt, stirring to coat the vegetables in the butter.  Let the vegetables gently sizzle until they are tender, stirring occasionally.   

When the rice/beans are cooked, scrape the asparagus and peas into the soup.  Swirl a ladleful of the broth around the sauté pan to get all the flavorful bits and add it back to the soup. Bring the soup to a boil and let simmer for a minute or two to allow the flavors to blend.  Taste and correct the seasoning.  If the soup seems too “crowded” with vegetables, add more water or stock.

Ladle the soup into bowls and place a dollop of pesto in the center of each bowl, allowing each person to swirl the pesto into their soup at the table.  Pass more pesto on the side if you like.

Serves 3 or 4. 

Notes & Variations:
  • Recipe is easly doubled, tripled, etc. 
  • When making this soup, carefully season at each step. Because it is subtle and mild, it will taste bland if not seasoned well. 
  • Add a couple of ounces of minced pancetta. To add, place the pancetta in the sauté pan and cook until rendered and beginning to crisp—adding some olive oil or butter only if the pancetta is very lean. When the pancetta is rendered, add the asparagus and peas and proceed with the recipe. 
  • As noted in the post this soup can be made with many combinations of starches and green vegetables…I like the soup best when the total quantity of cooked starches (rice, potatoes, beans, pasta) is roughly the same as the quantity of green vegetables…with maybe a little more green vegetable than starch….. 
  • You may use leftover/previously cooked rice or beans (and of course, pasta…choose something small, like soup shells or orzo…). To do this, add the green vegetables to the cooked onion, cooking until just tender before adding water or broth. Bring the broth to a simmer and then add the cooked grain, beans or pasta (adding any bean cooking liquid you might have along with the beans). Bring back to a simmer and serve.