Showing posts with label Cilantro. Show all posts

Wednesday, January 25, 2023

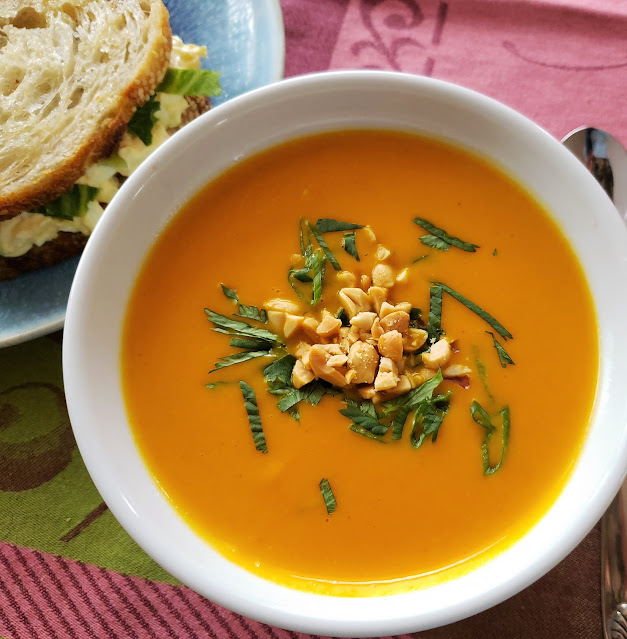
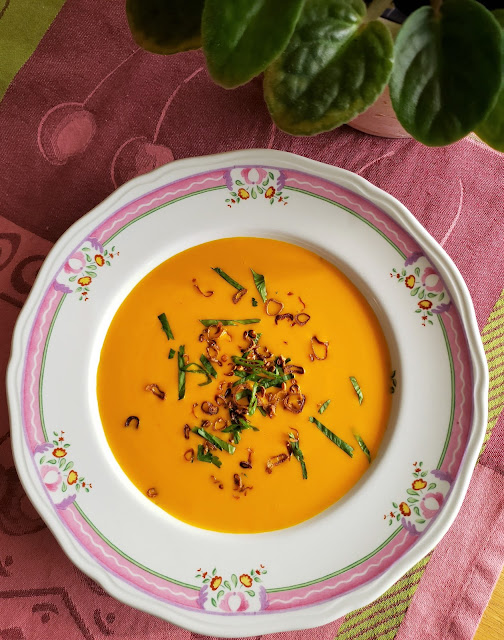
Creamy Gingered Carrot Soup

As is my habit during the early days of the new year, I have been making and enjoying lots of soup.  It really is the perfect food for January.  Not only is it soothing and warm on a dark, cold…and more often than not, wet…day—it is just the thing after the dietary excesses of the holidays.
 

Not surprisingly, this is also the time of year when I have traditionally taught soup classes.  Most of the recipes that were part of my class rotation have already appeared on my blog.  The carrot and ginger soup I’m posting today was always a class favorite.  I’m not sure why I never posted the recipe here.  It might be because the presence of fresh ginger…and lime…and cilantro…put it just outside the reaches of my normal home pantry.  But I have had fresh ginger on hand quite a bit in recent weeks for various things I’ve been working on…and since I always have carrots (and I’ve been in the mood for soup)…the other day I thought of this soup.  I was so glad I did.  The warm color—and tummy soothing ginger—make it a great post holiday/mid-winter soup.
 
I’m sure that in previous posts for puréed soups I have had a lot to say about the process.  But since it’s been a while since I wrote one of those posts, I’ll just repeat a few essentials here:
 
First…make sure you aren’t shortcutting the initial cooking of the onions and carrots in the fat.  This process allows the flavors of these vegetables to infuse the fats and give a deeper flavor to the final soup.  And along those lines, make sure your vegetables are fully cooked before you purée the soup, or you’ll have a coarse purée.  (The cooked vegetables should be tender to the tip of a knife—and you should be able to mash them against a plate with a fork or spoon).

Also, when adding liquid to a soup that is to be puréed, always hold back some—adding just what is necessary to cover the vegetables well and cook them through.  If too much liquid is added at this early stage, the final soup might be way too thin (and I say this as someone who prefers thinner soups).  You can always (and likely will) add more liquid while you are puréeing the soup.  I like the final consistency of my puréed soups to be like thick cream—it shouldn’t mound in the bowl or on the spoon (and should be “sippable”).
 
If you are using a traditional blender, don’t fill it too full with the hot soup (2/3 full is about right).  The pressure build up when you turn on the blender will push the cap up and off and if the blender is too full you’ll have a mess—and possibly a burn. 
 
Finally, I always pass my puréed soups through a fine meshed sieve.  I think it gives the most suave and velvety texture.  But I understand that some find this step to be a bit persnickety…and it also adds to the washing up.  Be assured that the soup will taste just as good without straining out the lingering fibrous bits.  Whether you are straining the soup or not though, take the time to run the blender until the soup is super smooth (you’ll be glad you did!). 
 

If you make this soup, be aware that its flavors are an interplay of strong and subtle…and that they change a bit over time.  On the day it is made, the ginger flavor is strong…and the soup has a warm spiciness.  The next day, the ginger flavor will be much more subtle.   If you like a stronger ginger flavor, simply add a grating of fresh ginger when you are reheating the soup on subsequent days.  If you want to eat it the day you make it…and you don’t like the strong flavor of the ginger, just add the ginger with the stock—its flavor will soften under the longer cooking time.  As far as the lime goes, it is added to balance not only the sweetness of the carrots, but also the honey.  It should not really be seen as the addition of lime flavor (although it will add a little)—but rather as a way to lift and brighten the flavors of the whole soup.  If you want a stronger lime flavor, add a grating of zest to the final soup (or as a garnish). 
 
As I type this post today, I have a lovely view of snow covered trees.  For the most part, people in my area are staying in after last night’s snowfall if they can.  It is just the right kind of day for this soup.  And even if you don’t typically keep fresh ginger in your home pantry, you can still make a carrot soup (without a run to the store) because this soup also happens to be a great template for a basic carrot soup.  Simply omit the honey, lime & ginger and you will have a delicious soup, the makings of which will already be in most home pantries. 


Gingered Carrot Soup
 
2 T. olive oil
1 large onion (8 to 9 oz.), thinly sliced
1 T. unsalted butter
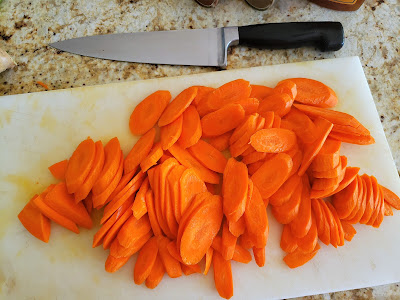
1 lb. carrots, peeled and thinly sliced
1 T. rice (Basmati, Jasmine, Arborio, etc.)
1/2  t. ground coriander
1 t. paprika
1 t. cumin
1 T. honey
3 to 4 c. chicken or vegetable stock
2 T. (18 g.) minced fresh ginger (or more to taste)
1/4 c. heavy cream
1 T. freshly squeezed lime juice (or to taste)
Salt & Pepper
Possible garnishes (alone, or in a combination that pleases you): Fresh Cilantro chiffonade, thinly sliced green onion tops, chopped peanuts, toasted pepitas, lime zest, olive oil, crispy fried shallots
 

In a medium stockpot or large saucepan, heat the olive oil over medium heat.  Add the onion along with a generous pinch of salt and sweat, covered, until the onions are soft and translucent—about 10 to 15 minutes.  


Add the butter and melt.  


Add the carrots another good pinch of salt and cook for 5 to 10 minutes—until carrots are beginning to soften.  


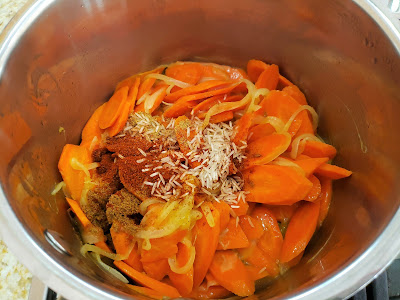
Add the spices and the rice and cook another 2 to 3 minutes to toast the spices and rice.
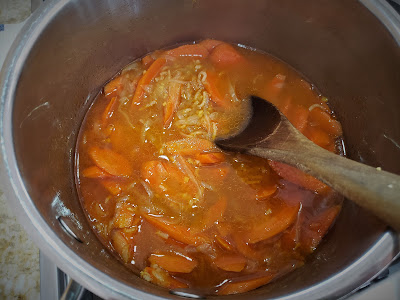
  Add the honey, stirring and cooking until the vegetables are coated and everything is sizzling nicely.  Add 3 cups of stock (or whatever you need to cover all the vegetables so that they are moving freely—reserve the remaining stock to add as needed when pureeing the soup).  Bring the soup to a simmer, cover and cook until the carrots are very soft—about 20 to 25 minutes, adding the ginger during the last 5 minutes of cooking.  


Purée the soup (using a traditional blender or an immersion blender), adding more stock as is necessary to produce a smooth, thin purée.  Pass through a fine meshed strainer if you like to achieve an even more suave and velvety texture.
 
Return the soup to the pot and add the cream.  Heat through.  Remove from the heat and add the lime juice to taste.  You may also add more freshly grated ginger if you like.  Correct the seasoning and serve immediately, garnished as you please.  Makes a scant 6 cups.


Monday, December 16, 2019

“Sheet Pan” Chicken with Spiced Carrots & Cauliflower


I have had a class called “Quick Weeknight Meals for the Holidays” in my rotation for several years now.  All but one of the recipes has appeared here on my blog.  The one recipe that hasn’t is a simple roast chicken with spiced cauliflower and carrots.  This year I converted the recipe to the popular “sheet pan dinner” model.  I was so pleased with the result…and a technique I discovered during the conversion process…that I thought I would share it here.

Sheet pan roasting recipes are successful because the sheet pan provides a wide surface area for a large quantity of food—creating an environment conducive to the caramelization that is the prize of the roasting process.  Crowded pans with high sides make it so the foods are more likely to steam than roast since the moisture produced by the cooking process can’t escape as efficiently. 

There are of course pitfalls inherent in the sheet pan roasting method too.  If the food is spread too sparsely it can burn (or dry out) before it is cooked through.  Also, you still have to consider the properties of the individual items in terms of cooking time—you can’t just throw everything on at once (which would most likely produce a pan filled with a mixture of cooked, under-cooked and over-cooked foods).  But if a sheet pan is filled so the ingredients are just snug…and items that take less time to cook are added at a later point in the roasting process than those that take longer…you can produce a simple, relatively quick and delicious meal using the method.


When I decided to alter my recipe to the sheet pan model I took some time to look around a bit to see how other cooks and chefs have approached the method.  In the process I came across a great trick at Food52:  Placing the chicken skin side down on a preheated sheet pan and letting it roast for 10 to 15 minutes before flipping it over and adding the vegetables.  


This guarantees crisp and well rendered skin.  It also makes it so that the final dish isn’t oily or greasy because you can use some of the chicken fat released during those first few minutes of cooking to coat the vegetables.  You will still need some olive oil…but not as much.  If you have ever tossed chicken with vegetables and olive oil and then put them in the oven to roast, only to discover everything is swimming in fat at the end, you will understand the advantage of this method….


This particular sheet pan chicken recipe is very simple and straightforward.  It’s just the chicken, carrots, cauliflower, spices and lemon juice (which is a not-to-be-missed finishing touch—it really lifts the flavors).  The carrots and cauliflower are cut to a size that insures that they cook through and are nicely caramelized in the 25 to 30 minutes or so that the chicken needs to finish roasting after its initial stint in the oven (you might need to stick the vegetables back in the oven for five minutes after the chicken is done—but since all meats taste better if they are given a brief rest before serving, this is not a problem).  To obtain a good result, make sure you cut the vegetables the size specified in the directions.  If they are too large, they won’t cook through (and they’ll probably burn before they are tender since the oven temp is fairly high).  If they are too small they will cook to mush before they are caramelized


In general you can improvise your own sheet pan dinners for chicken…pork…fish…etc. if you have a good idea of how long your chosen protein will need to cook…and if you have a good understanding of how to roast vegetables (how size, oven temperature, etc. affect the process).  If you aren’t as familiar with the process of roasting vegetables as you would like to be, check out the basics post I wrote several years ago.

I like to serve this as a “one dish” meal with steamed rice or couscous.  If you are trying to avoid starch, an alternative presentation would be to turn it into a big salad.  Omit the cilantro and toss some arugula with lemon juice, olive oil and salt and mound on a plate.  Then, top with the chicken and vegetables.  A scattering of toasted pistachios would add some delicious crunch.  Either way you decide to serve it, you will have a fast…nutritious…and delicious meal—perfect for this busiest time of year.    


Chicken Roasted with Spiced Carrots & Cauliflower

4 chicken leg quarters or 6 thighs (about 2 1/2 lbs. total weight)
salt & pepper
3 T. olive oil, divided
1 1/2 t. (slightly mounded) ground coriander…or more to taste
1 t. (slightly mounded) ground cumin…or more to taste
1 to 1 1/4 lb. carrots, peeled and cut on the diagonal into pieces about 2-to 2 1/2-inches long and 1/2-inch thick
1 to 1 1/4 lb. (trimmed weight) cauliflower, cut into large (1 1/2- to 2-inches) florets
1 to 2 T. freshly squeezed lemon juice
Roughly chopped cilantro, optional


Preheat the oven to 450°.  When the oven is hot, place a half sheet pan (18- by 12- by 1-inch baking sheet) in the oven for five minutes to warm up). 

Season the chicken with salt & pepper and sprinkle with some coriander and cumin, if you like.  Toss with a tablespoon of olive oil. Take the hot sheet pan out of the oven and place the chicken on the pan, skin side down.  Return the pan to the oven and roast for 15 minutes.

Meanwhile, place the vegetables in a large bowl with 2 T. olive oil (use less if the chicken is releasing a lot of fat), the spices and salt & pepper to taste.  Toss to lightly coat with the oil and seasonings.  Remove the pan from the oven, turn the chicken over (use a pancake turner style spatula to carefully release the skin if it is sticking).  The skin should be beginning to crisp nicely.  Arrange the vegetables evenly around the chicken pieces, stirring a bit to coat them a bit in the rendered chicken fat.   Return the pan to the oven. 

After another 15 minutes, give the pan a shake…using the spatula to flip the vegetables over if they are sticking or browning unevenly.  Everything in the pan should be sizzling nicely.  If this isn’t happening, increase the oven temperature to 475°.  If the chicken and vegetables are burning or the fat is smoking, reduce the temperature a bit. 

Return the pan to the oven and continue to roast until the juices run clear or the thigh meat registers 175° to 180° on an instant thermometer—another 10 to 15 minutes.


When the chicken is done, remove to a plate and let rest. If the vegetables aren’t browned to your liking, return them to the oven for another 5 minutes or so.  Drizzle the finished vegetables with a tablespoon of lemon juice.  Carefully scrape the bottom of the pan (so you won’t tear up the vegetables) with a flat wooden spoon to release the caramelized bits and fold these into the vegetables.  Taste and correct the seasoning with salt, pepper and lemon juice.

Serve immediately with rice or couscous, scattering some cilantro over all, if you like.  Serves 4 to 6.

(Recipe adapted from Everyday Food, March 2006)


Monday, January 22, 2018

Some Thoughts on Grain Bowls… Three Examples… and One Vinaigrette


For years I have been teaching…and posting…recipes and ideas for grain pilafs and salads.  To be honest, it has very little to do with the fact that whole grains are supposed to be good for me.  It just so happens that I like them.   Whether the menu includes one of the recently reintroduced grains (freekeh or farro)…a done-to-death trendy grain (quinoa)…or a soft porridge-like grain (polenta or risotto)…I’m there…spoon in hand.  I have never thought much about why I like grains so much (clearly not everyone feels the same way).  But in trying to guess at the reason, I have decided that it probably has something to do with the fact that I grew up on hot breakfast cereals. 

My mother never purchased any of the boxed, sugar-saturated cold cereals that many of my peers were enjoying.  If I wanted a cold cereal, I had a choice of Grape Nuts or Miniature Shredded Wheat.  Besides the fact that neither of these appealed to me very much (of the two, Grape Nuts was my preference), I found any cold cereal pretty off-putting since they were all reduced to mush in short order by the addition of the milk.  A bowl of hot cereal (particularly during the winter months) was vastly preferable.  Better yet was a soft cooked egg with buttered toast—even though I grew up in the era when everyone was removing eggs from their diets for “health” reasons.  (I count myself lucky that my mother never succumbed to this insanity.)

To this day I adore a soft cooked or poached egg on toast….for any meal of the day.  It did not occur to me until I began to consider why I like whole grains so much that—like a soft, runny egg—they are for me what we all mean when we say “comfort food”…. a food that conjures up memories of a time when someone else was taking care of us and making us feel warm, full and safe.

It is unfortunately not within my power to turn any food into a source of this kind of comfort for anyone.  But I can and will continue to try and share my love for grains by presenting them in their best light:  properly cooked…properly seasoned…and accompanied by all manner of delicious ingredients. 


All of this brings me to my recent obsession with grain bowls.  If you follow me on Instagram, you have probably noticed.  I am late to the party when it comes to the grain bowl.  (They have been “a thing” for several years now.)  But I am, as I have just pointed out, not late to grains.  And the fact of the matter is that there is really very little difference between a grain bowl and a grain pilaf or salad (both of which can be found in abundance on my blog).  As a friend and I were discussing the other day, a grain bowl is to a grain pilaf or salad what a composed salad is to a tossed salad—the ingredients in the former are arranged artfully (one hopes) on the plate and those in the latter are mixed up before they ever hit the plate.  All of the basic “rules” of how to create one will apply to the other.

The greatest advantage of a grain bowl over a pilaf or salad is they let you, the eater, create different combinations of flavor in every single bite.  To me, this adds in a way to the child-like pleasure I seem to derive from grains.  It is almost like being given permission to play with your food:  Taking your fork and dipping it here…dragging it there…in each bite combining the tastes and textures that please you most. 

There are of course some basic tips that will help you build a delicious grain bowl, but rather than write my usual “how to” post (many others have already done that….The Kitchn, Fine Cooking, The New York Times, Food52, and Williams Sonoma…just to name a few)….I thought I would illustrate how to create a grain bowl by sharing how I put together a few that we have enjoyed recently.  (I am including component recipes either as links to old posts in the text…or at the bottom of this post.)

It all started a few weeks ago when I noticed a colorful looking dish in Feast Magazine that featured some favorite winter vegetables (sweet potatoes and cauliflower).  The dish didn’t include any grains, but it was artfully arranged in a bowl…just like a grain bowl.  In addition to the “look” of the dish, the presence of some black beans made me think of brown rice.  I like brown rice, but I don’t cook with it very often (I have only featured it once on my blog).  The main reason for this is it takes so long to cook when compared to other grains I like.  But I don’t shy away from long cooking times in other ingredients, so I’m not sure why I would with brown rice.  With a little advance planning, the cooking time isn’t a problem.  And it is so good in combination with black beans that I thought the little extra time involved would be worth it.    


The dish that inspired my grain bowl included a generous drizzle of a sauce of pureed cashews and almonds seasoned with ginger, turmeric, garlic and lemon.  I decided to deconstruct this sauce and use the spices to season the roasted vegetables (along with a little added coriander), toast and chop the cashews for final garnish with minced parsley, cilantro and scallions and drizzle the whole thing with a lime vinaigrette seasoned with garlic and cumin.  A scoop of plain yogurt (I used traditional full-fat…but Greek would be nice…or Labneh…) was the final touch.  It was fantastic.

Another grain bowl I made recently was inspired by a breakfast out with some friends.  We were at a local coffee shop…and it was late morning….right about the time I’m hungry for a little something sweet.  So that’s what I had…a sweet and tender little financier.  Both of my friends ordered a delicious looking (and tasting!...I got to have a bite) avocado toast with a runny fried egg.  Well…I couldn’t get that toast out of my mind all day.  So for dinner I decided make a grain bowl featuring avocado and egg.  


My grain of choice for my avocado and egg grain bowl was freekeh (currently my favorite grain).  I cooked it using the pilaf method with some diced onion and seasoned it with a little allspice and cinnamon.  Besides the sliced avocado and a poached egg, I added a pile of carrots roasted with olive oil and a smidge of honey, a spoonful of harissa, a generous drizzle of leftover cumin and lime vinaigrette, and a final shower of sliced cilantro and toasted, broken pine nuts.  This too was excellent. Eggs are wonderful with grain bowls…just remember when you poach (or fry) an egg for a grain bowl to make sure that you leave the yolk nice and runny (it makes a great sauce!)

The most recent grain bowl I made is a great example of how one of the best uses for a grain bowl is as a way to use up a few leftovers…particularly for one person.  So often I find myself with only enough leftovers for one serving of something.  If, for example, we have eaten all the chicken I roasted, sometimes there will be one lonely serving of the vegetables that were roasted with the chicken left over.  I have often used odds and ends like this in a green salad for lunch (and will continue to do so on occasion)…but a grain bowl is much more substantial…and more along the lines of what I’m craving during the colder months. 

Last week I was in just this situation with a single serving of leftover roasted sweet potatoes and cauliflower (from my brown rice grain bowl)….  And since I had grain bowls on the brain, I made one from my lunch.  I cooked some quinoa (which only takes 25 minutes at most…bulgur would have been equally delicious, and even quicker), added a handful of arugula, some yogurt (always a good idea with grains, in my opinion) some julienned apple (crunchy, sweet and tart…and a perfect partner for cauliflower and sweet potato), the remains of my toasted and crushed pine nuts and then drizzled the whole thing with some of the last of my cumin-lime vinaigrette (but a mustard based vinaigrette would have been fine…or simply a good drizzle of olive oil and a squeeze of lemon or lime to finish it off). I particularly liked the raw and fresh additions of the apple and arugula in this one (and should mention that I took the time to season and dress them with a little of the vinaigrette before adding them to the bowl).


I hope that these examples will give you some ideas for assembling your own grain bowls.  Obviously I made great use of one, particular vinaigrette (recipe below).  But even this is instructive in that getting into the habit of keeping favorite vinaigrettes and condiments on hand is a good way to get a jump on future grain bowls.  And don’t feel like you have to have a freshly cooked grain in order to have a grain bowl.  I was able to cook some quinoa for my lunch the other day because I was working from home.  But if you don’t have this luxury (and you would like to have grain bowls for lunch), get into the habit of always making a little extra whenever you cook a grain for your dinner.

I’ll end with a few miscellaneous pointers...things that I try to keep in mind when I’m putting together a grain bowl:  First, always think about contrasts—both in tasted and in texture.  You don’t want a big bowl of all the same flavor profiles or something that is all soft…or all crunchy.  Also, make sure everything goes together/makes sense…as always, less is more.  You’ll be much happier with your bowl if it has distinct tastes that complement each other well than you will be if you just have a big mish-mash of indistinguishable leftovers in a bowl.  If you have one of each of the elements (grain, vegetable, protein, fresh and/or crunchy/chewy garnish, sauce/condiment/vinaigrette) don’t add something else just because you have it.

Finally, keep your eyes open for inspiration.  When you have a grain bowl at a restaurant or café, make a point to note what it is that you like about it…the flavors, the textures, how it’s dressed, etc.  Whenever you have leftovers, think about how you might use them in a grain bowl.  And lastly, take inspiration from everywhere: images and recipes on line, in cookbooks or in a favorite magazine.  Pretty soon you’ll be making such delicious grain bowls at home that you won’t need to go out and pay someone else to make one for you.     


A few recipes/cooking notes for the grain bowls described in this post:

The Grains
I almost always cook grains using the pilaf method--that is, I start by toasting the grain in a bit of hot fat (usually olive oil...about two to three teaspoons per cup of raw grain) in the sauce pan and then after a minute or two adding a hot liquid (lightly salted water or stock).  When the whole thing comes to a rolling boil, cover with a tight lid and reduce the temperature to the lowest setting.  When the grain is tender, turn off the heat and let it continue to steam/rest for five to ten minutes.  The amount of liquid you will need and the cooking time will vary for each grain.  For Brown Rice you need 2 measures of liquid for each measure of rice.  It will take about 40 to 50 minutes to cook.  For quinoa and freekeh I use 1 1/4 to 1 1/3 measures of liquid for every measure of grain.  Quinoa takes 15 to 20 minutes and Freekeh takes 20 to 25 minutes.  Almost all grains benefit from a good rinse under running water before you cook them.  Quinoa must be rinsed or it will be bitter.

In the above bowls I didn't add any seasonings (other than salt) to the brown rice or quinoa.  For the freekeh, I used this favorite recipe (with onion, cinnamon and allspice).  I used brown basmati, white quinoa and cracked freekeh.  

I start with 1/4 cup of raw grain for each person.  You may require more...or less...but that's a good place to start.

Components of 2 grain bowls:  Cooked freekeh, roasted carrots, vinaigrette,
 harissa, cilantro, avocado and pine nuts (eggs not pictured...)

The Black Beans
I used 1/2 cup of cooked black beans for each portion.  You may use canned (be sure you rinse them) or cook your own.  I like to bake beans in a low oven, they require less attention and maintain a better shape.  Soak the beans overnight (or not...they'll just take longer to cook).  Drain and rinse the soaked beans and spread them in a layer no deeper than an inch in a shallow baking dish.  Drizzle with some olive oil, add a few cloves of garlic, several sprigs of thyme and a cinnamon stick.  Cover with boiling water by an inch, cover the pan with foil or a tight fitting lid, and bake at 325 degrees until soft but not falling apart...about 2 hours for black beans.  Add salt when the beans are half cooked.   1 cup of dried beans will make 3 cups of cooked.

Whether you use canned or cook your own, finish the beans by cooking some red onion in a little olive oil until tender and beginning to caramelize (use about 1/4 c. of diced onion for each half cup of cooked beans), adding the beans along with a splash of water or bean cooking liquid (you don't want them to be soup-y...but you don't want them to be dry either) and heating them through.  Season to taste with salt and pepper.  (If you use canned beans, consider adding a little minced garlic and a dash of cinnamon to the onions just before adding the beans.)

Spice Roasted Sweet Potatoes & Cauliflower
If you aren't in the habit of roasting vegetables, check out my detailed tutorial.  For the vegetables in my brown rice bowl, I roasted a pound of sweet potatoes with 2/3 of a pound of cauliflower (and as mentioned in the text had extra...this was enough roasted vegetables for 3 or 4 grain bowls).  Peel the sweet potato and trim away the leaves and core from the cauliflower.  Cut the cauliflower into 1 1/2-inch florets.  Cut the sweet potatoes in slabs that are a generous half inch thick and cut the slabs into 1 1/2-inch pieces (so they are roughly the same size as the cauliflower florets).  Place them in a large bowl and add a teaspoon each of ginger and turmeric and a half teaspoon of coriander.  Add a couple of tablespoons of olive oil and season generously with salt.  Toss until the vegetables are evenly coated with the oil and spices.  If they look dry, add more oil.  Roast in a 450-degree oven (turning once when they are about 2/3 cooked) until tender to the tip of a knife and nicely caramelized...about 20 to 25 minutes.

Cumin-Lime Vinaigrette (Printable version)
Place 1/4 c. of freshly squeezed and strained lime juice in a small bowl.  Smash a fat clove of garlic to a purée with a pinch of salt and add it to the bowl.  Let sit for five to ten minutes (to allow the flavor of the garlic to mellow a bit).  Add a teaspoon of cumin and salt & pepper to taste.  Add 6 T. of olive oil in a thin stream while whisking constantly.  Taste and add salt and pepper as necessary.   Drizzle as generously as you like over your grain bowl...and pass more at the table.  The vinaigrette will keep easily for a week or two in the fridge.  Bring to room temperature and re-whisk before using.


Monday, January 8, 2018

Chicken with Dried Apricots, Green Olives & Almonds


Over the weekend a friend asked me what kinds of things I was cooking and what I was hungry for right now. We had been discussing my blog…and what I might be posting next. My first thought was that I wasn’t doing too much in the way of cooking at all. There are a lot of reasons for this. I’m tired from the busy season. I’m spending a lot of time catching up with friends (many of whom—including the friend who asked the question—work in my industry and are also coming up for air at the moment). This means I am eating out more than usual. I have also spent the first few days of the year digging myself out from under piles of paperwork and other things that got pushed to the side during the busy season. And I admit that I am plowing through all of this stuff at a rather leisurely pace… By the time dinner rolls around I am relying on the simple…and the tried & true (single ingredient pastas, soups, sandwiches, grain pilafs)—all things that I have already posted…or that are so simple and basic they don’t’ require a recipe.

My next thought was about the things I am truly hungry for this time of year. And it’s probably the same thing most of us are hungry for: rich braises and stews, slow roasts, hearty casseroles, all-day bean soups.... Foods that fill the house all afternoon with their good smells…and then warm you down to your toes when you finally sit down to the table. Foods like this are not difficult, but they do take a bit of advance planning….and my weekend was already well underway when I was having this conversation. 

As I was thinking about all these things, an image popped into my mind—a picture of a Moroccan-inspired chicken dish that I made a few years ago. (It must have been hovering there near the forefront of my mind after all the time I had spent going through some old pictures on my computer….) 


The recipe as I had made it was adapted only very slightly from the original in a winter issue of Martha Stewart Living. It is likely that I chose to make it the first time because it was a perfect intersection of the things I just described: It is simple and easy to make…and at the same time has the feel of the hearty and richly flavored foods I tend to crave during the early days of winter. 

Inspired by my conversation, I made it for dinner last night. I am happy to report that it was just as simple to make as I remembered. If you like Mediterranean flavors, you probably have the apricots, olives, almonds and spices on hand. If you cook regularly, it is also likely you have the carrots, onions and garlic at the ready. You might even have the chicken in your freezer (in which case, this would make a perfect snow day dinner!). As it happened, I did not have any chicken in my freezer, so I stopped on my way home from my coffee date with my friend and got some. And just as I remembered, once the ingredients were assembled, it was ready for the table in no time at all (…or in about an hour and fifteen minutes, to be more exact).

I have to admit that I find it difficult to believe that something that comes together so quickly can have such a rich flavor and unctuous texture. But it does. How great is that? And if you are craving this kind of dish—but just haven’t had the time to invest in a rich braise…or hearty casserole—I highly recommend that you add this one to your menu plans for some evening very soon.  


Chicken with Dried Apricots, Green Olives & Almonds

3 to 4 lbs chicken thighs
Coarse salt and freshly ground pepper 
Olive oil 
1 small red onion, halved and thinly sliced 
2 cloves garlic, sliced
1 lb. carrots, topped, tailed, peeled and cut on a long bias into 3-inch pieces (about 1/2- to 3/4-inch thick)
1 1/2 t. ground ginger 
3/4 t. ground cinnamon 
2 c. low-sodium chicken broth 
Zest of 1 orange
A generous pinch of saffron threads 
3/4 c. whole almonds, lightly toasted
3/4 c. dried apricots, halved crosswise if very large
1/2 c. green olives, pitted
1/2 c. lightly packed cilantro leaves, sliced into a rough chiffonade
Harissa, optional


Season chicken with salt and pepper (if time, do this up 12 to 24 hours ahead, cover loosely and store in the refrigerator). Heat a braiser pan or deep straight-sided skillet over medium-high heat; add enough oil to just coat the bottom of the pan (1 to 2 T.). Add the chicken, skin side down, and brown all over, in batches if necessary to keep from crowding the pan. Regulate the heat as necessary to maintain an active sizzle. This will take about 8 to 10 minutes. Transfer the chicken to a plate and pour off all but a tablespoon or so of fat from the pan. 


Reduce heat to medium; add onion, garlic, and carrots. Season lightly with salt (be careful, the olives will add a lot of salt). Cook, stirring occasionally, until onion is translucent, about 3 minutes. Stir in ginger and cinnamon and cook, stirring, until fragrant, about 30 seconds. 

Stir in broth, orange zest and saffron, scraping up browned bits from bottom of pan. Return chicken and accumulated juices to pan. Add the almonds, apricots and olives. Bring to a boil, then reduce heat and simmer, partially covered, until a thermometer inserted in thickest part of the thigh (without touching bone) reads 180 degrees, 30 to 35 minutes. Remove from heat. Taste and correct the seasoning. You may stir the cilantro in, or scatter it over the finished dish. Serve with couscous or rice. Pass harissa if you like. Serves 6 
(Recipe adapted from Martha Stewart Living)


Thursday, February 23, 2017

Grated Carrot Salad with Coriander & Pistachios

Monique Jamet Hooker in her book Cooking with the Seasons makes the observation that "The French eat carrot salad the same way Americans eat carrot sticks." Leave it to the French to turn the humble, raw carrot into something special.  I'll eat that plain, ubiquitous carrot stick when it shows up in a picnic basket or on a party relish tray...but only because it is less dubious than some of the other things that might be on offer.  The difference between noshing on a horse fodder-like carrot stick and a chic little dish of grated carrots dressed with a tangy and garlicky or herbaceous vinaigrette pretty well sums up the chasm between the French and the American manner of dining.  David Lebovitz tells us that the ability to produce this simple little salad is "in your DNA" if you're French.  Fortunately for the rest of us, Carottes Râpées is an easy thing to learn to make.

In its most basic form, a grated carrot salad is nothing more than grated (or julienned) carrots dressed in a simple vinaigrette.  I like it best if the vinaigrette is a lemony one...but a red wine vinaigrette will work fine too.  The vinaigrette should be on the tangy side.  It should not be overly sweet.  The sweetness in this salad should come primarily from the carrots themselves...not an abundance of added sugar or honey.  It is fine to correct carrots that are not as naturally sweet as you would like with a pinch of sugar or a drizzle of honey.  But the overall effect of the salad should be lively, tangy and zippy. 

Other additions to this basic salad are minimal and vary from cook to cook.  When starting out without a vinaigrette (just dressing the carrots directly with lemon juice or red wine vinegar and olive oil) it is usual to include garlic or shallot.  Some cooks add a bit of Dijon mustard.  Freshly toasted and ground spices like coriander, cumin and fennel are also common.  And the salad is almost always finished with fresh herbs...flat leaf parsley, cilantro, tarragon, chervil or chives.  Every recipe I have ever seen or made includes a bit of cayenne or hot pepper flakes.  David Tanis makes a fantastic Moroccan version that is finished with lime and a scattering of green olives

When I make a grated carrot salad I add a couple of steps that I think improve its taste, texture and shelf life.  The first is something you won't have to worry about if you are making your salad with a vinaigrette you already have on hand, and that is to allow the minced/smashed garlic and/or minced shallots to macerate briefly in the lemon juice or vinegar before adding them to the carrots.  This brief soak is how I always begin when I make a vinaigrette and its purpose is to soften the harshness of these two ingredients.  Not only will the flavor of garlic or shallot be stronger and harsher if you don't do this, their presence will become more and more prominent as the salad sits...making for a salad that tastes overwhelmingly of garlic or shallot on subsequent days.  Since one of the things I like about grated carrot salad is the fact that it keeps really well for several days, it would be a shame if it became inedible because the garlic or shallot had become too strong.


The second thing I do is something I picked up in David Tanis's Moroccan version.  Instead of making a vinaigrette and pouring it over the carrots...or simply throwing all the ingredients into a bowl and combining them, Tanis adds the ingredients in stages, adding the olive oil last.  The reason for this is that if allowed to sit on the carrots for a short length of time, the salt and the acidity of the lemon or vinegar will begin to soften the carrots by drawing out some of their liquid.  If you wait to add the oil until after the carrots have started to soften, you will use less oil and you won't end up with a pile of grated carrots sitting in a pool of oil.  The other benefit of waiting to add the oil is that the seasonings will be absorbed by the carrots better if there is no oil coating them and acting as a barrier.   

Obviously recipes for Carottes Râpées are easy to find...and I do hope you will look for one to try.  The one I am sharing today would be a good place to start.  It is from Jody Williams' book Buvette and it is a bit unusual.  Like the basic versions I have described, it is simple and streamlined.  But, it contains the surprise of chopped, toasted pistachios.  The pistachios add color... subtle crunch... and sweetness.  They are, I think, a genius touch...and make this salad my new favorite version of the grated carrot salad.    


Grated Carrot Salad with Coriander & Pistachios

2 T. freshly squeezed lemon juice...or more, to taste
1 small clove garlic, grated with a microplaner or smashed to a purée with a pinch of salt
1 lb. carrots, trimmed and peeled
1/2 t. kosher salt, plus more to taste as needed
1 t. coriander seeds, toasted and crushed in a mortar and pestle
pinch cayenne, or to taste
1/4 c. pistachios, toasted and coarsely chopped
3 to 4 T. cilantro chiffonade
about 3 T. olive oil


Place the lemon juice in a small bowl and add the garlic.  Stir to distribute the garlic and set aside.  (This is an important step, whether you are using garlic...or making another carrot salad with minced shallot.  Allowing the smashed/minced garlic—or shallot—to macerate for a bit in the acid will soften its harshness considerably.)


Coarsely grate the carrots using the large holes of a box grater or the grating disc of your food processer (see note). Put the carrots in a large bowl, sprinkle with the salt, and toss. Add the coriander and cayenne and toss.  Pour the lemon-garlic mixture over all.  Toss well and let soften a bit (20 to 30 minutes).


Add enough olive oil to coat and fold in the pistachios and cilantro.  Taste and adjust the seasoning with lemon juice, salt, black pepper and cayenne.  If the carrots are not as sweet as you would like, add a pinch of sugar or drizzle of honey.  Cover and set aside at cool room temperature for up to several hours, or refrigerate and then return to room temperature to serve.  The salad keeps, well covered and in the refrigerator for several days. 

(Recipe adapted from Buvette, by Jody Williams)


Note:  I recently read an article in the premier issue of Christopher Kimball's Milk Street that explained how grating actually enhances the sweetness of the carrots.  Since grating ruptures more of the carrot's cells, more natural sugars are released into the salad.  You will find French Carrot Salads that feature julienned carrots...and these are delicious too...but if you want to enhance the sweetness of the carrot, grating is the way to go.  Just make sure you grate them coarsely or you will have soggy carrot pulp instead of nice strands of crisp carrot.