Showing posts with label Zucchini. Show all posts

Tuesday, October 15, 2024

Bulgur Pilaf with Corn & Zucchini…with a Vibrant Late Season Tomato Compote


Last month, a friend who has access to an amazing vegetable garden brought me a mountain of beautiful tomatoes…literally hot off the vines.  They were so ripe there was no waiting; the moment to use them was now.  

Of course I wanted to preserve most of them in some way (I have written of many things that can be done to preserve the late summer abundance of tomatoes:  sauce, oven dried, frozen whole, fondue).  But as it happened, I was in the middle of planning my September curbside dinner.  I immediately knew that some of those tomatoes would make their way into a sauce of some kind for that menu.  Because I have to keep costs reasonable for these dinners, a sauce of vine ripened tomatoes—that usually cost upwards of five or six dollars a pound—is just not within reach.  What a great thing to receive a gift from my friend…that I could in turn share with my regular clients.  

I had recently made a dinner for myself of a simple basmati pilaf with sautéed zucchini and sweet corn…topped with an egg…and a few spoonfuls of a concentrated tomato compote/sauce.  The tomato sauce was a last minute thought because at the time I had a small, very ripe tomato sitting on my counter that I had really needed to use.  It was the size with which I would normally make a quick summer tomato sauce for pasta—but I wasn’t really in the mood for pasta.  So instead, I made my usual sauce… and then served it dolloped over the pilaf and egg.  

The result was memorable:  The tangy character of the ripe, late season tomato lit up the other ingredients.  And the meal itself perfectly captured the moment in terms of the available ingredients and this year’s extended season of warm weather (too warm really to start thinking about the traditional foods of autumn).


As I thought about what I wanted to make for my curbside, I remembered that little dinner.  I can’t really give my patrons a cooked ahead fried egg…but I can give them a nicely seared piece of fish that they can then finish in their own ovens.  

The tomato compote I made for the curbside was a cross between  my quick summer tomato sauce and a rich tomato fondue that I occasionally make.  The quick sauce is made with roughly chopped tomatoes (skins and seeds included) and cooked down quickly in lots of olive oil and garlic.  (It is ready in the time it takes to boil pasta!)  The tomato fondue is a rich, more refined, compote of skinned and seeded tomatoes, cooked down in a base of olive oil, garlic and onions that have first been cooked to total softness.  I ended up calling my sauce for the curbside fondue because it was reduced and concentrated.  But I left the seeds in (removing only the skin) and omitted the onions.  The result was thick and rich (perfect for dolloping)…and tangy and sweet (great for enhancing the mild flavors of the rest of the dish).  It is basically the quick sauce without the tomato skin.  I’ve decided to rename it “Late Season Tomato Compote.”  

When making the “compote” for just one or two servings, you can simply make the original quick summer tomato sauce.  The main reason I didn’t make it for the curbside was I discovered that the longer cooking required for larger batches tended to toughen the skins—making them discernible in the final dish.  

I had so many tomatoes that I made extra of the compote for myself.  I froze it in little 2 oz containers (about a quarter cup or one serving)…which I will be able to enjoy all winter long…on pastas and pizzas—or to enhance a soup—or to go with a grain pilaf with a fried egg.  If you are looking for ways to preserve those big boxes of late season tomatoes that might still be coming into your farmers market, you should give this a try.


When I finally settled on my menu, not only did I change out the egg for salmon…I also swapped out rice for bulgur.  I liked the color contrast and the variation (rightly…or wrongly…assuming that people are more likely to make rice for themselves than bulgur).  I also added some crushed fennel seed and dried oregano to the pilaf to further compliment all of the vegetables.  I’m going to post the recipe for the bulgur pilaf.  But you could obviously make a basmati pilaf (or freekeh…or quinoa…) instead.  The pilaf is mostly a vehicle for all of the delicious vegetables. 

I was very happy with the result.  I have made a lot of curbside dinners in the past few years…but I think this was one of my favorites.  It was simple…beautiful…and perfectly “of the moment.”  What a wonderful gift I received from my friend.


Late Summer Tomato Compote

3 to 4 T. olive oil
3 to 4 cloves of garlic, minced
1/8 to 1/4 t. hot pepper flakes (as you prefer)
1 1/4 lb. vine ripened tomatoes, peeled, cored and roughly diced 

Place the oil, along with the garlic and pepper flakes in a large sauté pan and place the pan over moderately high to high heat. When the garlic begins to sizzle enthusiastically and is just on the verge of taking on a bit of color, add the tomatoes (along with all of the juices) to the pan. The tomatoes should immediately begin to simmer rapidly. Allow the tomatoes to cook, shaking the pan back and forth occasionally, stirring at regular intervals and regulating the heat in order to maintain a brisk simmer, until the tomatoes have broken down and the sauce is very thick (a path will remain when you draw a spoon through the tomatoes) and the oil is just beginning to break out of the sauce.  You should have a generous cup.  Remove from the heat. Season to taste with salt.


Bulgur Pilaf with Corn & Zucchini


2 T. olive oil
1 small red onion (4 to 5 oz.), finely diced (you will have about 1 c. diced onion)
1/2 t. kosher salt
1 t. fennel seed, crushed with a mortar & pestle
1 t. dried oregano
1 c. (6 oz.) medium bulgur, rinsed and drained
1 1/4 c. boiling water

2 T. olive oil
10 oz. trimmed zucchini, cut in a 1/3-inch dice
2 cloves garlic, peeled and minced
2 ears of corn, roasted in the husk and kernels cut from the cob to yield 1 3/4 to 2 cups
2 T. minced parsley

Warm 2 T. olive oil in a medium saucepan with a tight fitting lid over moderate heat.  Add the onions along with a pinch of salt and sweat until tender and translucent and beginning to turn golden around the edges.  Add the garlic, fennel & oregano and cook until fragrant—about a minute.  Increase the heat to medium high and add the drained bulgur along with a generous pinch of salt.  Continue to cook for a minute.  Add the water and bring to a boil.  Reduce the heat to low and cook, covered until the bulgur is tender—12 to 15 minutes.  Remove from the heat and let stand (covered) for 5 minutes.  

While the bulgur cooks, sauté the zucchini.  Warm the olive oil in a medium sauté pan set over moderately high heat.  When the pan is hot, add the zucchini and sauté, tossing occasionally until tender and browned in spots.  Add the garlic, toss to distribute.  When fragrant, add the corn and toss to combine.  Heat through.  Season to taste with salt and pepper.

When the bulgur is done, transfer to a large bowl along with the zucchini and corn.  Add the parsley and toss to combine.

Enjoy the pilaf warm or at room temperature.  Serves 4


To serve the compote & pilaf with fish (as I did for the dinner):

Sear the Salmon (or whatever fish you prefer…Halibut would be good, too):  Place a heavy sauté pan that is large enough to hold the fish over medium-high heat.  While the pan is heating, season the fish on both sides with salt & pepper.  Add a thin film of olive oil to the pan.  When the oil is very hot, add the fish, service-side down (if you leave the skin on, this will be the side with the skin…if the fish is skinless, this will be the interior side).  Cook until it is a beautiful golden brown—about 3 minutes, regulating the heat as necessary to prevent smoking but at the same time, maintain an active sizzle. Turn the fish over and continue to cook until barely opaque in the center—another 3 minutes or so (reducing the heat further, as necessary).  Remove from the pan and keep warm.  Mound a quarter of the pilaf in the center of each plate, spreading out a bit to make room for the fish on top.  Transfer the fish to the pilaf.  Drizzle and dollop about a quarter cup of the compote over and around the fish and pilaf.  Enjoy.


Variation
:  Substitute a fried or poached egg for the fish.

Printable Version


Monday, September 25, 2023

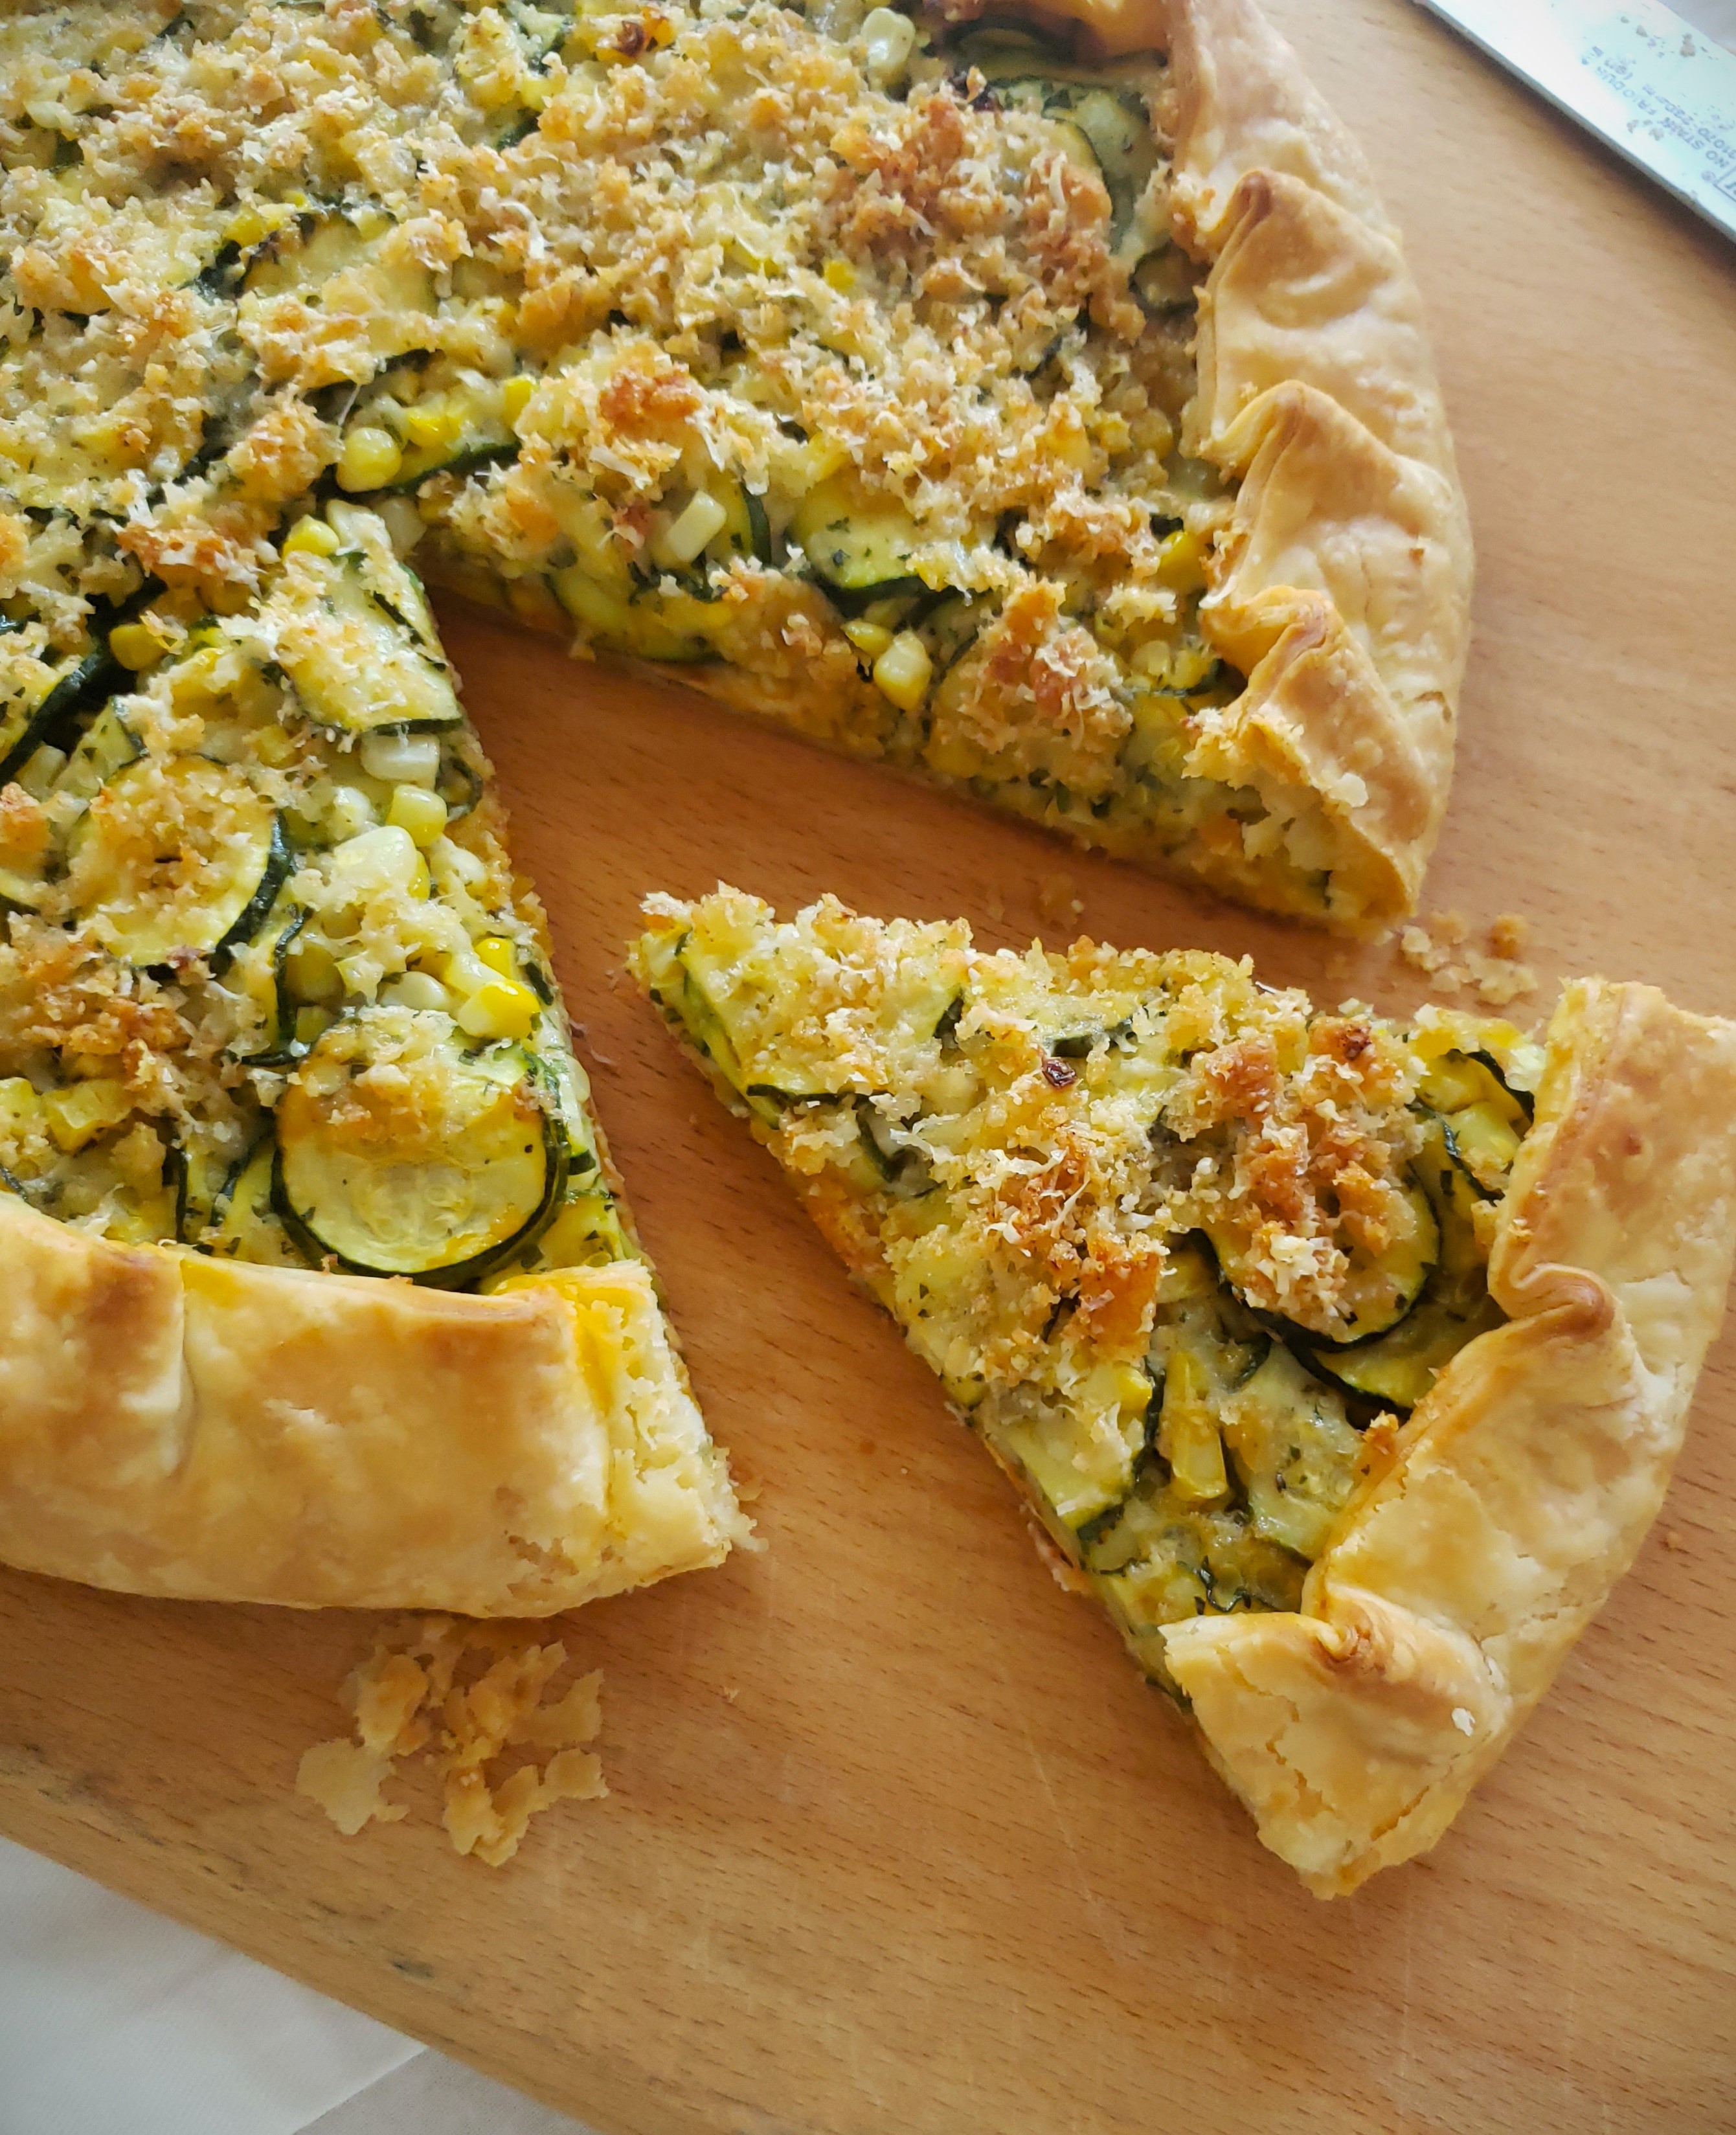
Late Summer Zucchini & Corn Galette with Tomato & Browned Butter Breadcrumbs


In the early days of the pandemic I started doing curb side pick up dinners. It was a good option for people who wanted to "eat out", but didn’t want to eat in a restaurant filled with people. The dinners were 3 courses and packaged with instructions for any last minute heating/dressing/etc. I enjoyed the change of pace…as well as the additional work…so have continued to do them occasionally—even though there is no longer the same “need” for them.

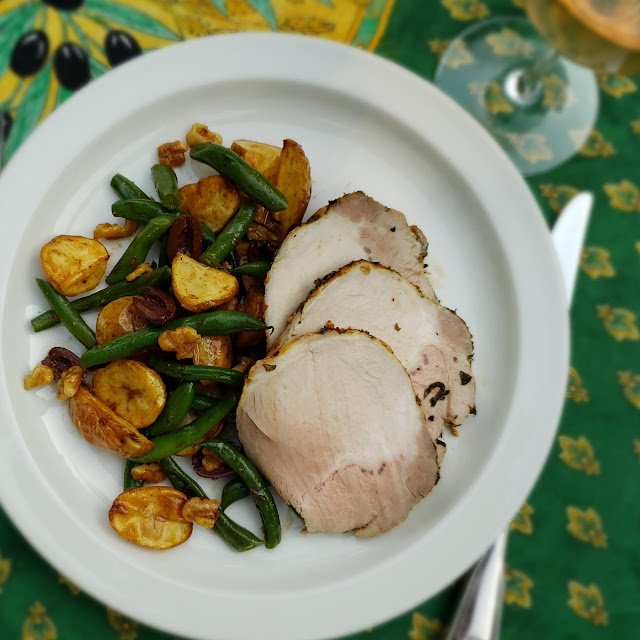
Just as with my private dinner menus I’m sure it comes as no surprise that my menus for these dinners always highlight seasonal ingredients. I usually start with an idea for one course and then create the remaining two courses around it. For the recent September dinner I started with the idea of Applesauce cake. It is still warm where I live so I opted for a room temperature roast pork with green bean and potato “salad” for the entrée. 


This meant I didn’t really want to do a true salad for the first course (it seems repetitive to have a salad in 2 of 3 courses…). Since the dessert was cake, a tart or pizza seemed like a good starter.

As I considered my seasonal options, corn and zucchini…and tomato!...came to mind. These things are at the end of their season. I always feel a nostalgic desire to eat lots of the waning fruits of the season—even as I look forward to the new crops coming in. (The “cusp” seasons are always exciting moments in the culinary year.)


I found a couple of interesting savory tarts on line that included these ingredients. And what I ended up making is a bit of a blending of these two…plus my own style of savory galette (with a creamy ricotta base)…and a favorite summer squash gratin. I was struck by the observation from the creator of one of the tarts I found that her tart was “something in between” a quiche and a gratin. I didn’t want to make a quiche, but the “gratin” part appealed to me and that favorite summer squash gratin came to mind as I was drifting off to sleep one night, noodling on how I was going to build my tart.


There are a lot of component parts to this galette. If you just want to make dinner, it will seem a bit fiddly. But it is actually pretty easy to put together once you have the components (all of which can be made ahead except for the salted squash)—making it perfect for entertaining. If you have your own favorite tomato sauce on hand, you can use it as long as it is very thick (cook it down a bit until it no longer weeps and it mounds on a spoon). You will need about 3/4 cup. The one I use here is my favorite summer tomato sauce—nothing more than vibrant, vine ripened tomatoes (skin, seeds and pulp) cooked down with a generous amount of garlic, pepper flakes and olive oil. You could likely omit the ricotta—the thick tomato sauce providing enough of a barrier to keep the crust from becoming soggy—but I like the richness that it adds. (If you were to omit the ricotta, I would probably increase the Gruyère a bit.) The tomato sauce, on the other hand, should not be skipped. Its tartness adds essential balance and interest to the other mild flavors.

The tart made a great first course for my curbside dinner—a wonderful addition to the end-of-summer theme. I enjoyed the leftovers for lunch…and then a light dinner…along with a nice green salad. I’m only sorry that the season for these vegetables is rapidly coming to a close and it will probably be next year before I make this vibrant tart again. Maybe you will find a way to squeeze it in this year.


Late Summer Zucchini & Corn Galette with Tomato & Browned Butter Breadcrumbs

Pâte Brisée (tutorial):
175 g. all purpose flour (about 1 1/3 c.)
1/2 t. salt
132 g. cold butter (about 9 T.)
50 to 66 g. water (about 3 1/2 to 4 1/2 T)

Combine the flour and the salt in a medium-sized bowl. Rub/cut the butter into the flour until the mixture has the appearance of cornmeal and peas. Drizzle 3 1/2 T. ice water over the flour/butter mixture. Using your hands, fluff the mixture until it begins to clump (if you grab a handful and squeeze it will adhere), adding more water if necessary. Turn the dough out onto a counter and form into a mound. Using the heel of your hand, gradually push all of the dough away from you in short forward strokes, flattening out the lumps. Continue until all of the dough is flat. Using a bench scraper, scrape the dough off the counter, forming it into a single clump as you do. Form the finished dough into a thick disk. Chill for at least 30 minutes (overnight is even better, if you have time).

To roll out the dough, let it warm up for a moment or two at room temperature. Line a baking sheet (preferably rimless) with parchment paper; set aside. Roll out the dough on a lightly floured surface into a circle that is about 1/8-inch thick and is 14 inches across. Brush off the excess flour. Trim any ragged or uneven edges if you like. Transfer the dough to the prepared sheet. Cover loosely with plastic wrap and chill for at least 30 minutes.

Ricotta Base:
150g whole milk ricotta (drained before weighing if very wet)
2 t. olive oil
2 t. flour
Salt & pepper

In a small bowl, combine the ricotta with the olive oil and flour. Season to taste with salt & pepper. Chill until ready to use (can be made a day or two ahead).

Summer Tomato Sauce:
2 1/2 T. olive oil
2 cloves garlic, minced
Pinch hot pepper flakes
340g. vine ripened tomatoes (preferably red or yellow), cored and cut into a rough dice

Place the oil, along with the garlic and pepper flakes in a wide sauté pan and place the pan over moderately high to high heat. When the garlic begins to sizzle enthusiastically and is just on the verge of taking on a bit of color, add the tomatoes (along with all of the juices) to the pan. The tomatoes should immediately begin to simmer rapidly. Allow the tomatoes to cook, shaking the pan back and forth occasionally, stirring at regular intervals and regulating the heat in order to maintain a brisk simmer, until the tomatoes have broken down and the sauce is thickened and emulsified (a path should remain when you draw a spoon across the pan and the sauce should mound on a spoon). You should have a scant 3/4 cup. Taste for seasoning and remove from the heat. Sauce may be made ahead.

Browned Butter Breadcrumbs:
3/4 c./41g. fresh breadcrumbs
1 1/2 T. butter

Place the bread crumbs in a bowl. In a small sauté pan cook the butter over medium heat for a few minutes, whisking occasionally, until it begins to brown and smells nutty. Pour the browned butter over the breadcrumbs, scraping in all of the browned bits. When cool enough to handle, toss to combine. Set aside.

Vegetable and Cheese Filling:
400g (about 2 large) zucchini, sliced 1/8-inch thick (use a mandolin)
1/ 2 t. kosher salt
41 g. (1/2 c.) finely grated Pecorino
100 g. (a scant cup) grated (medium fine) Gruyère
1 T. minced fresh thyme
2 T. minced parsley
2 T. olive oil
1 1/2 c./225g fresh corn kernels (cut from 1 large or 2 small ears)

Cut the squash into 1/8-inch thick rounds (use a mandolin slicer). Toss the squash slices with 1/2 t. kosher salt and place in a colander set over a plate. Let stand 10 minutes. Spread two layers of paper towels on your work surface and transfer the squash to the towels, shaking off as much of the liquid as possible as you do. Blot with another layer or two of paper towels. (The squash does not need to be spread in perfect single layers—you just want to have it spread out so that you can blot away the majority of the liquid).

Combine the pecorino with the buttered breadcrumbs and set aside.

Build the tart: Spread the ricotta mixture in a circle in the center of the chilled pâte brisée, leaving a 2-inch border of dough. Dollop and spread the cooled tomato sauce over the ricotta. Scatter half of the Gruyère over the tomato sauce.


In a large bowl, combine the squash, half of the pecorino/breadcrumb mixture, the remaining Gruyère, the herbs, olive oil and corn. Taste and correct the seasoning. Arrange this mixture on top of the ricotta/tomato/ Gruyère base on the pastry crust. Use your hands to do this, simply grabbing a handful of the mixture at a time and arranging the mixture in and even layer (your hands work best—rather than just dumping it out—because you can make sure you get a nice mix of corn and zucchini with each handful). Spread the remaining pecorino/breadcrumb mixture over all.

Pull up the edges of the crust and gently flip them over the filling to form a rustic edge. Pleat the dough as necessary, pressing lightly into place.

Bake the tart in a 400° oven on the lowest rack (or in the middle with the sheet pan sitting directly on a preheated baking stone). Bake until the filling is bubbling in one or two spots, the breadcrumbs are golden, and the crust is crisp and golden brown—about 30 to 40 minutes. Slide the tart onto a rack and let rest for 15 minutes (or cool until just tepid) before serving. The tart is also delicious made a day ahead. Slice while cold to get beautiful, clean slices and reheat for 15 minutes in a 350° to 375° oven. Tart serves 6 to 8.


Tuesday, August 11, 2020

Zucchini-Walnut Muffins with White Chocolate & Lemon Sugar


I have a confession to make. As much as I love all kinds of breakfast breads (coffeecake, scones, cinnamon rolls, yeasted-braids, muffins, etc), muffins tend to get the short shrift in my kitchen. It isn’t that I don’t like them. I do… I have posted recipes for many different kinds (all delicious). But to be honest, a standard muffin is just too small for my breakfast (I’m willing to accept the idea that the problem might be one of appetite, rather than muffin size…but I’ve chosen to approach this problem from the standpoint of blaming the muffin.) One would think the solution to this would be to just eat two muffins. But as it turns out, I think that two muffins are way too much. (Just call me Goldilocks…)
  
For several years now I have noticed pictures in cookbooks and magazines of muffins (and other miniature cakes) that had been baked in intriguing looking paper liners with large jagged, pointed edges. I didn’t think much about it other than that they were attractive. In any case I had never seen them for sale anywhere. 


Then, I saw them in use on a Bread Ahead Bakery tutorial for blueberry muffins. I was actually not being very attentive to the tutorial because I already have a blueberry muffin recipe that is the best (really). But when they began to fill the lined muffin tin with the batter, it became obvious to me that not only were these liners attractive, they made it so a standard muffin cup would hold more batter!

Several others watching at the time were asking about the liners and others who were familiar with them identified them as “Tulip” liners. As soon as the video was over I made a beeline for Amazon to search for Tulip muffin liners. A few days later my pack of 100 liners arrived.

I immediately made my blueberry muffin recipe, dividing it into 9 instead of 12 muffins. I could have made 8…but at the time I thought they looked quite full and I didn’t want to risk an overflow. I needn’t have worried. I got muffins that were tall and generously sized (but not too generous…). And as a bonus, because the liners are made with parchment paper, the muffins don’t stick at all (one of my pet peeves about the old-fashioned style of paper cupcake liners).

 
I now am able to use all of my delicious muffin recipes…and the standard muffin tins I already have in my cabinets…to make muffins that are just what I wanted: a muffin that is the size of 1 1/2 standard muffins. The only possible drawback to these lovely liners is that when you use them you don’t really get the quintessential “muffin top” (which I understand is the favorite part of the muffin for some people…). But since the “muffin top” portion generally wants to stick to the pan, this is not a drawback in my world.

Since muffins have been in the forefront of my mind, when I recently found myself with a glut of zucchini, a muffin was the first baked good I thought about making. I didn’t have a zucchini muffin recipe in my repertoire…so I decided to develop one. It is sort of a hybrid cross of Gina DePalma’s Zucchini & Olive Oil Cake and a Carrot & Apple Spice Muffin recipe that I posted a few years ago. I have added the white chocolate because I think zucchini requires a bit of extra sweetness and I didn’t want to add any more sugar to the muffin batter. I think golden raisins would be another great option. 

If you happen to have a few extra zucchini in your kitchen right now (a common problem in July and August), these muffins would be just the thing. Because they are muffins, they are quick to make and bake. They are also delicious: tender, sweet and spicy…with a tiny zing of lemon. And best of all, they are just the right size.


Zucchini Walnut Muffins 

3 T. granulated sugar
1/2 T. finely grated lemon zest

170 g. (1 1/2 c.) all-purpose flour
1/2 t. salt
1/2 t. baking soda
3/4 t. baking powder
1 t. cinnamon
1/2 t. ground ginger
1/4 t. nutmeg
2 eggs
1 t. vanilla
65 g. (1/3 c.) brown sugar
100 g. (1/2 c.) granulated sugar
135 g. (2/3 c.) olive oil
200 to 225 g. finely shredded zucchini (top and tailed, but skin intact)
60 g. (1/2 c.) coarsely chopped/crumbled toasted walnuts
85 g. (1/2 c.) white chocolate chips (optional) 


Combine the sugar and lemon zest;  set the lemon sugar aside.

Place the next seven ingredients in a small bowl and whisk to blend. Set aside.

Place the eggs and vanilla in a large bowl and whisk to break up the eggs. Add the sugars and whisk until smooth. Add the oil while whisking constantly. Whisk until the mixture is smooth, homogenous, and thickened. 


Add the dry ingredients and fold in with a rubber spatula. When the dry ingredients are almost absorbed add the zucchini, walnuts & white chocolate. Continue to fold, just until blended.

Divide the batter among eight to twelve muffin cups (an ice cream scoop works well for this) that have been lined with “tulip” or standard-sized liners. You will get 12 with standard sized, 8 or 9 with tulip-style liners. Sprinkle the lemon-sugar over the batter. 


Transfer to a 350° oven and bake until golden brown, springy to the touch, and a toothpick inserted in the center of one of the muffins comes out clean....about 25 to 35 minutes (depending on the size of the muffins). Let the muffins cool in the pan for five minutes before removing to a wire rack.

Serve warm or at room temperature. The muffins will keep well at room temperature (if stored air-tight) for a couple of days. Freeze them for longer storage.

Makes 8 to 12 muffins.


Monday, July 13, 2020

Raw Zucchini Salad

One of the things I love about my new home is my kitchen.  It will come as no surprise to hear that during my home search one of my “must haves” was a good kitchen.  It didn’t have to be state of the art—but it had to be highly functional.  The kitchen I got exceeded my wildest expectations.  I love it…and have enjoyed getting to know it over the past year or so.


But of course, nothing is ever perfect.  During the past two summers I have discovered one thing that I really miss about my old kitchen:  its location in the house.   My old kitchen was just off a large great room that had a two story vaulted ceiling.  The house thermostat was located on the opposite side of the great room.  Without even thinking about it—even on the hottest days of summer—I was in the habit of firing up my oven for tasks hot and large (pizza) as well as things small and moderate (toasting a handful of nuts to top pasta or a salad).  The heat from the oven just wafted out of the kitchen and rose up into the heights of the great room ceiling, never making it as far as the thermostat. The kitchen never got overly hot…and the A/C never had to work any harder to make up for the heat being pumped out of my oven.  In my blissful ignorance I baked and roasted my ways through the long hot summers, always a bit mystified when people in classes commented that they loved my summer pizzas, but they had no intention of turning their oven up to that kind of temperature in the summer.

Fast forward to my new home and kitchen….with its nice powerful convection oven and poorly placed house thermostat (in a small hall area right off the kitchen).   Even though the layout of the house is open, the ceilings are of a standard height.  That, coupled with a smaller space in general, makes it so the temperature in the house can quickly become overwhelmed by my nice powerful oven.  If I turn it on—even for a few minutes—the temperature in a good portion of the house begins to climb…and the A/C begins to run non-stop.  

I don’t share any of this to complain.  Rather, I mention it because it has forced me to become a bit more creative and efficient—which is always a good thing.  The worst issues were solved with a few strategically placed fans (at least turning on the oven doesn’t make the thermostat go up even when the A/C is running!).  I also plan now about when and how I will use my oven.  And as often as possible I double and triple up on tasks:  If the oven is on to make coffeecake (a non-negotiable essential), I toast nuts (in larger batches)…or roast a couple of ears of corn…or bake a bunch of beets.  This way, later in the week, when I want nuts or corn (or beets) for a cold salad, the oven doesn’t even come into play.  

Another change has been in the things I eat—choosing to eat something in its raw state rather than cooked.  Today’s salad is a case in point.  I have always added zucchini to pastas, salads, quichequesadillas…all summer long—almost always in its cooked form (roasted, broiled, sautéed, etc.).  When I have chosen to eat it raw I have always felt it necessary to shave it in long ribbons or thin and wide cross sections.  It’s delicious this way, but not always appropriate.


Recently I saw a salad of thick-ish batonnets of raw zucchini on the NY Times Instagram feed.  It included nuts…and herbs…and cheese…and a tangy dressing—but they were just garnish.  It was basically an all out raw zucchini experience.  I was intrigued…and a bit dubious…but I made a mental note to try it sometime.


Later in the week I was making a BLT for dinner and needed a quick side dish.  I had recently come into an abundance of zucchini.  I thought of that salad.  The vinaigrette for the salad was more involved than I wanted—and the salad included toasted almonds (I had raw…)—so I made a few changes.  I had some of the vinaigrette left that I always use on raw late spring/early summer vegetable salads and I thought it would do nicely.  And I used some toasted and salted sunflower seeds that I had on hand and wouldn’t require the oven.  It was delicious.  I was surprised at how much I enjoyed the soft crunch of the zucchini.  To be honest, I think the additional hard crunch of almonds would have been a bit much, so I was glad I had had to use the sunflower seeds instead.

In the days that have followed I have made this style of zucchini the base of my lunch time salad on several occasions.  I almost always add roasted corn (I keep it in a container in the fridge) and cherry tomatoes.  My nut of choice is walnuts (toasted in quantity, salted & oiled, and kept in my pantry), but occasionally I will use sunflower seeds.  Sometimes I use the shaved Pecorino called for in the recipe, but more often than not I opt for big crumbles of Feta.  Arugula makes a great addition…as does mint.  But if you don’t have either of these on hand, it is delicious without.  I’m guessing basil or parsley leaves would be good, too.  And that dressing I had on hand that first time?  It has become the standard.  I have since made a big batch.


It should be obvious that this is a highly adaptable salad. The main thing to keep in mind is the seasoning.  In looking at the recipe and in thinking of my own experience with raw vegetables in general—and zucchini in particular—it seemed to me that salt and acid are the keys to the success of the salad.  So a salty cheese, a tangy vinaigrette, and careful salting are a must.  If you don't have a salty cheese, some olives would be a good addition.  Other than that, feel free to improvise with ingredients—using a nice balance of crunchy, soft, and juicy ingredients.   As for quantities, the ones I’m giving in the recipe are just a guide.  I never weigh when I make this salad—I just add larger and smaller handfuls of the ingredients.  And that’s what you should do too.  The only reason there are weights and measures in my recipe is to give you a place to start.  The last time I made it, I weighed everything as I put it into the bowl for the purpose of posting a recipe.


I realize of course that most of the rest of the world has been having to make these summer cooking adjustments all along—that I was truly spoiled.  But that’s ok.  I have no desire to trade my new kitchen for my old.  I’ll just keep adjusting.  My next operation keep-the-house-cool project will be making friends with my neglected Weber.  Grilled pizza, here I come. 


Raw Zucchini Salad
With Roasted Corn, Cherry Tomatoes & Feta

For one lunch-sized salad (recipe multiplies easily):

1 small zucchini/summer squash (about 2 1/2 oz), cut into quarter-inch batonnets
1/2 c. (about 2 1/2 oz.) roasted corn kernels
1/2 c./2 oz. cherry tomatoes, quartered (or halved of very small)
A small handful/1/2 oz. arugula
20 g./3 T. toasted, oiled & salted walnuts, coarsely crumbled or 1 1/2 T. oiled and salted sunflower seeds
1 oz. crumbled Feta (used a good quality Feta packed in brine) or shaved Pecorino
Salt & Pepper
1 1/2 to 2 T. Basic Tangy Vinaigrette (below)


Place the first six ingredients in a bowl.  


Season with salt and pepper.  Drizzle with the vinaigrette, toss to combine. Taste and correct the seasoning…adding more vinaigrette if you like.  Mound on a plate and serve!

Notes: 
  • Quantities should be to taste.  I have given amounts only as a starting point.  You should alter to suit your preferences and your palate.
  • Salad is delicious with a handful of fresh mint leaves.


Basic Tangy Vinaigrette:
1 T. finely minced shallot
1 small clove of garlic, minced
1/4 c. red wine vinegar
Salt & freshly ground black pepper
1 T. Dijon mustard
3/4 c. oil—olive oil, or half olive oil and half vegetable oil
1 T. finely minced parsley

Place the shallot, garlic, vinegar, pepper and a half teaspoon of kosher salt in the cup of an immersion blender...or regular blender.  Let sit for five minutes.  Add the mustard. With the blender running, add the oil in a thin stream to form a thick, emulsified dressing.  Add the parsley and process briefly...or simply stir in.  Taste and correct the seasoning.  Makes 1 cup vinaigrette.

The dressing keeps at least two weeks in the refrigerator.  If all olive oil is used, it will solidify under refrigeration and you will need to bring to room temperature before using.  When made with half vegetable oil it will still be pourable when cold.

Note: You may add the parsley with the Dijon...just be aware that your vinaigrette will have a pale green cast to it.

(Vinaigrette recipe from Cooking with the Seasons by Monique Jamet Hooker)


Printable Version


Sunday, August 18, 2019

Zucchini Quiche with Feta, Walnuts & Lemon


Because my work involves so many different cooking outlets (teaching—at more than one place, private dinners—in many different homes, working in a pastry shop, testing recipes for all of the above…not to mention for my blog…) I occasionally purchase way too much of an ingredient.  Most of the time I am able to absorb the extra into my own cooking…or one of the many outlets…without too much thought.  Recently however, I found myself in possession of an extra quart and a half of cream that I didn’t “need” for any of my work.  I love cream.  But a quart and a half is a lot of cream for a household of one!

I began to look for ways to use lots of cream.  I made my mother a batch of scones….  I made myself a batch of scones….  And I still had almost a quart.  At the same time, I also had an abundance of beautiful eggs (gifts from good friends who keep chickens).  So, I thought ice cream would be the solution.  But I didn’t have any milk…and I didn’t feel like adding to my stash of dairy…

Then I went to the farmers’ market.  Actually, I went to three in one morning—because I really do love going to farmers’ markets.  When I got home I discovered that in shopping at three locations without a list I had purchased way too much zucchini and summer squash (it was just so beautiful—I think it has been a good year for squash). 


As I looked at my abundance of squash, wondering how I was going to consume it before it started to go bad, I thought about my stash of cream and eggs….  Then I thought of quiche.  A standard size quiche would use up at least a cup of cream…plus a couple of eggs and a good portion of my squash.  As luck would have it, I also had a round of pate brisée in my freezer (always a good thing to have on hand!).  Clearly a zucchini quiche was meant to be.

Now I just had to decide how I wanted to cook the summer squash (Vegetables should always be cooked before adding them to a quiche. To learn why, check out my “quiche basics” post from a few years ago.)  …and what other flavors I wanted to add to compliment the squash.  For the cooking of the squash I decided to go with a method I described in a pasta salad post several years ago.  The squash is cooked in a sauté pan with a small amount of olive oil and a minimal amount of water.  As the squash cooks the water evaporates.  Tom Colicchio (the source of the method) calls the result ‘the essence of zucchini’:  tender zucchini that isn’t water-logged (as it would be if boiled) or caramelized (as it would be if sautéed or roasted).  I thought it would be a perfect way to prepare it for a quiche.


My inspiration for the remaining flavors began with the zucchini tart in Anna Thomas’s The Vegetarian Epicure (which was the first recipe that popped into my mind when I began to think about a zucchini quiche).   Her tart is so tightly packed with zucchini slices that a cross-section looks like a mosaic.  It is the look I was striving for in my quiche.  She tops her tart with toasted breadcrumbs.  I loved the idea of a bit of crunch—and I love quiche topped with breadcrumbs—but I decided instead to get my crunch from some finely minced walnuts. 


Walnuts are one of my favorite companions for zucchini. The addition of lemon and garlic to this combination raises the flavor to one of those “greater than the sum of its parts” food experiences.  I don’t remember now where I first encountered this combination.  I wish I did, so I could give credit.  Zucchini can seem a bit bland and one dimensional—slightly bitter…with finer specimens exhibiting a nutty flavor profile.  The walnuts accentuate both of these things.  Garlic adds depth.  Lemon turns on the lights, allowing all the flavors to shine.  If you have never tried this combination of flavors, you should try making a side of simply sautéed zucchini, finished with garlic, lemon zest, a shower of chopped walnuts and a judicious amount of salt (and some parsley or thyme if you’re feeling fancy).  You will probably have a new favorite summer side dish.

All of these flavors were easily incorporated into the tart.  I added thyme to the zucchini as it cooked…and slipped the lemon and garlic into the custard.   And to get that little extra bit of salt that all of this requires, I added Feta.  Not only does Feta provide a nice tangy/salty accent, it can be cut into cubes (like the squash) and adds to the lovely mosaic look of the slices of quiche.  All in all, I found this tart to be unusually delicious—and a great way to use up some of that late summer abundance of zucchini (not to mention my own personal surplus of cream and eggs!).


Zucchini Quiche with Feta, Walnuts & Lemon

400 g./14 oz. small zucchini and/or summer squash, trimmed and cut into a 1/4- to 1/3-inch dice (see note)—a generous 3 cups
several sprigs of thyme, picked
1 1/2 t. olive oil
1/4 c. water (plus more as needed)
Salt & pepper, to taste
2 eggs
1 c. heavy cream
Zest of one medium or half of a large lemon
1 small clove of garlic
1 10-inch blind baked tart shell (see below)
1 1/2 oz. grated Parmesan or Pecorino (or a mix of the two—which is my preference)
4 oz. Feta (block in brine), cut into 1/4-inch cubes
1/4 c. walnuts (finely chopped)


In a very large skillet, warm the olive oil over medium to medium high heat. Add the zucchini, the picked thyme, a generous pinch of salt and 1/4 cup of water and cook over moderately high heat, stirring occasionally, until the zucchini is tender and the water has evaporated.  This will take 5 to 10 minutes, depending on the size and age of the zucchini.  Add more water if the zucchini starts to brown. Transfer the zucchini to a baking sheet to cool.  If the zucchini is tender and the water hasn’t evaporated, spread the zucchini on paper towels to absorb the excess moisture. 

Crack the eggs into a medium bowl and whisk until smooth.  Add the cream and lemon zest.  Using a microplane zester (the same one you used for the lemon zest), grate the garlic clove into the bowl (if you don’t have a microplaner, smash the garlic to a purée with a pinch of salt and add).  Whisk until smooth.  Season with salt and pepper to taste.

Place the baked crust on a baking sheet.  Scatter half of the Parmesan/Pecorino over the crust. 


Next, add the squash and spread into an even layer.  Scatter the Feta evenly over the squash and use your fingers to nudge it into an even layer with the cooked squash. 


Slowly pour the custard over the squash and Feta, jiggling the pan a bit so the custard will be evenly distributed and will penetrate any pockets created by the squash and cheese. Be careful not to let the custard flow over the edge. If there are any low places in the edge of your crust, you will not be able to use it all. Scatter the remaining Parmesan/Pecorino over the tart, followed by the walnuts.


Bake the tart in a 375-degree oven until the custard is set—about 25 to 30 minutes (a knife inserted in the center will come out clean). Slide the tart under the broiler to brown slightly if you like. Serves 6 as an entrée (with a salad or vegetable side), 8 to 10 as a light first course with a fluff of lightly dressed greens.


Note: 

  • The tart is very fragile if served right away.  If you don’t mind the zucchini slipping apart from the custard a bit as you eat, this isn’t a huge problem.  But if this bothers you, simply make the tart ahead—it slices beautifully if it has time to rest and set up.  And, it actually tastes better on subsequent days—the flavors having had time to develop and blend.
  • I have made this tart with both diced and sliced (scant 1/4-inch) zucchini.  When sliced, the “slipping” of the squash (previous note) is even more pronounced.  But slicing the zucchini is obviously faster than dicing…and as mentioned above, isn’t a problem after the tart has had a few hours to set up.
  • Parmesan is nutty—accenting the nuttiness of the squash and the walnuts.  Pecorino contributes a salty tang (like the Feta).  I like the inclusion of both—but one or the other would be fine too.


Pâte Brisée
(Short Crust Pastry)

1 1/3 c. all-purpose flour (150g)
3/8 t. salt
8 T. cold unsalted butter, cut into pieces (113g)
3 to 4 T. ice water

Combine the flour and the salt in a medium-sized bowl.  Rub the butter into the flour until the butter is in small pea-sized pieces. Drizzle the smaller measure of ice water over the flour/butter mixture.  Using your hands, fluff the mixture until it begins to clump, adding more water if necessary.  Turn the dough out onto a counter and form into a mound.  Using the heel of your hand, gradually push all of the dough away from you in short forward strokes, flattening out the lumps.  Continue until all of the dough is flat.  Using a bench scraper, scrape the dough off the counter, forming it into a single clump as you do.  Form the finished dough into a thick disk.  Chill for at least 30 minutes.

To roll out, let dough warm up for a moment or two.  Butter/spray a 10-inch removable bottom tart pan and set it aside.  Roll out the dough on a lightly floured surface into a circle that is about 1/8- to 1/6–inch thick and with a diameter 2 to 3 inches larger than that of the pan.  Trim any ragged edges.  Brush off the excess flour and fold the dough circle in half.  Transfer it to the prepared pan.  Unfold the dough and ease it into the pan being careful not to stretch it.  Press the dough against the sides of the pan (being sure not to stretch the dough) and cut the dough off flush with the edge of the tart pan.  Chill for at least 30 minutes.

To blind bake, line the pastry with aluminum foil or parchment paper, pressing it into the corners and edges.  Add a layer of pie weights or dried beans.  Bake in a 400° to 425° oven for 20 to 25 minutes.  When the pastry begins to color on the edges and is cooked through, remove the foil and weights and continue baking until the pastry dries out and turns a golden brown (another 5 minutes or so).

Printable Version

Monday, September 3, 2018

Marinated Summer Squash…with Cherry Tomatoes, Olives, and Capers


Earlier this summer I had an unfortunate experience with a recipe for marinated summer squash.  I wasn’t really paying attention to what was going on during the cooking process…I think I was distracted...and I was just blindly following a recipe in an attempt to get dinner on the table quickly.  (It happens to us all!)  The result was mushy…and oily…and kind of awful.  Because this was early in the summer, I’ve had the whole growing season to be sort of peripherally obsessed with marinated summer squash.  I’ve noticed it whenever a recipe for it crossed my path (which—surprisingly—happened with some frequency), and I’ve made several variations now.


Early on I happened across a great basic recipe from The Canal House.  I love recipes like this—no-frills, “method” recipes that enhance your understanding of a process and can then be used as a foundation for all kinds of variations.  Once you have the method recipe for something in your repertoire, you then begin to see it being used within more elaborate recipes all the time…and even when the more elaborate recipe is poorly or obscurely written, if you like the dish that recipe is trying to convey, you can then use your knowledge of the basic method…and the idea presented in the new recipe…and produce something delicious to eat. 

The basic method for marinated squash is to cook large pieces of squash 


(grill, broil, roast, sauté in a skillet, etc.) until golden brown and just tender (should still have a bit of resistance in the center) 


and then dress it with a tangy, garlicky, herby dressing while still warm. 


Then, all you have to do is let the squash sit and marinate until it has cooled to room temperature.  At that point you can enjoy it right away…or the next day (or later).  It is good chilled, at room temperature, or reheated.  The trick for success is choosing small, tender squash


...and then being careful not to overcook it (no matter what size you end up with).


I have run across variations on this basic method ranging from simple to complex.  Bon Appétit had a recipe in June with hazelnuts and mint (served on a bed of ricotta).  Joshua McFadden in his book Six Seasons includes a recipe with cherry tomatoes and a complex vinaigrette made with capers, raisins, anchovies and loads of parsley.  For subtle crunch, he tops the whole dish with a shower of toasted breadcrumbs.  


Michael Solomonov (Zahav) spoons his marinated squash over a “charred zucchini baba ganoush” and tops it with feta and hazelnuts. In her book Fresh from the Farmers’ Market, Janet Fletcher makes her vinaigrette with tomato concassé, niçoise olives, and capers.

Marinated squash can be served as a side dish (it’s especially nice with fish, chicken and lamb), but that’s just the beginning.  As demonstrated by the Bon Appétit and Solomonov versions, it is perfect for serving on top of a smear of ricotta, hummus…or other favorite spread.  If you add a loaf of crusty bread…or some warm flatbread…you have dinner.   At my table, I have served this squash for dinner on top of a big mound of fresh corn polenta…and as a side to halibut and toasted pine nut couscous.  


And I have enjoyed it for lunch with a custardy, soft cooked egg and a mound of warm freekeh.  


My favorite version is a hybrid of several of the recipes mentioned above (and it’s the one I’m including in my post).  Once you make it, I imagine you will come up with your own variations…and find a myriad of ways in which to serve it.

Marinated Summer Squash with Cherry Tomatoes, Olives, & Capers

1 lb. firm small summer squash (a mix of shapes and colors, if possible)
1 T. olive oil
Salt & pepper
2 T. red wine vinegar
1 large clove of garlic, peeled
1/2 lb. cherry tomatoes, halved (mixed colors, if available)
1 1/2 T. capers, rinsed and coarsely chopped
1/3 c. Kalamata (or other favorite brine-cured olive), halved
1/3 c. olive oil
10 to 12 large fresh basil leaves, cut in a medium chiffonnade
1/4 c. toasted breadcrumbs or toasted walnuts


Trim the squash.  For cylindrical squash, halve each squash lengthwise.  If the squash are on the large size (larger than 4 or 5 oz.), cut each in half again lengthwise.  Your goal is long slabs that are about 1/2-to 3/4-inch thick.  For patty pan-style squash, cut in half horizontally through the equator.  Again, if they are on the large side, you may want to cut these slices in half (to make semi-circles) or if the squash is extra tall, you may just want to cut it in 3 thick slices horizontally.  As with the zucchini, your goal is slabs that are 1/2- to 3/4-inch thick. 


Heat your grill or broiler to high.  Place the squash in a bowl and toss with a tablespoon of olive oil.  If you are broiling the squash, spread it on a baking sheet.  Slide the pan under the broiler or, alternatively, arrange the squash on the grill.  Grill or broil, turning occasionally, until both sides of the squash are lightly browned and just tender, but not mushy—there will still be a small amount of resistance in the center of the squash.  (Alternatively, you can simply brown the squash in a skillet on the stove top.  Film the pan with oil and cook over medium to medium-high heat, starting with a cut surface and then turning as the squash brown.)


While the squash cooks, place the vinegar in a large bowl.  Using a microplaner, grate the garlic into the bowl.  Add the tomatoes, olives, capers and olive oil.  Season generously with salt & pepper and toss to combine.


When the squash is tender, transfer to a wide, shallow dish and season with salt.  (If any of the squash is longer than 4 inches, then cut those in half first.) Pour the tomato salad over the squash and add the basil.  Gently toss everything together using a rubber spatula.  Taste and adjust the seasoning.  


Let the squash sit for at least half an hour before serving, gently tossing the ingredients a time or two as they sit.  The squash may be gently warmed or served at room temperature.  To serve, transfer to a serving platter and shower with toasted bread crumbs or walnuts.  Serves 4.

Toasted Breadcrumbs:  Remove the crusts from a day old baguette or a few slices of artisanal style white bread.  Place in the food processor and process until bread is reduced a mixture of crumbs ranging from fine to pieces that are about the size of a pea.  Spread the crumbs in a small baking pan or pie plate and drizzle with a small amount of olive oil.  Toss to distribute the olive oil and moisten all of the crumbs.  Transfer to a 350° to 375° oven and bake, stirring at five minute intervals, until the crumbs are golden brown and crisp.  Let cool.  Toasted breadcrumbs may be stored for a few days at room temperature in an airtight container.   Freeze for longer storage.

Toasted Walnuts:  Spread the walnuts in a small baking dish and place in a 350° oven until golden and fragrant…about 5 minutes.  When cool enough to handle, crumble the walnuts with your hands.  Drizzle sparingly with olive oil and season with salt.

Printable Version