Showing posts with label Chocolate. Show all posts

Sunday, July 21, 2024

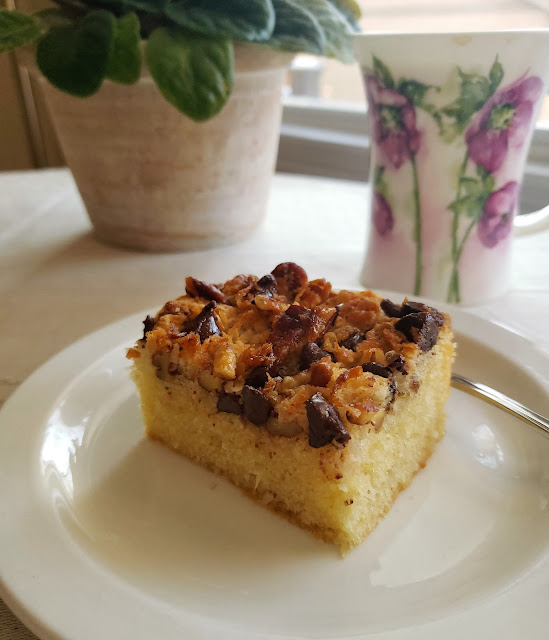
Bing Cherry Coffeecake with Chocolate-Pecan Streusel


I always try to teach—in my classes…through m blog—that a large part of learning to cook well is finding and honing a few basic, reliable and versatile recipes.  You should make these basics so often that you can practically make them in your sleep.  It might seem like this approach to food preparation might be boring…or limiting.  But it isn’t.  It is actually liberating.  The repetition will hone your skills in the kitchen.  And it will actually make you more adventurous as you recognize the patterns and techniques you have learned when you encounter them in new recipes (which will in turn give you confidence to try them).  French home cooking—as I learned it—leans heavily on this idea of learning a slate of basic tried and true recipes and then expanding your repertoire out from this core.  Julia Child called this style of cooking “theme & variation.”  

My short crust pastry is one of these foundational recipes in my kitchen.  When approaching a new recipe for a tart, pie or turnover, unless there is a compelling reason to use another recipe for the crust (maybe the dough needs an alternate flour/grain…or a very specific textural result that my recipe doesn’t provide is required…etc), I just substitute my own dough.  This leaves me free to focus on the part of the recipe that is new to me…and gives me a leg up on having a successful result.

For those of you who have been reading my blog for a while, you are probably aware that this is the way I approach cooking in general. I have posted several kinds of quiche…all with the same custard ratio.  Many ice cream recipes have appeared—all with the same basic formula underneath their varied flavors.  And so on.  

It will probably come as no surprise then that many of my coffeecake recipes are frequently variations on one basic, simple cake: a rich, sour cream cake that is itself a variation on the classic American 1-2-3-4 cake (1 c. butter, 2 c. sugar, 3 c. flour, 4 eggs.).  I shared it first in a Pear & Walnut Coffeecake.  It has since popped up (almost unchanged) in a Pineapple Upside-down Cake and a Peach Streusel Coffeecake.  And it has been the springboard for variations that eventually became Coconut Coffeecake, Piña Colada Cupcakes, Rhubarb Upside-down Cake and Chocolate Coffeecake with Browned Butter Streusel (to name a few).

A few weeks ago, after poking around on line a bit searching for a streusel coffeecake that suited my pantry and finding nothing appealing, I remembered that I already had a delicious recipe that I could use…and that I was pretty sure would turn out well.  Just like the pear coffeecake…and the peach one…I wanted a coffeecake that used the abundant fruit of the moment.  This time it was Bing cherries (not only was I almost out of coffeecake at the time…I had purchased too many cherries for some reason).  I love Bing cherries with chocolate…so I wanted a little chocolate in the cake.  My basic recipe was able to accommodate all of these things easily.  It was a no brainer to make it.  

If you make it…I hope you enjoy it as much as I did.  The basic cake—underneath the cherries and chocolate—might even become one of your favorite basic recipes.     


Bing Cherry & Chocolate-Pecan Streusel Coffeecake

1/2 c. all-purpose flour (60g)
1/4 t. nutmeg
1/3 c. brown sugar
1/4 c. butter
1/2 c. pecans (60g), lightly toasted and coarsely chopped
1/2 c. chocolate chips (85g)

1 3/4 c. all-purpose flour (200g)
3/4 t. salt
1/2 t. baking powder
1/2 t. baking soda
8 T. (1 stick/114g) unsalted butter, at room temperature
1 c. sugar (200 grams)
2 eggs, at room temperature
1 t. vanilla
1 c. sour cream (242 grams)
360g (about 2 1/2 c) Bing (or other dark, sweet cherry) cherries, stemmed, pitted and halved


To make the topping, combine the first four ingredients in a small bowl, rubbing the butter into the dry ingredients. Fold in the pecans and chocolate chips and chill until ready to build the coffee cake.

Combine the flour, salt, baking powder and baking soda in a small bowl and set aside. Cream the butter and sugar until light and fluffy (about 2 to 3 minutes using a stand mixer).  Beat in the eggs one at a time, scraping down the sides after each addition.  Beat in the vanilla. Fold in the flour mixture in three additions, alternating with the sour cream in two additions.  Spread the batter in a greased and floured 13- by 9-inch baking pan. Arrange the cherry halves, cut side up, over the batter so they are relatively evenly spaced.  


Scatter the topping evenly over all.  Bake in a 350° oven until golden and a toothpick inserted in the center comes out clean—35 to 45 minutes. 


Note: This cake freezes beautifully. If you want to have a slice for breakfast every morning, portion the whole cake and freeze the individual portions in an airtight container or in a single layer in a Ziplock freezer bag. A piece can be thawed in the microwave (medium power) or you can let it thaw overnight. To do this, before you go to bed, take out a slice, set it on a plate and cover it tightly with plastic to conserve the moisture as the cake thaws.

Printable Version


Saturday, February 18, 2023

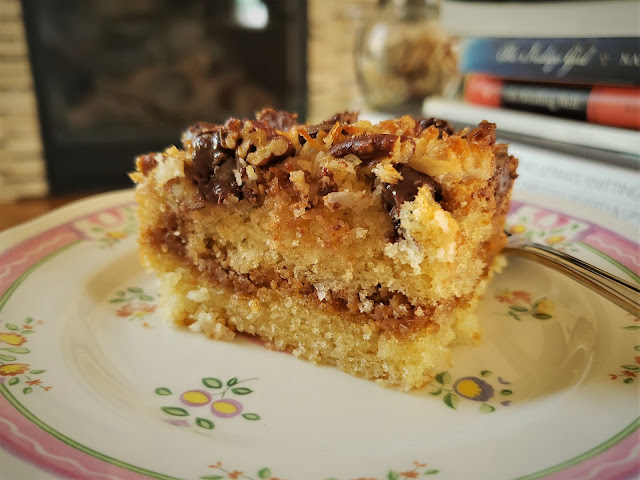
Coconut Coffeecake with Chocolate-Coconut-Pecan Streusel


In my first blog post after my long hiatus I mentioned that much of my personal cooking these days is centered around using things up: ingredients/partial containers left from cooking classes…private events…etc.  But as I pointed out then, anyone who lives and cooks in a small household is familiar with the need to learn to cook with the odds and ends left from previous meals.
 
As I reassemble my career in our post-pandemic world, I have begun to focus on my online cooking classes more and more.  I have been teaching cooking classes for over twenty years, but early in the pandemic it became obvious to me that the kinds of things that had worked well for in-person classes were not the same things that would work well for an online session.  So I’ve been adjusting a bit. 
 
It has occurred to me that the online format is perfect for giving people a peek into the actual workings of a small household kitchen.  I can make the things I actually cook for myself…in the portion sizes I cook them in…basically showing my cooking reality in order to encourage other people who are living the small household life that it is totally possible to cook and eat well when there is “just” one…or two…of you.  As it turns out, those of us living this life are not a small group.  I read the other day that as of 2021, 28% of American households were comprised of single adults.  35% are made up of two adults.  It is clear that small households are the majority of us.  We should be eating well at home!
 
So you might be wondering what all of this has to do with coffeecake.  Well…besides the fact that I regularly make big coffeecakes and cut them into portions for the freezer (and because it’s just me, they are mine…all mine…), this particular coconut streusel coffeecake came about because I had some ingredients leftover from a curbside dinner.  


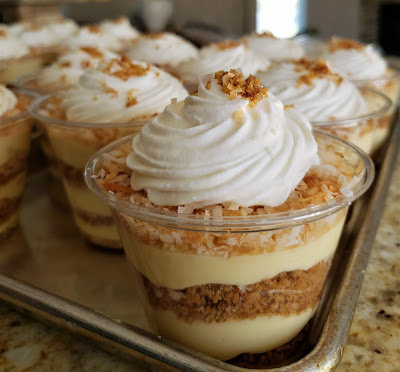
I had made a Coconut Bavarian Parfait and had an open can of coconut milk, a partial bag of shredded coconut, and extra egg whites.  Not to mention the big container of granola-like (i.e. eminently snack-able) graham cracker-coconut crumb crust that was left in my pantry.

So I created a coffeecake that used all of these ingredients.  At the time I thought it was a one-off…a never-to-be-duplicated treat…because I was unlikely to ever make the crumb crust again just to fill a coffeecake.  But of course the cake doesn’t need a crumb crust middle.  And as I have been getting ready for my first “cooking for a small household” class, I remembered this coffeecake because one of the recipes in the class includes a can of coconut milk.  


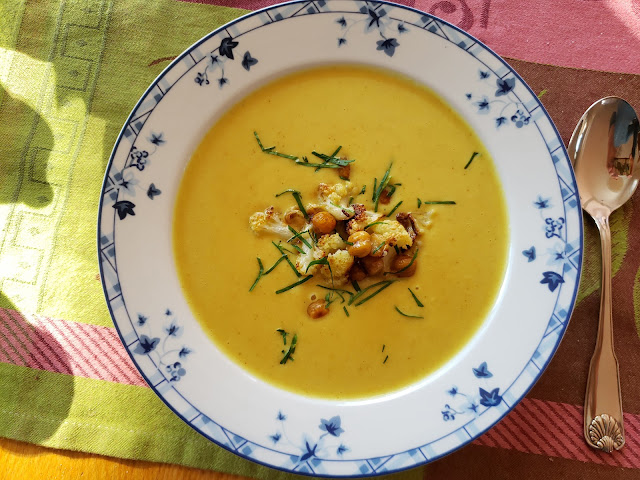
The recipe in question is a delicious purée of spicy roasted cauliflower and chickpeas.
  You can make a big batch and use up the whole can (and freeze or share the extra portions of soup).  Or—like me—you can make a small batch….in which case, you’ll have some coconut milk leftover.  You could roll that can of coconut milk into another dinner later in the week (these pork meatballs are fantastic)…or you can make a cake.  I know.  Tough decision.

You’ll notice when you look at the cake recipe that it uses all egg whites.  I almost always have a container of egg whites in my refrigerator.  I frequently make things that use just egg yolks and I save the whites.  They keep well in an airtight container for several weeks (just mark the date so you won’t keep them for six months…).  But if you don’t have egg whites, just use two large eggs instead. 


I have not included the graham cracker-coconut crumb crust filling in the recipe I’m posting.
  But if you would like to add it, the recipe can be found on the post for my Coconut Bavarian Cream Tart.  Just make the crust…toasting the clumps spread out on a baking sheet instead pressed into a pie or tart pan.  Break the clumps up a bit when they are cool.  To add this to the cake, spread half of the batter in the pan, scatter 2/3 to 3/4 cup (or however much you like) of the toasted crumb crust over the batter, dollop the rest of the batter over the crumbs and smooth out.  Top with the streusel and bake.  Increase the baking powder to a tablespoon if you add a layer of crumbs—the cake batter will need a little extra oomph because of the weight of the crumbs. 
 
If you make this coffeecake, you’ll have a little over half a can of coconut milk left.  There are lots of great things you can do with that half can.  But if you happen to see this post before February 28, I hope you’ll consider joining me for my “Cooking for a small Household: a Head of Cauliflower and a Can of Chickpeas” class.  I’ll be making that delicious soup…as well as a couple of other nice dishes using cauliflower and chickpeas.


Coconut Coffeecake with Chocolate-Coconut-Pecan Streusel
 
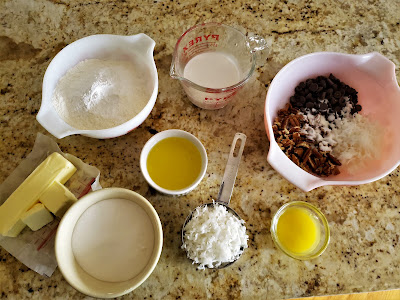
80 g. (scant 3/4 c.) pecans, lightly toasted and coarsely broken
115 g/4 oz. (2/3 c.) semi-sweet chocolate chips
50 g (1/2 c.) sweetened shredded coconut
25 g. (2 T.) sugar
25 g. (2 T.) melted butter
 
1 3/4 c. all-purpose flour (200 g.)
1/2 t. salt
2 1/2 t. baking powder
10 T. plus 2 t. (150 g.) unsalted butter, at room temperature
1 c. sugar (200 g.)
100 g. egg whites (see notes)
1 1/2 t. vanilla
2/3 c. coconut milk (160 g.)
75 g. (3/4 c.) sweetened shredded coconut
 

Butter a 9x9-inch baking pan.  Line the bottom with parchment.  Butter the parchment.  Flour the pan.  Tap out the excess and set aside.  Preheat the oven to 350°.
 
To make the streusel, place the pecans, chocolate chips, coconut and sugar in a bowl and stir until everything is evenly distributed.  Drizzle the melted butter over all and fold with a rubber spatula until the butter is well distributed.  Set aside.
 
Combine the flour, salt, and baking powder in a small bowl and set aside.  Beat the butter and sugar until smooth.  Increase the speed and cream until fluffy.  Beat in the egg whites in two or three additions.  Beat in the vanilla.  Fold in the flour mixture in three additions, alternating with the coconut milk, beginning and ending with the flour mixture.  Add the coconut with the final addition of the dry ingredients. 
 

Spread the batter in the prepared pan.  Scatter the streusel evenly over all.  


Bake in a 350° oven until golden and a toothpick inserted in the center comes out clean—40 to 45 minutes.  Serve warm.  Serves 9 to 12.
 
Note:  If you don’t have any egg whites on hand, you may replace the 100 grams of egg whites with 2 large eggs.

Monday, June 15, 2020

Peanut Butter & Brownie Chunk Ice Cream


A few weeks ago I made some brownies for part of a dessert I made for a private dinner for two.  Since it would have been more work to calculate the amount of batter needed for a tiny pan than it was to just go ahead and make a normal sized batch, I did the latter.  This also gave me a few brownies for my own consumption.  I tucked those extra brownies into the freezer so I could consume them in a controlled manner…at a leisurely pace.

A few days later I wanted to have one after my lunch…and I didn’t particularly want to wait for it to thaw (so much for control…and a leisurely pace…).  I’m only slightly embarrassed to admit that I ate it while it was still mostly frozen.  And it was delicious—with a nice fudge-y and chewy texture.

I must have been extra hungry because I immediately started thinking about how delicious it would be to fold some of those brownie chunks into some ice cream.  Some peanut butter ice cream…  At that point I pretty much set aside my plans for the rest of the afternoon while I worked out a formula for peanut butter ice cream.  By lunch the next day I was enjoying my first scoop. 


I suppose you could use any brownie recipe for this ice cream.  In general, brownies have so much sugar, that unless they happen to be one of those super-dense brownies, they will tend to have that nice fudge-y and chewy texture when frozen.  I used a favorite from my childhood:  the “Dinah Shore Brownies” I posted many years ago.  You can make the recipe as I posted it (using 70% chocolate), or do as I did for the brownies I put in my ice cream and use unsweetened chocolate (the conversion is in the “note” at the bottom of the recipe). 

The ice cream itself is simply a variation on my standard French custard ice cream.  I just replaced part of the heavy cream with peanut butter.  The ice cream as I made it was very peanut buttery (perfect, in my opinion).  If you would like a slightly less intense version, you can reduce the peanut butter by a third.  And if peanut butter and chocolate isn’t your thing, you can make vanilla…or coffee...or fresh mint…or maybe Bing cherry…and fold your brownie chunks into that instead.  Any one of these will be sure to hit the spot when you start to crave something cool and creamy as the summer heat settles in.


Peanut Butter & Brownie Chunk Ice Cream

1 1/2 c. (363 g.) whole milk
3/4 c. (174 g.) Heavy Cream (see notes)
6 T. (75 g.) sugar
6 (120 g.) egg yolks
1/4 c. (85 g.) honey
3/4 c. (198 g) Peanut Butter (see notes)
300 g. fudge-y brownies, frozen and cut into small cubes (see notes)

Place the milk in a medium-sized, non-reactive saucepan and bring to a boil. While the milk is heating, pour the cold cream into a chilled bowl, set aside. Whisk the egg yolks with the sugar until thick and pale yellow. When the milk boils, temper the egg yolks by gradually whisking in about 2/3 c. of the hot milk. Stir the tempered egg mixture back into the saucepan and place the pan over medium heat. Cook, stirring constantly, until the custard is thickened and forms a path when you draw your finger across the back of the spoon. Immediately strain the custard into the bowl of cold cream. Add the honey and the peanut butter and stir until they have melted into the warm custard.  Refrigerate until thoroughly chilled.

Freeze the ice cream in an ice cream machine according to the manufacturer’s instructions. When the ice cream is the consistency of soft serve, add the frozen brownies and fold in.  Transfer to a freezer container and freeze for an hour or two before serving. Makes about 1 quart ice cream.

Notes:
  • This quantity of peanut butter makes an intensely peanut buttery ice cream. If you prefer a lighter peanut butter taste, reduce the peanut butter to 1/2 cup (132 g.) and increase the cream to 1 cup (232 g.).
  • If you make “Dinah Shore Brownies” …and cut them into 16 squares…you will need 6 brownies. For this ice cream I made the brownies with 4 oz. of unsweetened chocolate and 1 1/2 c. of sugar (instead of 6 oz. of bittersweet chocolate and 1 c. of sugar) as described in the notes of the recipe.
  • When I cut the brownies, I crumbled up a few of the cubes to add varied texture to the ice cream…some large and some fine bits of brownies.
Printable Version

Monday, March 16, 2020

Chocolate-Pistachio Financiers

One year ago this past week I moved to a new home.  This was my first move in almost 30 years…and it involved a lot of changes and adjustments to routines and responsibilities.  Everything about the move was good…but developing, testing and writing about recipes fell to the bottom of my to-do list for pretty much the whole of 2019. 


As 2020 began, things felt as if they were calming down a bit, but I still struggled to find room for my blog.  I had begun to wonder if I was going to be able to find time to work up a recipe and write a tenth anniversary blog post (which just so happens to be today!), when all of a sudden I have found myself with abundant time:  In the space of four days every piece of business on my calendar for the remainder of March has been canceled as almost all social interactions have ground to a halt in an attempt to stem the tsunami that is COVID-19. 

In light of the current situation, before I share my anniversary recipe, I want to encourage readers to follow me on Instagram or Twitter (if you aren’t already).  I love IG and have been fairly active there for the past few years, regularly sharing the things that I cook at home in hopes that this will provide inspiration for others in the daily quest to put dinner on the table.  As we are entering this time of social distancing and self isolation, I will begin to post this same kind of thing  on Twitter as well. 

I don’t know how long the current situation will last, but as restaurants are today beginning to close their doors many people will find themselves in the foreign territory of having to cook for themselves on a regular basis.  This would be hard enough in normal times—but it’s even more difficult if you are trying to feed yourself from a limited pantry of almost entirely shelf stable items.  So follow me—and encourage your friends (who might not have previously been in the habit of cooking for themselves) to follow me too—as I share the things I’m cooking for myself from a more limited pantry (supplemented by produce from less frequent trips to the grocery store).  It would be fantastic if there could be a truly good outcome from this rather traumatic period:  people rediscovering the pleasures of home, cooking and the table.


As for my anniversary, longtime readers might remember my tradition of making something Pistachio to mark each successive anniversary.  There is no particular reason for this other than I posted a pistachio cake on my first anniversary.  Then on the next one I made another pistachio cake.  At that point I felt like I needed to continue to challenge myself to come up with something featuring pistachios each year.  Besides cakes there have been a couple of cookie recipes, cupcakes, a savory sauce…even pancakes!

This year I made some mini cakes:  Chocolate-Pistachio Financiers.  The idea came to me as I was preparing for a class in February.  The dessert I taught was a “Chocolate Almond Mini Cake” from Patricia Wells’ book Simply French.  When I ran across the recipe I recognized it as a chocolate financier (a miniature French browned butter and almond meal cake).  Served with homemade espresso ice cream, it was a big hit with the class.


At the time it occurred to me that I would like the cake even more if it were made with pistachios.  I like almonds…but I love the flavor of pistachios—not to mention that it is especially good with chocolate.  And like all nut flours, pistachio flour/meal tenderizes and adds moisture.   

So, that was my plan for my anniversary post.  But as the day approached, I still hadn’t made a pistachio version.  Then, suddenly I had the whole weekend right before my anniversary free…with no pressing projects (other than figuring out how I’m going to earn a living for the foreseeable future….).


So I made these little chocolate-pistachio cakes my Sunday project (I’m trying to have a specific project each day while my work has stopped and I’m stuck at home).  And as it turned out, I was right:  I do indeed like them better than the almond ones.  The almond version didn’t get the lovely glaze I put on the pistachio cakes—but even without it, I think the pistachio cakes would still be better.  Pistachios have a natural sweetness that enhances the chocolate rather than diluting its flavor the way added sugar might.  They are intensely chocolate-y, tender and moist.  The perfect little bite of cake. 

If you are a baker, you probably have all of the ingredients for these cakes in your pantry already.  If you don’t have pistachios, but you have almonds…or hazelnuts…you can substitute either of those and have a delicious cake.  Baking is a great thing to do when you are stuck at home.  Besides baking, I’m catching up on other things I never had time to do this past year…and reveling in the extra time I have available to spend out in my garden at one of my favorite moments of the gardening year (when everything is waking up). And hopefully I’ll spend more time getting back into the rhythm of testing recipes and posting them here for all of you to enjoy.


Chocolate Pistachio Financiers

55 g. (1/2 c.) pistachio flour/meal (see note)
30 g. (1/4 c.) all-purpose flour
5 g. (1 T.) cocoa
90 g. (3/4 c.) powdered sugar
1/4 t. salt
90 g. bittersweet (70%) chocolate, chopped
20 g. (1 T.) honey
90 g. (6 T.) unsalted butter
3 egg whites (90 grams)—beaten until foamy
1 recipe chocolate glaze
2 or 3 T. coarsely chopped pistachios


Whisk the first five ingredients together in a medium bowl; set aside. 

Place the chocolate in a heatproof bowl and drizzle the honey over.  Place the butter in a small saucepan set over medium heat. As the butter begins to sputter and pop, whisk occasionally. The butter solids will begin to turn brown. When the solids are a golden brown and the butter has a pleasantly nutty aroma, pour the butter over the chocolate and honey (making sure to get all the browned bits).  Let sit for a few moments.  Whisk until smooth.

Add the egg whites to the bowl with the dry ingredients and whisk until smooth.  Drizzle in the warm chocolate mixture in while whisking until fully incorporated.  Divide the batter among 9 buttered 2 oz. ramekins (or you can use a standard muffin tin--just fill 9 instead of all 12).  Chill for at least 30 minutes and up to 24 hours.  

When ready to bake, preheat the oven to 350°F.  If the ramekins have been in the fridge for longer than an hour or two, let them sit briefly on the counter so the ramekins can come to room temperature.  Place on a baking sheet and transfer to the oven.  Bake until the cake a toothpick inserted in the center comes out with a few moist crumbs—about 18 to 22 minutes.  Cool the cakes for 10 minutes before turning them out. 


The cakes may be served warm:  Dust with powdered sugar and serve with a small scoop of ice cream, custard sauce, or whipped cream.

Or, cool the cakes and decorate with chocolate glaze: Turn the cakes upside down (so the smooth, slightly domed side will face up) 


and place a spoonful of the cooled glaze (see below) in the center of a cake.  Spread the glaze to the edges so that it begins to drip randomly down the sides. Repeat with the remaining cakes.  


When the glaze is just set, garnish with a small mound of chopped pistachios placed on the center of each cake.  

The cakes may be baked up to 24 hours ahead.  Store airtight.

Notes:
  • I have never found pistachio flour for sale.  I grind raw pistachios in a rotary nut grinder (the kind used for Parmesan) to make nut flour.
  • You can substitute almonds or hazelnuts for the pistachios
  • When I made these cakes I didn’t have any 70% chocolate in my pantry.  But I did have unsweetened (i.e. 100%) and 60%.  So I used 1/4 unsweetened and 3/4 60% to approximate 70%. 

Chocolate Glaze

55 g. (4 T) unsalted butter, diced
85g. (3 oz.) bittersweet chocolate, broken up
1 T. (21 g.) honey

Melt the butter, chocolate and honey together in the microwave or over a pan of barely simmering water, stirring until smooth.  Let the glaze cool until it just begins to thicken (the temperature will be about 80°

Monday, February 25, 2019

Hazelnut Financier with Glossy Chocolate Frosting (and optional sautéed pears)

A couple of posts ago I mentioned a series of classes I have been teaching called “Inspired Cooking by the Book.”  In addition to obviously seasonal recipes (during the winter, recipes that include brassicas—broccoli, cabbage, kale, cauliflower, kale, turnips, etc.—as well as root and other storage vegetables and citrus fruits of all kinds), I always like to include a dessert (classes that end with dessert are always a good idea).  The dessert could of course be something with apples or pears.  But these would most likely show up in the autumn version of the class. During the winter I like to turn to chocolate and nuts for the dessert course.


For the most recent version of the class I decided to teach the Hazelnut Financier that appears in Suzanne Goin’s Sunday Suppers at Lucques.  She loves this cake so much that it was the cake she chose to have made for her wedding.  I think that’s a pretty strong recommendation for a cake.  But really, what’s not to love about a cake made with toasted hazelnuts and browned butter?  It seemed like a slam dunk addition to the class, so as the class approached I focused on the other recipes.  I have been making financiers for years and knew that I would only need to make the cake once to make sure there weren’t any typos or errors in the recipe (because all cookbooks…even really good ones…have recipes with typos….). 

During this same time period I noticed that a cookbook group I am a member of on Facebook was cooking through Sunday Suppers at Lucques.  I don’t have as much time as I would like to participate in this group, but I try to keep an eye on the activities.  It’s a great way to hear about new cookbooks and learn from the experiences of other cooks.  Several people were making the cake I had chosen for my class.  I noticed one version in particular because they had covered the cake with chocolate ganache instead of serving it plain with sautéed pears (as in the book).  


In reading the post, I discovered two things:  First, Deb Perelman of Smitten Kitchen had made this cake and had been the one to come up with the idea of the chocolate ganache (a fantastic idea, I think).  And second, this cake—which is called a “Hazelnut Browned Butter Cake” (not a Hazelnut Financier) in the book—was not made like a traditional Financier at all.  This was a surprise to me.  I had looked at the ingredient list and assumed the method….

For those who have never made a Financier, you should check out my post from a few years ago for a Rhubarb Financier.  The mixing method could hardly be easier:  Simply combine the dry ingredients…then whisk in the egg whites followed by the browned butter.  The cake in Goin’s book was mixed in an entirely different way:  First, you whip the whites with the sugar to stiff peaks and then you fold in the nut flour/flour mix and the browned butter in alternating additions. 

I was intrigued and a bit put out when I discovered this.  Intrigued because I wanted to know how the cake would be different.  Put out because I was running out of time before my class and would possibly need to make the cake more than once.  (But since this would just mean that I got to eat more cake, I wasn’t too upset.) 

After making the cake both ways, I decided to teach it with the traditional Financier method.  I did this mostly because I really like the texture of a Financier.  Financiers have a dense crumb—in a pleasant, pound cake-like way.  This is the perfect texture if you are making and serving this cake in a single layer—whether you are serving it plain or with chocolate frosting or sautéed pears. 


As for the method from Goin’s book, if you are making the cake to serve as a layer cake (as Goin would have for her wedding) her altered method would probably work well.  The resulting cake should be much lighter. But be warned: the altered method is for an adept baker.  The volume of fat that is folded into the whites is unusually high.  If you are not experienced at whipping whites…and folding heavy ingredients into said whites…you can end up with a fallen/sunken cake.  Several of the versions of this cake I have seen on line have a distinctly sunken look about them.  Furthermore, I know from experience how touchy the batter is.  I got a phone call while I was mixing the cake.  I thought it was an emergency (I wouldn’t have picked up the phone as I was starting to fold things into my whites if I hadn’t thought it was an emergency).  When I discovered it wasn’t an emergency I couldn’t convince the person on the other end that I really needed to get off the phone.  Meanwhile…my whites were losing volume under the weight of the half folded dry ingredients and butter.  I knew the cake was a loss.  But I could tell from the way it behaved around the edges that the method would have produced a nice cake layer if I had been able to prepare it properly.

So I ended up with the cake I had imagined from the start:  a delicious, dense, buttery, hazelnut-y Financier.  But I picked up a great idea for the garnish:  chocolate.  I decided to frost mine with a glossy chocolate frosting that I discovered while searching for a deep chocolate frosting that wouldn’t get as firm as ganache.  I think it is just perfect.  But since I was testing a specific recipe that included sautéed pears, I made those too…and you can do the same if you like.  This is basically a cake that can be served three ways:  plain (for a snack with coffee or tea), frosted with chocolate (for a simple dessert), or with sautéed pears (cake frosted or not…as you please) for a nice dinner party. 


Hazelnut Financier

5 oz. (143 g./1 heaping cup) blanched/skinned hazelnuts
1/2 lb. (2 sticks) unsalted butter
1 t. vanilla
180 g. (1 1/2 cup) powdered sugar
40 g. (1/3 cup) all-purpose flour
1/2 t. salt
6 egg whites (180 grams)—beaten until foamy

Spread the hazelnuts on a baking sheet and toast in a 350° oven until light golden brown and fragrant—about 12 to 15 minutes. Cool and using a nut grinder, grind the nuts to a flour. (You may use 5 oz. of purchased hazelnut flour if you prefer.)

Meanwhile, place the butter in a small saucepan set over medium heat. As the butter begins to sputter and pop, whisk occasionally. The butter solids will begin to turn brown. When the solids are a golden brown and the butter has a pleasantly nutty aroma, scrape the butter (making sure to get all the browned bits) to another container to stop the cooking process (you should have 180 g. browned butter).  Whisk in the vanilla extract.

Place the ground hazelnuts, all-purpose flour, salt & powdered sugar in a medium sized bowl. Whisk to combine. Whisk in the egg whites. Drizzle in the warm browned butter and whisk until smooth.  Refrigerate the batter for at least an hour and preferably overnight. (This will allow any developed gluten to relax and will give the butter time to firm up.)

When ready to bake the cake, butter a 9-inch round cake pan.  Line the pan with a round of parchment and butter the parchment.   Scrape the batter into the pan and spread it into an even layer.  

Transfer the pan to a pre-heated 350° oven and bake until the cake is golden brown and beginning to pull away from the sides.  A toothpick inserted in the center should come out clean—about 40 minutes.  Cool the cake in the pan for 10 minutes before turning out onto a rack to cool completely.

The cake is delicious served with nothing more than a sprinkling of powdered sugar.  Suzanne Goin serves hers with sautéed pears and lightly sweetened whipped cream.  I like to smear the top with a glossy chocolate frosting (recipe below)…which gives a Nutella-like taste.


Glossy Chocolate Frosting

4 T. unsalted butter (2 oz.)
3/4 c. sugar (150 g.)
1/2 c. plus 2 T. unsweetened cocoa—natural or alkalized (2 oz.)
1/2 c. plus 2 T. heavy cream (145 g.)
2 T. sour cream (30 g.)
1 t. vanilla extract
Pinch of salt

Combine heavy cream and sour cream in a measuring cup, mixing until smooth.  Set aside.

Melt the butter in a small saucepan over medium heat.  Stir in the sugar and cocoa.  The mixture will be thick and grainy.  Gradually add the cream mixture, stirring until blended and smooth.

Cook over medium heat, stirring constantly, until sugar has dissolved and the mixture is smooth and hot to the touch. Do not boil.  Remove from the heat and stir in the vanilla and salt.

Use warm as a sauce or a glaze, or let it cool and spread it like frosting (it will take about 3 hours at a cool room temperature.  Store the leftovers in a covered container in the fridge.  Reheat gently in a pan of simmering water, or in a microwave on low.

Makes 2 cups  (Recipe is easily doubled.)

(Recipe adapted from Cuisine at Home)

Sautéed Pears

1 lb. Bartlett Pears, peeled, cored and cut into a 1/2-inch dice
1 T. butter
1 T. granulated sugar

Heat a sauté pan that is large enough to hold the pears in a snug single layer over moderately high heat.  Add the butter.  When the foam subsides, add the pears.  Let them cook, tossing once or twice until they stop releasing moisture and begin to caramelize.  This might take a minute or two, but will depend on the ripeness of the pears.  Sprinkle the sugar over the pears and continue to cook, allowing the pears to caramelize in the butter and sugar until they are golden and tender…but not mushy.  Regulate the heat as necessary to maintain a good sizzle without letting the pears scorch.

Makes about a cup and a half of sautéed pears.  Recipe is easily doubled…just choose a larger pan…or cook in batches (rinsing and drying the pan between batches).

 
Printable Version