Showing posts with label Swiss Chard. Show all posts

Sunday, April 26, 2020

Moroccan Spiced Sweet Potato & Chickpea Stew


This time of year my pantry is usually beginning to fill with spring onions, radishes, young root vegetables, asparagus and young tender greens (chard, kale, spinach…).  It goes without saying that this year is different.  Because I’m pre-ordering from the farmers’ market I don’t have the abundance of local spring ingredients I usually do.  Pre-ordering limits my impulse shopping (a good thing for my wallet…but not so great for the growers…).  Furthermore, I don’t need that much—I’m still cooking a lot from my shelf-stable pantry.  (I’m almost to the bottom of the big bag of onions I bought in March just before the lockdowns started.)

So a couple of days ago when I had to make some flatbread for dinner (I had made some dough with my new starter and its refrigerated shelf life seemed to be nearing an end), a Moroccan spiced chickpea stew is what popped into my head (doesn’t everyone have several cans of chickpeas in their isolation pantries?).  I also had some Swiss chard (from the farmers’ market!) that really needed to be used…and a few sweet potatoes.  All of this sounded like a promising combination.  


As it turns out, this is not an unusual combination.  There are lots of Moroccan- and Indian-spiced stews floating around the blogosphere that include this combination of vegetables.  I’m not really adding a whole lot new to the conversation by posting this.  I’m mostly sharing it because the dish I came up with was delicious and I want to make it again.

My stew is different from many that I saw in one way:  Most of the stews I saw had a lot of tomato.  Mine does not.  I have big cans of tomatoes that I could have used, but I didn’t want a stew that felt like it was all about the tomatoes.  Canned tomatoes (especially when packed in puree) can be very assertive.  Sometimes I feel like recipes call for a whole can just because it was convenient to use the whole can…not because the food needed it.  For my stew I just wanted the tomato to be a background flavor—something that served to thicken…and add a little acidity.  I routinely freeze canned Italian plum tomatoes in quarter can/200 gram portions…just so I can use exactly the amount I want (and no more).  A cup of tomatoes added exactly the elements I was looking for…without making me feel like I was eating a bowl of tomato sauce.


When I started making the stew I decided to roast the sweet potatoes before adding them.  This ends up saving time (the sweet potatoes roast while you cook the onions), but that’s not the reason I chose to do it that way.  Sweet potatoes have a tendency to fall apart when cooked in liquid.  The roasting process seals the exterior (which helps them hold their shape).  Because they are fully cooked they can be added to the liquid right before serving (giving them no time to absorb liquid and disintegrate in the simmering broth).  On subsequent days, as I ate the leftovers, some of the sweet potatoes began to fall apart…but for leftovers, this is not the end of the world.  And the stew still tastes delicious.

I served the stew the first night with the aforementioned flatbreads, a spoonful of thick yogurt and a favorite cinnamon-scented couscous with golden raisins.  It was delicious.  On subsequent days (when I was eating it for lunch) I simply crumbled some salty Feta over the stew.  This too was delicious.   Since the weather is warming up…and my storage pantry is dwindling…this stew might not appear on my table again for a while.  But I will be certain to put it into regular rotation when the weather begins to cool off again in the fall.


Moroccan Spiced Sweet Potato & Chickpea Stew

1 t. paprika
3/4 t. cumin
3/4 t. coriander
1/2 t. ginger
1/2 t. turmeric
1/4 t. cinnamon
Pinch cayenne (or more to taste)
1 lb. sweet potatoes, peeled, quartered lengthwise and cut crosswise into generous 1/2-inch thick slices
Olive oil
1 small onion (5 to 6 oz.), minced
2 fat cloves garlic, sliced
A scant cup (1/4 of a can/200g.) canned Italian Plum Tomatoes, crushed with your hands
2 c. chicken stock (or vegetable stock would be fine too)
1 15.5-oz can chickpeas/garbanzo beans, drained and rinsed
1 large bunch Swiss chard, stems removed, leaves cut crosswise in rough 1-inch ribbons and rinsed in several changes of water
Roughly chopped fresh Italian Parsley or Cilantro
Thick yogurt, Labneh, or crumbled Feta
Warm flatbreads (optional)
Couscous (optional)

Combine the spices in a small bowl and set aside.

Toss the sweet potatoes with just enough olive oil to coat.  Season the potatoes with salt and pepper and a heaped teaspoon of the spice mixture and toss to coat.  Spread the sweet potatoes on a rimmed baking sheet and place in a 400° oven.  Roast the sweet potatoes, turning them over with a pancake turner once about 2/3 way through the cooking, until they are tender and golden—about 40 minutes.

Meanwhile, warm a tablespoon or so of olive oil in a shallow, wide sauce pan set over moderate heat.  Add the onions along with a pinch of salt and cook until tender and just beginning to turn golden.  Add the garlic and cook a few minutes more.  Add the rest of the spice mixture and cook briefly (a minute or two) until fragrant and toasted. 

Add the tomatoes and simmer until thickened (about 5 minutes).  Add the stock along with the chickpeas and bring to a simmer.  Add the chard and cook until just tender.  Taste and correct the seasoning.  Gently fold in the roasted sweet potatoes and heat through. 

Serve with a large spoonful of couscous and a dollop of yogurt (or crumbled Feta).  Scatter the parsley over.  Serve with warm flatbreads on the side, if you like.

Serves 4 if serving couscous, 3 if not.
  
Cinnamon-Scented Couscous with Golden Raisins

1 cup couscous
1/2 t. salt
2 T. butter
1/2 c. golden raisins
1 1/4 c. water
1/4 t. cinnamon

 Place the couscous in a bowl with the salt, butter and raisins.  Bring the water to a boil and pour over the couscous.  Jiggle the bowl to make sure the water has penetrated all the couscous.  Cover tightly with plastic wrap and let stand for 10 minutes (or however long the package says).  Uncover, add the cinnamon and fluff with a fork.  Taste and correct the seasoning.  Serves 4.

(Couscous adapted from One Good Dish by David Tanis)


Saturday, May 11, 2019

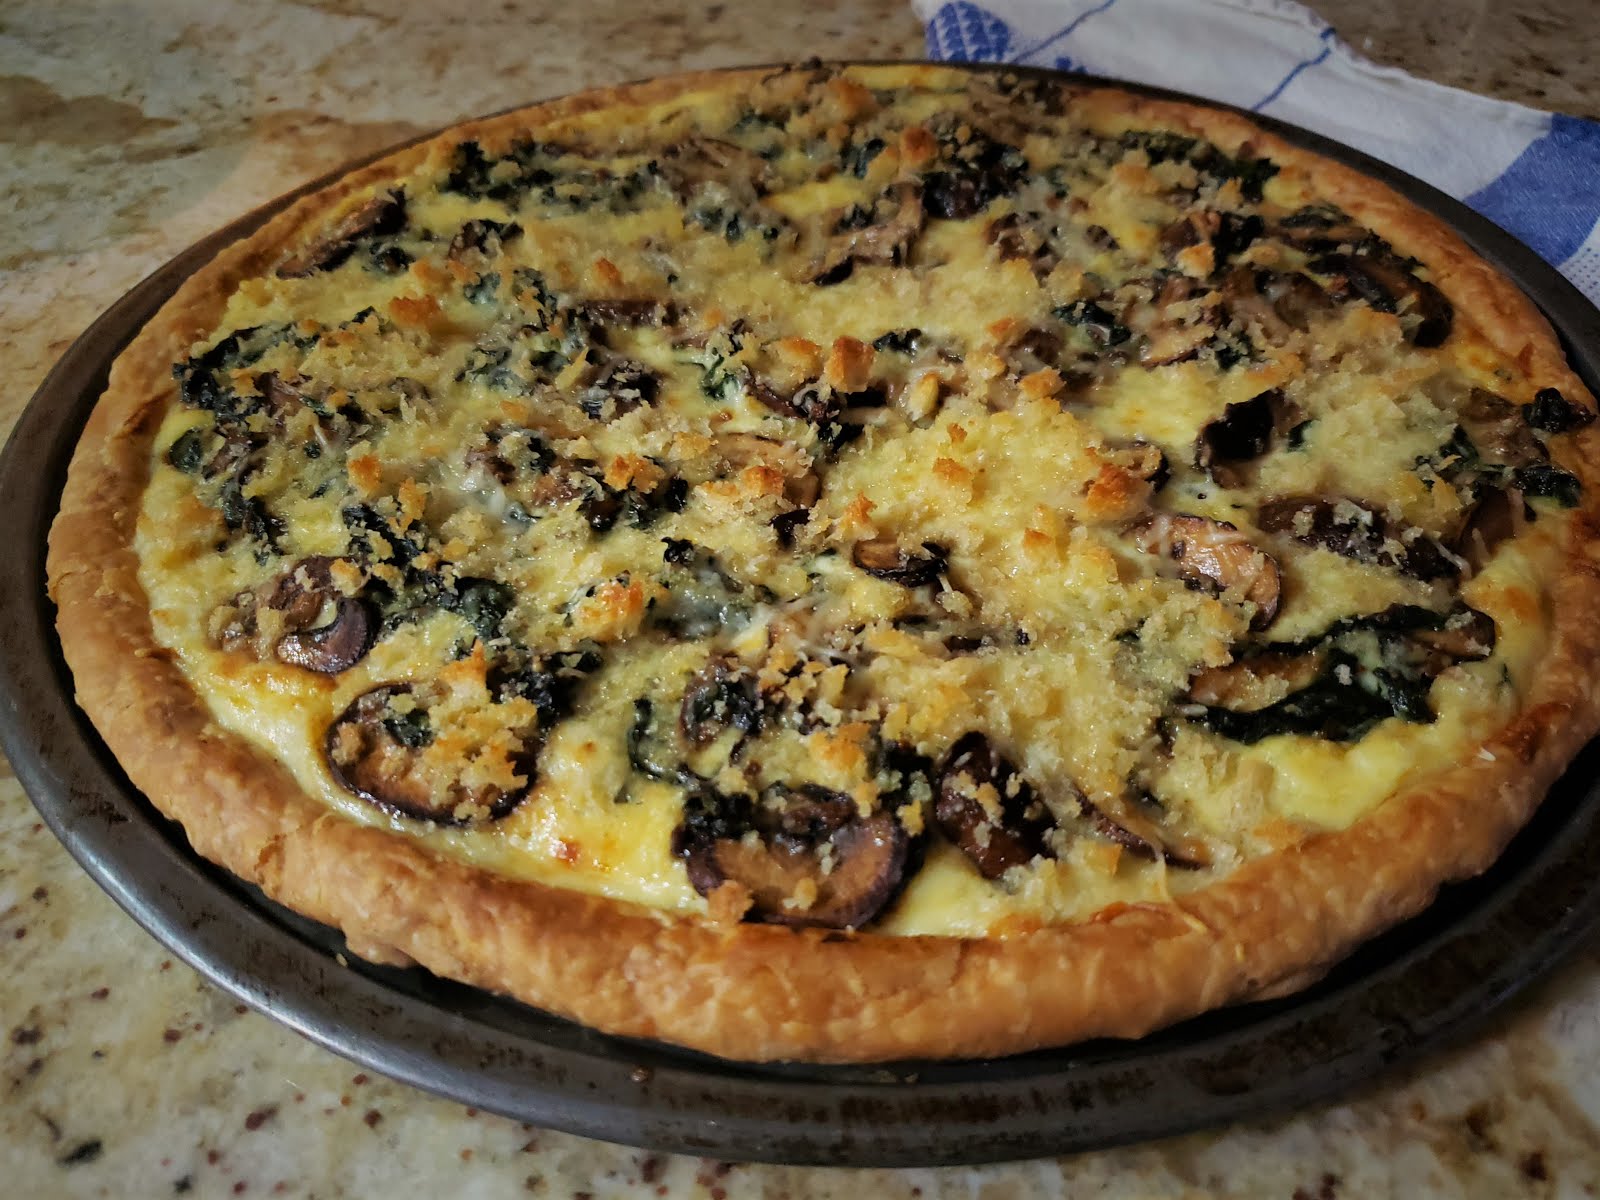
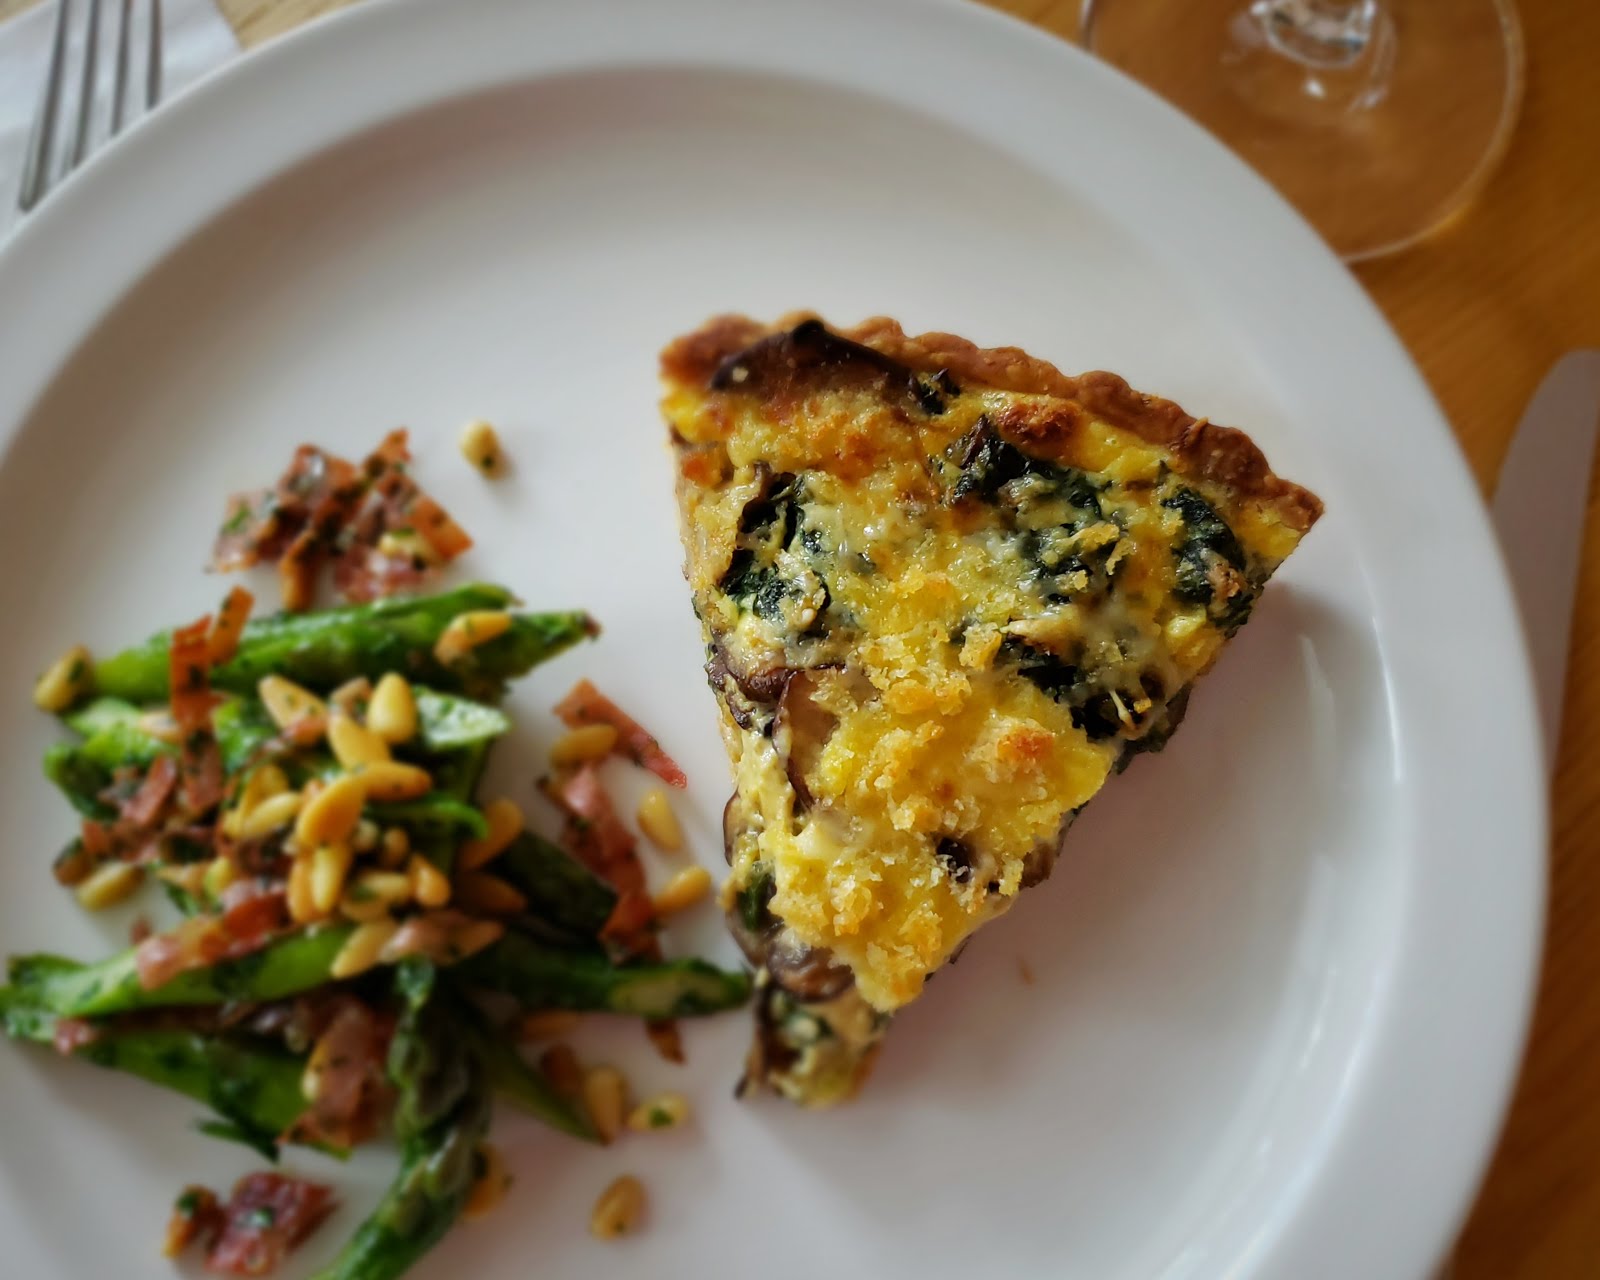
Savory Beet Greens & Mushroom Quiche...two ways...


This spring has been for me a season of beet greens.  It started when I saw some beautiful beets at the store and suddenly realized I hadn’t had beets in a while and that I was really hungry for them.  These particular beets had beautiful tops…so I saved them and added them to a pasta (or perhaps a grain pilaf…the exact preparation escapes me now).  Then suddenly I had a couple private dinners in a row that included roasted beet salads.  So I had more beet greens—because when you buy nice beets you almost always get the greens too…which basically makes them free.  So I made more pastas and pilafs…and a fantastic soup (with pasta) that I hadn’t had in a while… 
 
And still there were more.  So when I came home from a class with a pastry shell left from the demonstration, I decided to make a beet greens tart.  Greens of all kinds make fantastic fillings for tarts, so a tart of nothing but the greens…shrouded in a custard and enhanced with a little onion and garlic…or bacon or sausage…would have been delicious.  But at the time I happened to have some mushrooms on hand.  I remembered a good pasta I made a year or two ago with mushrooms, greens and bread crumbs.  So I decided to turn that pasta into a tart. 


I hadn’t planned on posting the recipe—there are after all, many, many tart recipes on my blog—but this tart was the thing I decided to make again when I ended up with another windfall of beet greens.  Anytime I like something so much that I make it twice in a short span of time, it’s usually a good indication that I should post the recipe—if for no other reason than I know I will be glad I did when at some point down the road I want to make a well-liked dish again and I can’t find my notes.

Aside from selfish reasons, I thought the post would be instructive.  It is the season of greens at the markets…and people are always looking for ways to use this abundance.  This tart is a great way to do this.  Even if you don’t have beet greens:  You can of course replace the beet greens with spinach or chard…even kale (just remember to blanch kale before adding it to the pan with the onions).

The second time I made the tart I didn't really have enough of the beet greens (on the left)...
so I supplemented with a handful of spinach and a few chard leaves... 
Almost any green would be good in this tart.

But beyond the tart being a great place to use some of your greens, I had another reason to post this recipe.  The glut of beet greens continued until I had another leftover tart shell from a class—a tart shell that was a different shape.  The first tart shell was the large, almost flat, pizza style that I tend to favor (it shows off ingredients to great advantage...plus, it has a higher proportion of crust to filling…which I love).  The second was a traditional shell (baked in a removable bottom, 9-inch tart pan).  I have always told people that these two shells (the 12-inch pizza pan crust and the 9-inch standard crust) held the same amount of filling…but I think this is hard for most people to believe.  (They certainly don’t look like they would hold the same amount of filling.)  Posting this recipe is my chance to demonstrate that this is in fact true.  Both the tarts pictured in the post used exactly the same amount of vegetable filling and custard.  You can make it either way.  The traditional style will appeal to people who really think tarts are all about the filling.  The “pizza style” will appeal to those who—like me—always want more crust.


Before I close I want to make a couple of observations about the ingredients.  The first time I made the tart I used red onion and mature garlic.  When I made it the second time I had spring onions and green garlic in my pantry…so of course I used those!  You should use what you have on hand.  I have given instructions for both.   

And while on the subject of ingredients, I want to mention the rosemary.  I normally don’t make a big deal about the addition of particular herbs, because I think they fall into the category of seasoning to your preferences.  But for this recipe, if you have it—and you like it—you should include it.  It is delicious with both mushrooms and greens…and it really adds to the savory and complex flavor of this tart.  I’m sure the tart would be good without it…but it is exceptional with it.

Finally, you may have noticed in the title of the post that I have called this recipe a “quiche”…yet I have referred to it as a “tart” throughout the post.  I was going to call it a tart in the title…because it is a tart:  It’s baked in a tart pan…and the filling is cradled in a flaky pastry crust.    But it is also a quiche—a specific class of tarts in which the filling that goes into the crust is suspended in an egg custard.  I bring this up only because I was asked this very question in a class recently:  Was I making a tart? Or a quiche?  And, what exactly is it that makes something a tart or a quiche?  I then realized I had been using the words interchangeably as I taught the class…because the thing I was making happened to be both.  But of course this is not always the case.  As far as I know, all quiches are tarts.  But it is not true that all tarts are quiches since all tarts (savory or sweet filling baked in a pastry crust) don’t necessarily include custard.  So now you know the difference (if you didn’t before…).  In any case, whatever you choose to call it, I hope you will find it to be as satisfying and delicious to eat as I have.  And I also hope you will find it to be a useful way to use and enjoy the greens that are flooding the markets right now.


Beet Greens & Mushroom Quiche

Olive oil
1/2 medium red onion, finely diced, or 2 or 3 spring onions, finely sliced or minced
1 clove garlic, minced, or one stall green garlic, finely sliced or minced
A small sprig of rosemary, picked and minced (to make about 1/2 to 3/4 t. minced)
1/8 t. hot pepper flakes
5 oz. (trimmed weight—no stems or ribs) beet greens, Swiss chard or kale, rinsed in several changes of water
8 oz. crimini mushrooms, sliced 1/4-inch thick
1 12-inch “pizza-style” tart shell or 1 standard 9-inch tart shell, blind baked (see below)
100 gr/3 1/2 oz. Gruyère cheese, finely grated (about a cup)
2 eggs
1 c. heavy cream
1/3 to 1/2 c. coarse, fresh breadcrumbs, tossed with a teaspoon of melted butter
salt & pepper


Film a wide sauté pan set over moderate heat with olive oil. If you using red onions and mature garlic, add the onions along with a pinch of salt and cook, stirring occasionally until the onions are tender and beginning to become golden at the edges. Add the garlic, rosemary and pepper flakes and cook until fragrant. If using spring onions and green garlic, add the onions and garlic to the pan along with a pinch of salt and cook until tender and translucent. Add the pepper flakes and rosemary and cook until fragrant. The red onion base will probably take about 15 minutes…the spring onion base will take less time—perhaps 5 minutes or so. For both kinds of onions, regulate the heat as necessary to allow the mixtures to sizzle gently, reducing the heat if the onions threaten to scorch. If the pan ever looks dry, drizzle in a bit more oil.

When the onions are cooked, add the greens. If using beet greens or chard, add them a handful at a time, turning with tongs to coat them in the fat and expose them to the heat and adding more as they begin to collapse. If the greens were recently washed, there should be enough water clinging to them to create steam and help them cook…if they were washed ahead (or spun dry) you may need to add a few tablespoons of water to the pan. Cover the pan and cook until the greens are tender. Uncover and continue to cook until any liquid has evaporated. Season to taste with salt and pepper and set aside in a warm spot. 

If using kale, bring a large pot of water to a boil. Add the kale and cook until tender (about 7 minutes). Lift the kale out and spread on a baking sheet to cool. When cool enough to handle, squeeze out the excess water. Add the cooked kale to the onion mixture and cook gently for a few minutes to infuse the greens with the flavor of the onions. Set aside.

While the greens cook, sauté the mushrooms: Depending on the size of your pan, you may need to sauté in batches—don't overcrowd the pan. Heat a sauté pan (non-stick, if you have one) over high heat. Add oil to coat the pan (a tablespoon or so), then add the mushrooms. Cook, shaking the pan occasionally, until the mushrooms are browned, tender and any liquid that they have given off has evaporated. If they seem dry at any time as they cook, drizzle in a bit more oil. Transfer the mushrooms to a plate and season with salt & pepper. When the greens are cooked, add the mushrooms to the greens. Set aside.

Preheat the oven to 375°. Place the baked crust on a baking sheet. Scatter about 2/3 of the cheese over the baked crust. Scatter the greens and mushrooms over all. Whisk together the eggs and the cream. Season with salt and pepper—and a pinch of freshly grated nutmeg if you like.

Slowly pour the custard over the vegetables, jiggling the pan a bit so the custard will be evenly distributed and will penetrate the vegetables. Be careful not to let the custard flow over the edge.


If there are any low places in the edge of your crust, you will not be able to use it all. Scatter the remaining cheese over the tart, followed by the buttered breadcrumbs. Bake the tart until the custard is set—about 20 minutes for the pizza-style tart, 25 for the traditional (a knife inserted in the center will come out clean). Slide the tart under the broiler to brown slightly if you like. Serves 6 as an entrée (with a salad or vegetable side), 8 to 10 as a light first course with a fluff of lightly dressed greens.


Pâte Brisée
(Short Crust Pastry)

For a 12- to 13-inch “pizza-style” crust
1 3/4 c. all-purpose flour (200g)
1/2 t. salt
11 T. cold unsalted butter, cut into pieces (150g)
1/4 to 1/3 c. ice water

For a 9- to 10-inch tart shell

1 1/3 c. all-purpose flour (150g)
3/8 t. salt
8 T. cold unsalted butter, cut into pieces (113g)
3 to 4 T. ice water

Combine the flour and the salt in a medium-sized bowl.  Rub the butter into the flour until the butter is in small pea-sized pieces. Drizzle the smaller measure of ice water over the flour/butter mixture.  Using your hands, fluff the mixture until it begins to clump, adding more water if necessary.  Turn the dough out onto a counter and form into a mound.  Using the heel of your hand, gradually push all of the dough away from you in short forward strokes, flattening out the lumps.  Continue until all of the dough is flat.  Using a bench scraper, scrape the dough off the counter, forming it into a single clump as you do.  Form the finished dough into a thick disk.  Chill for at least 30 minutes.

To roll out, let dough warm up for a moment or two.  Butter/spray the a pan and set it aside.  Roll out the dough on a lightly floured surface into a circle that is about 1/8- to 1/6–inch thick and with a diameter 2 to 3 inches larger than that of the pan.  Trim any ragged edges.  Brush off the excess flour and fold the dough circle in half.  Transfer it to the prepared pan.  Unfold the dough and ease it into the pan being careful not to stretch it.  Fold the edges to form a ½-inch rim of a double thickness of dough for the pizza-style crust.  For the traditional tart pan, simply press the dough against the sides of the pan (being sure not to stretch the dough) and cut the dough off flush with the edge of the tart pan.  Chill for at least 30 minutes.

To blind bake, line the pastry with aluminum foil or parchment paper, pressing it into the corners and edges.  Add a layer of pie weights or dried beans.  Bake in a 400° to 425° oven for 20 to 25 minutes.  When the pastry begins to color on the edges and is cooked through, remove the foil and weights and continue baking until the pastry dries out and turns a golden brown (another 5 minutes or so).

Printable Version


Sunday, September 9, 2018

Swiss Chard & Sweet Corn “Spanakopita”


A frequent topic of conversation at my friend Nancy’s bake shop (where I work on call) is what to make for dinner.  We both love to cook and eat…and we each have our different food and cooking ruts that we fall into—having each other to bounce ideas off of can, and often does, lead to delicious meals that we just wouldn’t have thought of without the other’s input. 

A little over a week ago during this conversation I was listing some things in my pantry that I really needed to use.  A big bunch of Swiss Chard and a portion of a box of phyllo (left from a class…phyllo is something I don’t ordinarily have on hand) were among the things I had to work with.  Nancy suggested I make some kind of Spanakopita.  I have of course made Spanakopita in professional settings (those little spinach, onion and feta filled triangles are a staple of catering operations everywhere…) but for some reason had never made it at home.  What a good idea.

When I finally got around to making my Spanakopita, I discovered I really didn’t have enough chard.  The quantity of greens used to make a typical sized (13x9 dish) Spanakopita is two pounds.  I had a very large bunch of chard, but the trimmed greens still only weighed about a half pound.  I could have simply made some small triangles (like the aforementioned catering fare) but didn’t really want to do something so fiddly for dinner. 

Since my Spanakopita wasn’t going to be classic anyway (I was, after all, using chard instead of spinach), I started to consider the things I had on hand that would be good with the chard and would bulk up my filling.  Almost immediately I settled on corn.  I am almost never without corn in the summer.  I really think it is one of my favorite summer foods.  And it is delicious when combined with slightly bitter greens (kale, chard and spinach).   I already knew it would be good in phyllo since my leftover phyllo was in fact the remains from a corn and mushroom filled strudel.


While looking for alternate fillings for my spanakopita I had done a little poking around on line and had found an interesting looking “spinach phyllo pie” on Martha Stewart’s site.  If I hadn’t thought of using corn, I would probably have made this recipe.  I loved the idea of adding golden raisins to the filling.  But what I really took away from her recipe was the shape.  It was basically a free-form roll.…perfect for whatever volume of filling one might happen to have.

I loved the way my “Spanakopita” turned out.  It sliced beautifully and tasted delicious.  With a simple salad of mixed summer tomatoes on the side, it made a satisfying late summer dinner.  But since summer—and the season of fresh corn and vine-ripened tomatoes—is just about over, I should mention that I’m sure you could make it in the fall or winter.  Just use frozen corn (there is still time to purchase fresh and freeze your own!)….and choose a more season-appropriate side:  Perhaps a Mediterranean chickpea or white bean salad…or maybe a pile of cumin and honey roasted carrots….or possibly a nice rice pilaf, with a little tzatziki….  No matter what you choose, I think you'll be glad I had this particular combination of ingredients on hand when Nancy and I started talking about dinner.  I know I was.


Swiss Chard & Sweet Corn “Spanakopita”

When I made this, I only made one roll/pie (which is why all the pictures are of just one)…but it really makes more sense to make two.  As I mentioned in the text, my bunch of chard was very large—really half again as large as a typical bunch.  If you purchase 3 bunches of chard, you will mostly likely have the 1 lb. of cleaned greens needed to make two pies/rolls. (For one roll, you would need 1 1/2 bunches…)   The other reason that I wanted to post the recipe for two rolls instead of one, is that two rolls will use exactly a half box of phyllo—and most boxes of phyllo contain two inner packages that can be thawed and used separately.  If I had only posted the recipe as I made it (for one roll) a quarter pound of thawed phyllo would have been left over… causing a similar issue to the one that made me go looking for a recipe in the first place….  You can of course cut the recipe in half and just make one roll (as I did).

2 T. olive oil
1 large or 2 medium onions (about 10 oz. total), diced
Salt & pepper
4 cloves garlic, minced
2 T. minced fresh oregano
1 T. butter
2 c. fresh corn (cut from 2 large ears)
1 lb. stemmed and cleaned chard (from 3 bunches), leaves cut into rough 1-inch wide strips
2 eggs, beaten
4 oz. Feta, crumbled
1/4 c. (3/4 oz.) finely grated Parmesan
1/2 lb. thawed phyllo (18 9 x 14 sheets)
8 T. butter, melted


Warm the olive oil in a wide sauté pan—preferably one with deeper sides and a tight fitting lid.  Add the onions and a good pinch of salt a cook over moderate heat until the onions are soft and just beginning to caramelize (about 15 minutes).


Add the garlic and oregano and cook until fragrant.  Add the butter and when it has melted, add the corn and cook until the corn is hot and sizzling.  Begin to add the chard a handful at a time, turning with tongs to coat in the fat and vegetables and adding successive handfuls as the chard collapses.  (If the chard is dry, add a splash of water to the pan—otherwise, the water clinging to the leaves from washing will be sufficient to facilitate the cooking process.) When all the chard has been added, season lightly with salt, cover the pan and cook over low heat until the chard has completely collapsed and is tender.  Uncover the chard, taste and correct the seasoning.  Continue to cook until any excess moisture has evaporated.  Set the chard and corn mixture aside and cool to room temperature.


In a large bowl, combine the cooled chard, the eggs, Feta and Parmesan.  Taste and correct the seasoning with salt and pepper.  You are now ready to build the rolls.

To form the rolls, lay a piece of plastic wrap on the counter.  Lay the stack of phyllo on top of the plastic and cover with another sheet of plastic, lightly pressing the edges to seal.  It is important as you work with the phyllo that you keep it covered at all times.  It dries out very quickly and is impossible to work with once it dries out.  Some people cover the phyllo with a damp towel instead of plastic wrap, but I think this makes the phyllo soggy.

Lay one sheet of phyllo on your work surface with the long side parallel to the edge of the counter.  Brush the sheet lightly with butter (don't overdo it or the finished pie will be greasy instead of crisp and light).  Place another sheet of phyllo on top of the first.  Brush lightly with more butter.  Repeat with seven more sheets of phyllo for a total of nine layers.


Arrange half the chard filling down the center third of the buttered phyllo, leaving an inch of so free of filling at both ends.  Fold one of the long edges up and over and then fold the other up and over—overlapping the other edge by about an inch.  Pinch the ends…or fold and tuck under slightly.  It isn’t necessary that this be beautiful—you just want to discourage the filling from oozing out the ends while the rolls cook.  Brush the surface with butter


and roll the log over so the seam is down.  Transfer to one side of a parchment-lined baking sheet, keeping the seam side down and brushing the top and sides with more butter.  


Repeat this process with the remaining filling and another nine sheets of phyllo, placing the second roll on the same baking sheet as the first.  Make sure there are several inches between the two rolls so that they will be able to brown on all sides as they cook.  Using a sharp knife, make 7 or 8 diagonal cuts on the top of each roll (cutting just deeply enough to go through all 9 layers of phyllo and expose the filling).      

Transfer the phyllo rolls to a 375° oven and bake until they are golden brown all over and the filling is bubbling through the slashes….about 40 to 45 minutes. 

Cool slightly before serving. Using a serrated knife, trim away the ends.  Then, cut the rolls on the diagonal to portion.  Each roll will serve 3 as an entrée and 6 to 8 as an appetizer. 


Sunday, July 22, 2018

Swiss Chard & Ricotta Fritters…a delicious way to enjoy the abundant greens of early summer


When I was planning the class I mentioned in my last post, I wanted to make sure I included a recipe that used loads of greens.  The goal of the class was to teach recipes that use things that are abundant during the late spring and early summer months.  If you are a member of a CSA…or you choose to purchase most of your produce from a farmers’ market during the growing season…up until about mid-June, an awful lot of what you have to cook with are greens.  In addition to wanting to teach something that used some of those greens, I wanted to choose a recipe that would be a nice accompaniment to the vegetable curry that Nancy was planning on teaching. While brainstorming with her about it, it occurred to me that a Swiss chard fritter I had made for dinner recently would fill the bill nicely.


The fritter I ended up making for the class was a blending of that first one I had made (a recipe I found at Delicious Magazine) and a recipe from Deborah Madison’s cookbook Vegetable Literacy. Some might not call Madison’s recipe a fritter because it is many ways similar to a ricotta pancake.  But since the batter is quite thick—almost as thick as the actual fritter recipe I made first—I’m calling it a fritter.  I loved the seasoning in the first recipe…and the texture of the latter.  Combined, it is just about perfect.


I have made these fritters with both Swiss chard and a combination of Swiss chard and Tuscan kale.  I’m certain they would be delicious with all kale, beet greens or spinach.  Beet greens can be substituted in the exact same quantity as the chard.  For kale, you might need slightly less…and for spinach, slightly more.  If you want to try and be precise about it, in the body of the recipe I give a volume and weight of the cooked greens.  But in practice, if you have a little more or a little less, I think the recipe will still be successful.

As for an accompaniment, I think a creamy-tangy yogurt or sour cream based dressing is essential.  It adds an important flavor counterpoint.  Although, you could probably sever them with a nice, tangy, fresh summer tomato sauce too.  If you want to make little one- or two-bite sized fritters to serve as an appetizer, the only adornment you might want (other than the sauce) would be a sprig of dill…or maybe parsley.  If you want to make large fritters to serve as an entrée, in addition to the tangy sauce, I think a chunky vegetable salad would be delicious.  Roasted beet, fresh tomato, roasted/grilled corn, shredded carrot, and cooked chickpea salads all sound pretty good to me. 


I admit to being partial to the combination of this fritter with beets.  The first time I made them I made an accompanying arugula and beet salad.  Recently, I served it with another beet salad (with mint, cumin and walnuts) and a quick tomato and cucumber salad from the cookbook Zahav.  It was delicious.  If you happen to purchase a bunch of beets with a large bunch of greens attached, you would pretty much have dinner.    

One of the things I love about teaching is that I have gotten to know…and make friends with…so many of those who have attended regularly over the years.  Among these are a father and daughter (Ed and Emma) who both happen to be accomplished cooks and bakers.  Ed is particularly knowledgeable about flours.  I share this because during this class I mentioned that I suspected that chickpea flour would make a nice substitution for the all purpose flour I chose to use in the recipe (Deborah Madison used white whole wheat flour).  Ed spoke up when I said this, saying that he thought the chickpea flour was a great idea, but that it should be substituted for only half of the all purpose.  About a week after the class, Emma relayed to me that they had tried it and that it worked perfectly.  So, if you want to bump up the protein and the substance of these fritters, I’m happy to report that the chickpea flour would be a great option.

I also want to mention that should you have any fritters leftover, they reheat beautifully.  I have reheated mine in the microwave and Ed shared that his reheated very nicely in a skillet.  They are also astonishingly good at room temperature (or even cold) if you just want to grab a few for an afternoon or mid-morning snack…or want to take them to work for lunch. 

All things considered, these fritters were a super addition to the class.  They went well with Nancy’s curry and they provided a versatile recipe (working well as an appetizer, entrée or lunch…) that exploits the early summer abundance of greens from the farmers’ market.  They were a hit with the class… and they have earned a permanent spot in my repertoire.


Swiss Chard & Ricotta Fritters

3 to 4 bunches of Swiss Chard, ribs removed and discarded or reserved for another use—you should have 454 g/1 lb. of trimmed leaves
120 g/4 oz/1 c. all purpose flour
1 t. salt
1 1/2 t. baking powder
250 g/1 c. whole milk ricotta
3/4 c. whole milk
30 g/1/3 c. finely grated Parmesan or more
2 eggs
3 T. olive oil, plus more for frying
Zest of 1 small lemon
1 peeled clove of garlic, finely grated using a microplaner or smashed to a purée with a pinch of salt
Pinch of cayenne (to taste)
1 recipe dilled yogurt sauce or plain yogurt or sour cream
Dill sprigs to garnish


Bring a large pot of lightly salted water to a boil.  Add the chard leaves and cook until just tender—about five minutes.  Lift out the cooked leaves and spread on a baking sheet to cool.  When the leaves are cool enough to handle, use your hands to squeeze out as much of the excess water as you can.  Chop the dried greens finely.  (You should have about 1 3/4 c./180 g. prepared greens.)


Place the flour, salt and baking powder in a small bowl and whisk to combine.

In a large bowl, combine the ricotta, milk, Parmesan, eggs, olive oil, zest, garlic and cayenne and whisk until smooth. 


When you are ready to cook the fritters, whisk the greens into the cheese mixture.  


Add the dry ingredients and mix with a rubber spatula just until the dry ingredients are absorbed. 


Heat a non-stick or cast iron skillet over moderate heat.  Film the pan with olive oil.  Dollop in the fritter mixture using a spoon or a small ice cream scoop (you can make the fritters any size that you like—I like them made with a generous tablespoon of the mixture—for appetizers and a three or four tablespoon scoop when serving as an entrée).  As you add the fritters to the pan, use the back of the scoop/spoon to barely flatten the batter—resist the temptation to spread the fritters out.  The fritters should sizzle gently in the oil.  


Cook on the first side until they are golden brown and have puffed—about three minutes.  Carefully turn the fritters over and cook for another three minutes.  They should be golden brown on both sides and springy to the touch.  


Transfer to a platter or baking pan and keep warm while you finish cooking the rest of the mixture.

Serve the fritters hot with the yogurt sauce and a scattering of dill sprigs.

Makes about 36 appetizer-sized fritters (serving 8 to 12) and 16 to 18 large fritters (serving 4 to 6 as a light entrée)

(Recipe adapted from Vegetable Literacy by Deborah Madison)

Dilled Yogurt Sauce:  Combine 1 cup of thick yogurt (strained or Greek) with 1 T. minced fresh dill, a small clove of garlic (finely grated with a microplaner or smashed to a purée with a pinch of salt) and salt and lemon juice to taste.